Few dishes capture the warmth of British home cooking like this Blackgate Cumberland Sausage & Apple Cider Skillet. It is a rich, one-pan comfort meal that brings together golden sausages, caramelised onions, and tender apples in a glossy cider gravy.
Made with Blackgate Signature Premium Cumberland Pork Sausages (1.2 kg) , this recipe delivers authentic flavour and quality every time. Whether you’re serving a cosy family dinner, a Sunday lunch, or a pub-style feast, this Blackgate Cumberland Sausage & Apple Cider Skillet fills the kitchen with irresistible aromas and classic comfort.
Juicy, hand-linked sausages are gently simmered in a glossy apple cider gravy. They are combined with sweet caramelised onions and crisp apple slices, creating the perfect harmony of savoury and sweet. It’s the kind of dish you’ll want to serve on a chilly evening with creamy mash and a glass of cold cider.
Why You’ll Love This Recipe
Authentic Flavour: Made with high-quality Blackgate Cumberland sausages, perfectly spiced and bursting with traditional seasoning.
Sweet & Savoury Harmony: Apples and cider bring brightness that balances the richness of the pork.
One-Pan Wonder: Less mess, more flavour — everything cooks together for ultimate convenience.
Quick & Satisfying: From pan to plate in under an hour.
🇬🇧 A True British Classic: Comfort food that tastes like the Blackgate Cumberland Sausage & Apple Cider Skillet you make at home.
A Classic Made Modern- Recipe
While the combination of sausages, apples, and cider is deeply rooted in traditional British pub fare, this skillet version modernises the classic. It’s simple enough for a midweek dinner, yet elegant enough for weekend entertaining. And the best part? It all comes together in one pan, making cooking (and washing up!) a breeze. Consider adding the Blackgate Cumberland Sausage with Apple Cider for that modern twist.
This recipe captures that cosy, rustic feel of an English countryside kitchen. It features hearty meals, simple ingredients, and bold flavours to take centre stage. Here are the recipe and instructions on how to make it:
Blackgate Cumberland Sausage & Apple Cider Skillet
A rich, caramelised one-pan dish that brings together juicy Cumberland sausages, sweet apples, earthy onions, and a luscious cider gravy. It’s hearty, perfectly balanced, and ideal for a family dinner, pub-style menu, or festive gathering.
Course Comfort Food, Dinner, Family Meal, Main Course, Pub-Style Dish
Cuisine English, Modern European, Traditional Pub Food
Diet Low Calorie
Keyword apple cider skillet, Blackgate Signature sausages, British comfort food, Cumberland sausage recipe, one-pan sausage dinner
Heat the olive oil in a large cast-iron pan or deep skillet over medium heat. Add the Blackgate Cumberland sausages and brown on all sides for 10 minutes. Remove and set aside.
Caramelise the onions & apples
In the same pan, add the onions and cook for 5 minutes until soft. Add the apple slices and brown sugar, then cook for another 5–7 minutes until caramelised and golden.
Create the cider gravy
Sprinkle the flour over the onion and apple mixture, stirring well to coat. Gradually pour in the cider, followed by the stock, stirring constantly to create a smooth sauce. Add mustard, Worcestershire sauce, thyme, salt, and pepper. Simmer for 5 minutes until thickened slightly.
Combine and simmer
Return the browned sausages to the pan, nestling them into the cider gravy. Reduce the heat to low, cover, and simmer for 25–30 minutes until the sausages are cooked through and the sauce is rich and glossy.
Scatter with fresh parsley and serve directly from the skillet for a rustic, homely presentation.
Notes
Versatile & comforting: This Cumberland Sausage & Apple Cider Skillet is a true taste of British comfort food — sweet, savoury, and hearty enough for any season. Ideal for family dinners, Sunday lunches, or pub-style menus.Make ahead: The flavours deepen overnight, so this dish tastes even better the next day. Simply cool, cover, and refrigerate for up to 2 days. Reheat gently on the hob until piping hot.Freezer-friendly: Once cooled, portion into airtight containers and freeze for up to 3 months. Defrost overnight in the fridge before reheating.Ingredient swaps:Use pear cider or white wine for a milder flavour.Swap apples for pears or shallots for a more subtle sweetness.For a lighter version, use low-fat sausages or reduce the oil by half.Serving ideas: Pair with buttery mashed potatoes, roasted vegetables, or Yorkshire puddings for a full British feast.For a glossy finish: Stir in a knob of cold butter just before serving — it makes the sauce rich and silky.Best sausages to use: The Blackgate Signature Premium Cumberland Pork Sausages (1.2 kg) have a perfect balance of spice and coarsely ground pork, ensuring a satisfying bite every time.
Crusty bread — perfect for soaking up the cider gravy.
Steamed green vegetables — like broccoli, green beans, or peas for freshness.
If you’re entertaining, serve the Blackgate Cumberland Sausage & Apple Cider Skillet family-style straight from the skillet for a rustic, pub-inspired presentation.
This Blackgate Cumberland Sausage & Apple Cider Skillet is proof that simple ingredients can make the most satisfying meals. It’s a timeless recipe that celebrates the best of British cooking — hearty, flavourful, and irresistibly comforting. Whether you’re feeding a family, hosting friends, or simply craving something warming, this dish never fails to impress. Serve it with your favourite sides and raise a glass of cider to true comfort food done right.
Few dishes say comfort quite like a slow-braised British Beef Shin Ragù — rich, silky, and bursting with deep, savoury flavour. Using the exceptional Alec Jarrett British Red Tractor Beef Shin Middle Cut, this recipe transforms a humble cut into a restaurant-quality masterpiece.
As the beef gently cooks in red wine, tomatoes, and aromatic herbs, it breaks down into tender shreds. This creates a sauce so luscious you’ll want to savour every bite. Served over buttery Parmesan mash, it’s the perfect balance of rustic warmth and indulgent dining.
This is comfort food, elevated — and proof that with Nicol Retailer Limited’s premium British beef, you can bring chef-level flavour straight to your home kitchen.
Why Alec Jarrett British Red Tractor Beef Shin is the Star Ingredient
The Alec Jarrett British Red Tractor Beef Shin Middle Cut from Nicol Retailer Limited is the hero of this dish. It’s a premium British cut known for its exceptional quality, traceability, and melt-in-the-mouth tenderness. Every reason to choose it makes this recipe shine:
🇬🇧 Certified British Quality: As a Red Tractor Assured product, this beef guarantees traceability, animal welfare, and sustainable farming practices — so you know exactly where your meat comes from.
Rich and Full-Bodied Flavour: Beef shin is cut from the hardworking leg, rich in connective tissue and flavour. When slow-cooked, the collagen melts down, giving the sauce its silky texture and mouthfeel.
Generous and Versatile: The 5 kg pack is ideal for batch cooking, dinner parties, or freezing portions for future meals — delivering incredible value and consistent quality.
Perfect for Braising: The slow cooking process transforms this affordable cut into restaurant-quality tenderness, full of deep, comforting flavour.
You can source this premium ingredient exclusively at Nicol Retailer Limited — the home of professional-grade British meats.
Recipe
This easy-to-follow recipe guides you through every step. From browning the beef and building layers of flavour to preparing the creamy mash that completes the dish. Whether you’re cooking for a Sunday family meal, a special dinner, or simply craving a hearty bowl of comfort, this British Beef Shin Ragù is a timeless classic that delivers every time. Here is the recipe and ingredients:
Braised British Beef Shin Ragù with Creamy Parmesan Mash
Indulge in pure comfort with this Braised British Beef Shin Ragù with Creamy Parmesan Mash, a dish that brings slow-cooked luxury to your dinner table. Using Alec Jarrett British Red Tractor Beef Shin Middle Cut from Nicol Retailer Limited, this recipe delivers melt-in-the-mouth beef simmered in a rich red wine and tomato sauce, served over velvety Parmesan mash.Each bite combines deep, savoury flavours and silky textures — perfect for Sunday roasts, date nights, or elegant family meals. With Red Tractor-certified British beef, this dish guarantees both quality and flavour in every forkful.
Season beef pieces and brown in olive oil over medium heat until golden on all sides. Remove and set aside.
Build the base:
In the same pot, cook onions, carrots, and celery for 5 minutes. Add garlic and tomato purée; cook for 1 minute
Deglaze:
Pour in red wine, scraping up any caramelised bits. Reduce slightly.
Simmer:
Add chopped tomatoes, stock, herbs, and ISFI Cayenne Pepper. Return beef to the pot.
Braise:
Cover and cook gently for 3 hours in the oven at 160 °C (140 °C fan) until beef is tender and falling apart.
Finish:
Shred the beef into the sauce with a fork. Simmer uncovered for 10 minutes to thicken.
Make the mash:
Boil potatoes until soft. Drain, mash with butter, milk, Parmesan, and salt until smooth.
Serve:
Spoon creamy mash onto plates and top generously with beef shin ragù. Garnish with extra Parmesan and herbs.
Notes
Chef’s NotesBest Cut for Braising: The Alec Jarrett British Red Tractor Beef Shin from Nicol Retailer Limited is naturally rich in collagen, giving your ragù a luxurious, velvety sauce when slow-cooked.Cook it Low and Slow: For tender, melt-in-the-mouth beef, cook gently at 160 °C for about 3 hours — patience pays off with this dish.Plan Ahead: Make your ragù a day in advance; the flavours deepen overnight for an even richer taste the next day.Freezer Friendly: Cool completely, portion into containers, and freeze for up to 3 months — ideal for batch cooking or quick weekday meals.Flavour Upgrade: Add a splash of cream or a pinch of ISFI Professional Cayenne Pepper for an indulgent twist.Creative Serving Idea: Spoon leftover ragù over buttery pasta, polenta, or even inside a Yorkshire pudding for a British-Italian fusion treat.Perfect Pairing: A glass of Chianti, Barolo, or Malbec enhances the deep beef flavour and tomato richness beautifully.
This Braised Beef Shin Ragù isn’t just a main course — it’s a centrepiece meal that deserves to be enjoyed slowly. Here are a few pairing and plating ideas to make it even more memorable:
On the Side
Garlic Bread or Ciabatta: Perfect for soaking up every drop of that rich red-wine sauce.
Crispy Roast Vegetables: Try roasted parsnips, carrots, or tenderstem broccoli for a pop of colour and crunch.
Green Salad: A fresh rocket and Parmesan salad cuts through the richness perfectly.
Creamed Spinach: Adds a luxurious, buttery texture alongside the mash.
Occasions to Serve
Sunday Roast Alternative: Serve this instead of traditional roast beef for a modern twist.
Dinner Parties: Impress guests with a dish that looks like it took hours (because it did — and it’s worth it!).
Winter Feasts: Perfect for cold evenings by the fire, paired with a glass of red and good company.
Leftover Magic: Spoon the leftover ragù over pappardelle, layer into lasagne, or use as a jacket potato topping.
Chef’s Tip: Add a splash of balsamic vinegar or a knob of butter right before serving for extra shine and richness.
Conclusion
There’s something truly special about taking simple, honest ingredients and transforming them into a dish that feels both comforting and luxurious. This Braised British Beef Shin Ragù with Creamy Parmesan Mash is proof that with patience, care, and quality ingredients, home cooking can rival any restaurant experience.
The slow-cooked Alec Jarrett British Red Tractor Beef Shin Middle Cut delivers incredible flavour and tenderness. Meanwhile, the buttery Parmesan mash provides the perfect base for soaking up that rich, glossy sauce. It’s a true celebration of British beef — hearty, satisfying, and packed with depth.
Whether you’re cooking for loved ones, preparing a Sunday feast, or just craving a bowl of comfort after a long day, this recipe promises to deliver warmth, flavour, and satisfaction in every bite.
Created by Nicol Retailer Limited — proudly bringing premium British Red Tractor meats and professional-grade ingredients to your kitchen.
Discover more gourmet recipes and chef-quality products at nicolretailer.com .
Looking for the ultimate crowd-pleasing appetiser or weekend dinner idea? These Spicy Honey-Glazed Chicken Wings, made with ISFI Professional Cayenne Pepper, are sticky, crispy, and bursting with flavour — perfectly balanced between sweet, smoky, and spicy.
The secret ingredient? ISFI Professional Cayenne Pepper – Pure Ground Chilli from Nicol Retailer Limited. This high-quality, chef-grade spice delivers clean, consistent heat with a pure chilli flavour that transforms simple chicken wings into something truly irresistible.
Whether you’re hosting a barbecue, a game-night feast, or just fancy a midweek treat, these wings will have everyone licking their fingers.
Why Choose ISFI Professional Cayenne Pepper?
When it comes to heat, not all chilli powders are equal. ISFI Professional Cayenne Pepper stands out for its purity, strength, and versatility.
Pure ground chilli – no fillers, just fiery, flavourful heat.
Professional-grade quality – trusted by chefs for consistent results.
Large 460 g tub – perfect for home cooks, caterers, or spice lovers.
Perfect balance of flavour and heat – ideal for marinades, rubs, and sauces.
Get ready to turn up the heat with these irresistibly Spicy Honey-Glazed Chicken Wings, crafted with the bold kick of ISFI Professional Cayenne Pepper from Nicol Retailer Limited. This recipe strikes the perfect balance between fiery spice and sweet stickiness, giving you wings that are crispy on the outside, juicy inside, and coated in a glossy honey-chilli glaze. Using high-quality, pure ground chilli ensures consistent flavour in every bite — ideal for impressing guests or enjoying a restaurant-style dish at home. Follow the simple, step-by-step instructions below to create the ultimate game-night snack, BBQ favourite, or comfort-food dinner that’s guaranteed to disappear fast!
Here is the recipe:
Spicy Honey-Glazed Chicken Wings with ISFI Cayenne Pepper
These Spicy Honey-Glazed Chicken Wings made with ISFI Professional Cayenne Pepper from Nicol Retailer are sticky, crispy, and packed with flavour. A perfect balance of heat and sweetness, this easy one-pan recipe is ideal for parties, barbecues, or weeknight dinners.
Course Appetizer, Main Course, Party Snack, Starter
Cuisine American, Barbecue, British (with a modern twist)
Preheat your oven to 200 °C / 400 °F / Gas 6. Line a large baking tray with foil and lightly oil it.
Season the wings:
In a large bowl, toss chicken wings with olive oil, cayenne pepper, paprika, garlic powder, salt, and pepper.
Bake:
Spread the wings in a single layer and bake for 35–40 minutes, turning halfway through until golden and crisp.
Make the glaze:
In a small saucepan, warm honey, soy sauce, ketchup, vinegar, and a pinch of cayenne pepper. Stir until slightly thickened.
Coat & finish:
Remove the wings from the oven and brush with the warm glaze. Return to the oven for 5 more minutes until sticky and sizzling.
Serve immediately with extra glaze for dipping and garnish with fresh coriander or sesame seeds.
Notes
Chef’s NotesAdjust the Heat: The ISFI Professional Cayenne Pepper from Nicol Retailer adds bold, fiery flavour. Start with ½ teaspoon for mild wings, or go up to a full teaspoon for an extra kick.Cooking Methods: These wings are perfect for baking, grilling, or air frying. For barbecues, finish them over charcoal for a smoky, flame-grilled taste.Gluten-Free Friendly: Use a gluten-free soy sauce to make the recipe completely gluten-free without sacrificing flavour.Meal Prep Tip: Cook in bulk and refrigerate for up to two days—ideal for quick lunches, party platters, or next-day snacking.Perfect for Sharing: These sticky, spicy wings are a guaranteed crowd-pleaser for parties, family dinners, or game nights.Flavour Boost: Add a squeeze of lime juice or a drizzle of extra honey before serving for a glossy, restaurant-style finish.
These Spicy Honey-Glazed Chicken Wings are incredibly versatile and can be enjoyed as everything from a fiery party appetiser to a satisfying main course. The sweet heat from ISFI Professional Cayenne Pepper, available at Nicol Retailer Limited, pairs beautifully with a range of sides, dips, and drinks.
Side Dishes That Pair Perfectly
Sweet Potato Fries: Their caramelised edges and natural sweetness balance the cayenne heat beautifully.
Buttered Corn on the Cob: A classic BBQ pairing that adds a buttery crunch to every bite.
Zesty Coleslaw: A cooling side that cuts through the spice — try one with lime juice or Greek yoghurt dressing.
Garlic Roasted Potatoes: Crispy, golden and seasoned with a pinch of cayenne for extra depth.
Fresh Garden Salad: Keep it light with cucumber, cherry tomatoes, and a drizzle of olive oil and lemon.
Mac & Cheese: For indulgence lovers, the creamy cheese perfectly offsets the chilli warmth.
Dips & Sauces
Garlic Mayo or Aioli: A cooling, creamy dip that soothes the spice while adding richness.
Spicy Yoghurt Dip: Mix yoghurt with lime juice, mint, and a dash of ISFI Cayenne Pepper for a refreshing twist.
Honey Mustard Sauce: The sweetness of honey complements the glaze perfectly.
Classic Blue Cheese Dip: For those who love contrast — tangy, rich, and irresistible with heat.
Occasions to Serve These Wings
Game Nights: The ultimate sharing snack that keeps guests coming back for more.
Summer BBQs: Grill the wings outdoors and brush with honey glaze for smoky perfection.
Family Dinners: Serve with rice or salad for a quick, satisfying meal.
Party Platters: Pair with vegetable skewers, chips, and dips for a complete spread.
There’s nothing quite like the combination of sticky honey, crispy chicken, and the fiery warmth of ISFI Professional Cayenne Pepper to make a meal unforgettable. These Spicy Honey-Glazed Chicken Wings are proof that with the right ingredients, simple home cooking can taste like restaurant-quality perfection. Whether you’re planning a family dinner, a game-night feast, or a summer barbecue, this recipe brings the perfect balance of heat, sweetness, and flavour to the table.
Ready to add some spice to your kitchen? Shop the hero ingredient — ISFI Professional Cayenne Pepper Pure Ground Chilli, 460g — exclusively at Nicol Retailer Limited. Premium quality, professional-grade spice, and endless culinary inspiration — only from Nicol Retailer.
Few desserts capture the joy of summer — or any season — quite like the Vanilla-Berry Ice Cream Float “Twist”. This irresistible recipe combines creamy vanilla soft-serve, fizzy homemade berry soda, and fresh British berries. It creates a dessert drink that’s as beautiful as it is delicious.
Crafted using the premium Arla Slower Melt Soft Ice Mix 2 L, it delivers that signature soft-serve texture and a slow-melt finish. This holds perfectly in warm weather. And because its flavour is timeless, you can enjoy this creamy, fizzy indulgence all year round. It fits from sunny garden parties to cosy winter dinners.
A Dessert for All Seasons
This isn’t just a summer dessert — it’s an all-year-round indulgence. In spring and summer, the fizzy berry soda keeps things light and refreshing. In autumn and winter, serve it with warm berry compote. Or you can drizzle it with hot chocolate sauce for a comforting twist.
The combination of creamy vanilla soft-serve, sparkling soda, and fresh fruit makes this dessert timeless, versatile, and always crowd-pleasing. Thanks to Arla’s Slower Melt Soft Ice Mix, it also stays picture-perfect longer — ideal for entertaining, catering, or home enjoyment.
Recipe
This dessert is easy to prepare, fun to serve, and endlessly adaptable — the perfect addition to your Nicol Retailer Limited recipe collection:
Beat the heat with this Vanilla-Berry Ice Cream Float “Twist” — a creamy, fizzy, and fruity dessert made using Arla Slower Melt Soft Ice Mix 2 L. This irresistible treat layers smooth vanilla soft-serve with homemade sparkling berry soda and fresh summer berries for a colourful, café-style finish that’s perfect for BBQs, garden parties, or weekend indulgence.The Arla Slower Melt Soft Ice Mix gives you a luxuriously creamy texture that holds its shape longer — ideal for floats and sundaes served in warm weather. Paired with a fizzy blend of strawberries, raspberries, and blueberries, this recipe delivers a refreshing burst of flavour in every sip and spoonful.”.
Fresh raspberries, strawberries, and blueberries (about 1 cup total)
4 mint sprigs for garnish
4 tall dessert glasses
Paper straws
Instructions
Make the Sparkling Berry Soda
Add strawberries, raspberries, blueberries, sugar, and lemon juice to a small saucepan.
Simmer on low-medium heat for 5–7 minutes until the berries release their juices and soften.
Strain through a fine mesh sieve, pressing gently to extract as much syrup as possible.
Allow the syrup to cool completely, then mix with chilled sparkling water just before serving.
Optional: Adjust sweetness with a little more syrup or sugar to taste.
Prepare the Ice Cream
Pour 600 ml of Arla Slower Melt Soft Ice Mix into your soft-serve machine and churn until thick and creamy.
No machine? Freeze the mix in a shallow container for 1–1½ hours, stirring every 30 minutes until it reaches soft-serve texture.
Assemble the Floats
Add a few fresh berries to the bottom of each glass.
Pour in about 100 ml of the homemade sparkling berry soda.
Add one large swirl (or scoop) of soft ice cream.
Top with more berries and a mint sprig.
Add a straw and serve immediately — watch the fizz bubble up beautifully!
Notes
Recipe Notes – Vanilla-Berry Ice Cream Float TwistUse quality ice cream mix: The Arla Slower Melt Soft Ice Mix 2 L creates a rich, creamy texture that holds its shape longer — perfect for floats, sundaes, or summer dessert drinks.Homemade berry soda: Fresh berries, lemon juice, and sparkling water make a naturally flavoured soda that’s lighter and more refreshing than store-bought versions.Best served fresh: Assemble just before serving to keep the fizz lively and the soft-serve texture silky.Chill everything: Keep the glasses, soda, and serving spoons cold to prevent premature melting.Customise flavours: Swap berries for mango, peach, or cherry for different seasonal twists.Make it vegan: Use a dairy-free soft-serve alternative and ensure your sugar and soda are vegan-friendly.Make ahead: The berry syrup can be prepared up to 2 days in advance and stored in the fridge.Presentation tip: Garnish with fresh mint, edible flowers, or a drizzle of berry coulis for a professional café-style finish.
he Vanilla-Berry Ice Cream Float “Twist” is wonderfully versatile — a dessert drink that’s as fitting at a summer BBQ as it is after a festive roast dinner. With its mix of creamy vanilla soft-serve and fruity fizz, it complements a wide variety of flavours, making it an easy centrepiece for any menu or celebration. Below are some delicious ways to serve and pair this dessert for maximum impact.
Sweet Treat Pairings
Classic Shortbread Biscuits – Crisp, buttery, and lightly sweet, shortbread is the perfect companion for a creamy dessert. Its crumbly texture contrasts beautifully with the smoothness of the ice cream float.
Mini Meringues or Pavlova Pieces – Add crunch and sweetness with crushed meringue. It is especially lovely when topped with extra berry syrup for a touch of decadence.
Lemon Drizzle Cake – The light citrus notes of a classic British lemon drizzle pair wonderfully with the soft vanilla base. They enhance the tangy berries.
Sponge Fingers or Madeleines – Elegant and airy, these delicate cakes soak up the fizzy berry soda. They do this just enough to enhance each bite.
Vanilla or Almond Wafers – Add a nostalgic touch with wafer rolls or almond biscuits — ideal for dipping into the creamy layers.
Flavour Add-Ons & Seasonal Twists
Summer: Add crushed pistachios, toasted coconut, or a drizzle of mango syrup for a tropical flair. Serve with grilled peaches or nectarines for an alfresco dessert.
Autumn: Drizzle caramel or maple syrup over the ice cream for a toffee-apple twist. -Pair with cinnamon shortbread or spiced apple crumble bites.
Winter: Replace the chilled soda with warm berry compote or mulled fruit syrup. Add grated dark chocolate or a splash of Irish cream liqueur for a comforting, grown-up version.
Spring: Use fresh rhubarb syrup or add edible flowers such as violets or pansies for a floral touch.
How to Serve for Impact
For Home Entertaining: Use tall clear glasses or mason jars to show off the colourful layers. Add a reusable straw and serve on small dessert plates with biscuits on the side.
For Parties or Catering: Prepare the berry syrup and soda in advance, and churn the ice cream just before serving. Offer toppings such as chocolate flakes, chopped nuts, or fruit purees so guests can customise their floats.
Expert Tip from Nicol Retailer Limited:
Because Arla Slower Melt Soft Ice Mix holds its texture longer than standard soft ice, you can serve this dessert confidently at buffets, outdoor events, or high-volume service — no more melting mess before your guests dig in!
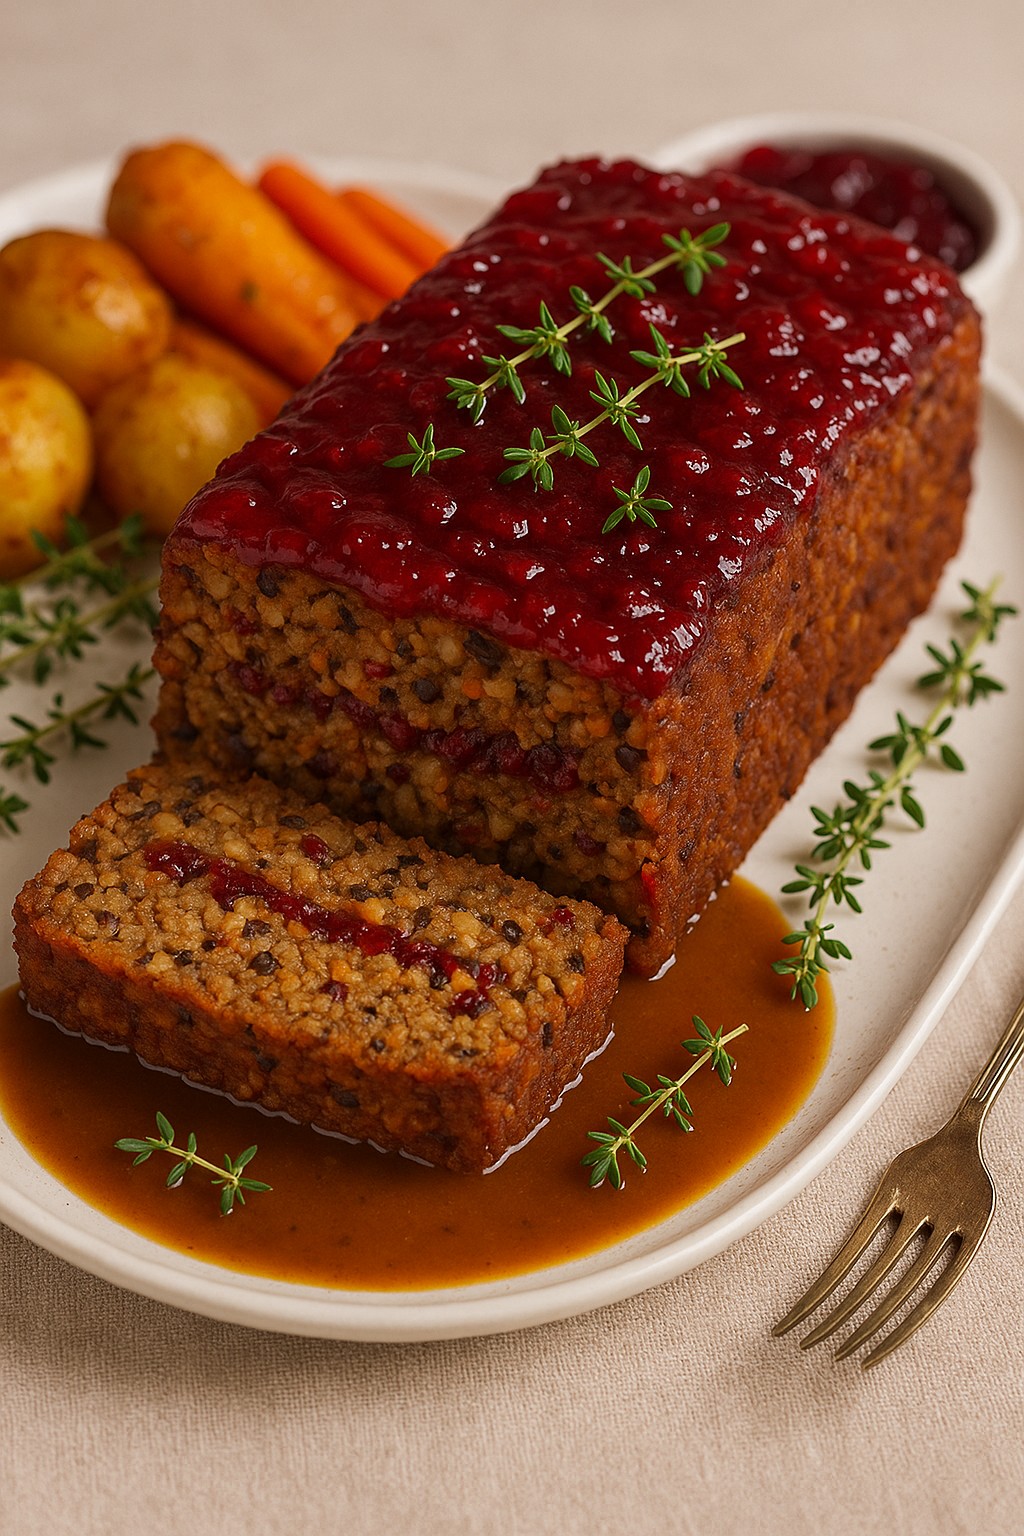
There’s something magical about Christmas dinner — the smell of rosemary and thyme filling the kitchen, the sparkle of fairy lights, and the comfort of a hearty roast at the centre of the table. If you’re planning a vegan or vegetarian Christmas dinner, this Festive Nut Roast Loaf with Cranberries & Chestnuts deserves pride of place.
Rich, hearty, and beautifully glazed with cranberry sauce, this nut roast is a far cry from the dry, dull versions of the past. It’s moist, full of texture, and bursting with savoury-sweet flavour from chestnuts, mushrooms, and herbs.
The Secret to a Perfect Nut Roast
A truly great nut roast is all about balance — nutty crunch, tender vegetables, and a touch of festive sweetness. In this recipe, roasted nuts and chestnuts bring depth, mushrooms and lentils add savoury body, and cranberries provide that Christmassy sparkle.
Why It’s a Christmas Classic
This festive nut roast brings together everything we love about Christmas cooking: comfort, colour, and community. It’s a dish that feels homemade, wholesome, and special — without being complicated. Every slice tells a story: toasted nuts for crunch, lentils for body, chestnuts for warmth, and cranberries for a sparkle of joy. It’s proof that vegan food can be indulgent, comforting, and utterly beautiful on the Christmas table.
Recipe
Now, let’s dive into what you’ll need to create this perfect Christmas nut roast:
Festive Nut Roast Loaf with Cranberries & Chestnuts
This Festive Nut Roast Loaf is the ultimate Christmas showstopper for vegetarians and vegans alike. Bursting with roasted nuts, earthy lentils, sweet cranberries, and savoury herbs, it’s moist on the inside with a crisp, golden crust. Topped with a glossy cranberry glaze and served alongside roasted veggies and vegan gravy, it’s a plant-based main that everyone will love. Ideal for Christmas dinner, New Year’s feasts, or cosy winter gatherings.
180°C (fan 160°C) / 350°F. Line a large 2lb loaf tin with baking paper.
Cook the vegetables:
Heat olive oil in a large frying pan. Sauté the onion, garlic, carrot, celery, and red pepper for 5–6 minutes until soft.
Add mushrooms:
Stir in mushrooms and cook for another 5 minutes, until most of the moisture evaporates.
Combine ingredients:
In a large bowl, mix the cooked vegetables with the chestnuts, chopped nuts, breadcrumbs, lentils, soy sauce, tomato purée, herbs, smoked paprika, nutritional yeast, cranberries, salt, and pepper.
Bind the mixture:
Add the flaxseed mixture (or eggs). Stir well until everything holds together. Add extra breadcrumbs if too wet or a splash of water if too dry.
Assemble the loaf
Spoon half the mixture into the tin, press down firmly, spread with half the cranberry sauce, then add the rest of the mixture on top. Smooth the surface and finish with the remaining cranberry sauce.
Bake:
Cook for 50–60 minutes, until firm, golden, and slightly crisp on the edges.
Rest before serving:
Allow the loaf to rest for 10 minutes before slicing — this helps it hold together beautifully.
Notes
his Festive Nut Roast Loaf with Cranberries & Chestnuts is a hearty, flavour-packed vegan or vegetarian main that’s perfect for Christmas dinner, Sunday roasts, or any special occasion. It combines the richness of mixed nuts and chestnuts with sweet-tart cranberries and savoury herbs, creating a beautifully balanced dish that’s both satisfying and festive.Make it ahead of time — simply prepare and bake the loaf the day before, then reheat gently before serving. It slices best when cooled slightly and can be frozen for up to 3 months.For a gluten-free version, use gluten-free breadcrumbs and tamari instead of soy sauce. For a lower-sodium option, choose reduced-salt soy sauce or omit added salt.This nut roast pairs wonderfully with vegan gravy, roast potatoes, Brussels sprouts, and a dollop of cranberry sauce for the perfect plant-based Christmas feast.
A glorious nut roast loaf like this deserves to be served in style — surrounded by all the trimmings, glistening gravy, and the sparkle of Christmas cheer. Here are some delicious ways to serve your Festive Nut Roast with Cranberries & Chestnuts for a truly memorable meal:
1. The Classic Roast Dinner Plate
Pair your nut roast with all the traditional trimmings for the ultimate comforting Christmas feast:
Crispy roast potatoes tossed in olive oil and rosemary for that irresistible crunch.
Maple-glazed carrots and parsnips that bring natural sweetness to the plate.
Brussels sprouts with chestnuts sautéed in vegan butter for a double-chestnut hit.
Rich vegan gravy, poured generously over each slice for a luscious, savoury finish.
This combination strikes the perfect balance of flavours — crisp, creamy, sweet, and savoury — everything a Christmas dinner should be.
2. For a Lighter Festive Lunch
If you’d rather serve this nut roast as part of a lighter meal, try pairing it with:
A winter salad made from kale, roasted beetroot, orange segments, and toasted pecans.
A spoonful of cranberry relish for tang and colour.
Some warm crusty bread or roasted root vegetables drizzled with olive oil and thyme.
It’s simple, elegant, and full of seasonal flavour — perfect for Boxing Day lunch or a relaxed New Year’s Eve supper.
3. The Leftover Magic
One of the best things about this nut roast? The leftovers. Slice it thick and layer it into sandwiches with:
Vegan mayo, rocket, and extra cranberry sauce for a fresh, festive kick.
Or crumble it into a wrap with stuffing and roasted veg for a delicious on-the-go treat.
You can even reheat slices in a pan until golden and serve with a fried egg (if not vegan) or tofu scramble for a hearty post-Christmas brunch.
5. Presentation Tips for the Wow Factor
Turn your nut roast into the star of the show with a few finishing touches:
Brush the top with extra cranberry sauce before serving for that glossy, ruby-red shine.
Garnish with fresh thyme or rosemary sprigs for an elegant, aromatic finish.
Serve it on a rustic wooden board or white platter surrounded by roasted vegetables and twinkling lights for a picture-perfect festive look.
Make It Ahead – Stress-Free Christmas Cooking
Christmas Day is magical — but let’s be honest, it can also be hectic. Between roasting potatoes, basting veggies, and keeping the prosecco chilled, the last thing you want to worry about is timing your main course perfectly. That’s why this Festive Nut Roast with Cranberries & Chestnuts is a dream come true for busy cooks — it’s make-ahead friendly, freezer-safe, and easy to reheat without losing flavour or texture
Make the Mixture in Advance
If you want to save time on the big day, you can prepare the nut roast mixture up to 24 hours ahead. Here’s how:
Follow the recipe up to the point of baking.
Pack the uncooked mixture into your lined loaf tin.
Cover tightly with cling film or foil and store it in the fridge overnight.
When you’re ready to cook, simply remove it from the fridge, let it sit at room temperature for 20–30 minutes, then bake as normal. This method not only saves time but also allows the flavours to develop and deepen overnight, making the roast even tastier.
How to Freeze Your Nut Roast
This recipe freezes beautifully, so you can make it weeks in advance and still enjoy that just-baked freshness. To freeze before baking:
Assemble the loaf, wrap it tightly in cling film and foil, and freeze for up to 2 months.
Defrost completely in the fridge overnight before baking.
To freeze after baking:
Allow the loaf to cool completely.
Wrap well in foil or place in an airtight container.
Label with the date and freeze for up to 3 months.
To reheat, defrost overnight in the fridge, then cover loosely with foil and bake at 170°C (fan 150°C) for about 20–25 minutes, until piping hot in the centre.
Reheating and Refreshing the Glaze
To restore that gorgeous glossy top, brush the nut roast with fresh cranberry sauce or a drizzle of maple syrup just before reheating. This not only refreshes the appearance but also locks in moisture and gives it that irresistible festive shine. If you’re reheating individual slices, a few minutes in the oven or a quick pan-sear in olive oil works wonders — it gives a lightly crisped edge while keeping the middle soft and juicy.
Serving on the Day
Once reheated, plate it up on a warm serving dish and garnish with:
Fresh rosemary sprigs
Whole cranberries
A scattering of toasted nuts or pomegranate seeds for sparkle
No one will ever guess it was made ahead — it looks and tastes like it just came out of the oven.
Why This Recipe Is Perfect for Planning Ahead
One of the joys of this make-ahead vegan nut roast is its flexibility:
Holds its shape perfectly even after freezing or reheating
Tastes even better the next day, as the flavours have time to mingle
Saves time and stress on Christmas morning
Leaves your oven free for all those glorious trimmings.
A Little Christmas Wisdom
Christmas cooking isn’t about perfection — it’s about joy, warmth, and good food shared with loved ones. With this make-ahead Festive Nut Roast Loaf with Cranberries & Chestnuts, you’ll have one less thing to worry about and one more reason to celebrate. Light the candles, pour a glass of something bubbly, and let the delicious aroma of your homemade nut roast fill the house. You’ve earned it.
Created by Nicol Retailer Limited
This Festive Nut Roast Loaf with Cranberries & Chestnuts recipe was lovingly created by Nicol Retailer Limited — your trusted source for quality vegan, gluten-free, and festive ingredients. Every element of this dish, from the mixed nuts and chestnuts to the herbs, lentils, and cranberry sauce, is available to buy directly from Nicol Retailer.
Explore our full range of seasonal products, plant-based essentials, and baking favourites in-store or online at Nicol Retailer Limited and bring your Christmas cooking to life with quality you can taste.
Shop the Ingredients for This Recipe
Make your Christmas cooking simple, stress-free, and full of festive flavour with Nicol Retailer Limited. We stock everything you need to recreate this Festive Nut Roast Loaf with Cranberries & Chestnuts — all in one place!
Ingredients Available at Nicol Retailer
Mixed Nuts – premium quality almonds, cashews, walnuts & hazelnuts for the perfect crunch.
Lentils – wholesome plant-based protein that adds heartiness and texture.
Cooked Chestnuts – sweet, buttery, and ready to chop straight into your nut roast.
Cranberry Sauce – tangy and glossy, ideal for glazing your loaf or serving on the side.
Herbs & Spices – rosemary, thyme, smoked paprika, and festive seasonings for authentic Christmas flavour.
Breadcrumbs (Gluten-Free Option Available) – to hold your roast together beautifully.
Olive Oil, Tomato Purée & Soy Sauce – pantry staples for that savoury, umami richness.
All ingredients are available to buy at Nicol Retailer Limited, in online. We pride ourselves on offering high-quality vegan, vegetarian, and allergy-friendly ingredients, carefully sourced to make your festive meals truly special.
Bring your Christmas menu to life with the best festive ingredients from Nicol Retailer Limited. Visit: https://nicolretailer.com/shop/
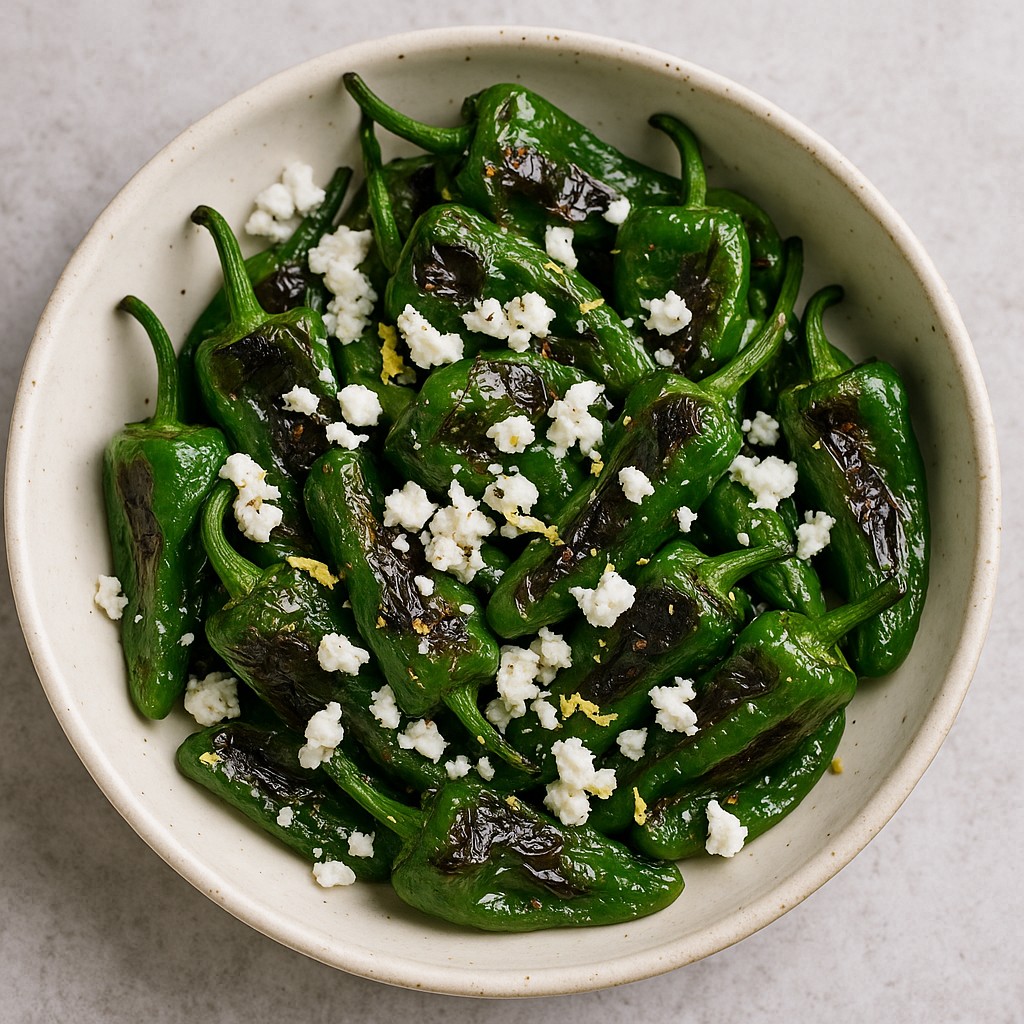
There’s something irresistibly simple yet special about Padron peppers. Mild, smoky, and sometimes with a cheeky surprise of heat, these little green gems are a true Spanish favourite. Our Charred Padron Peppers with Garlic, Lemon and Feta Crumble bring all the sunshine of Spain straight to your kitchen — and it all starts with the freshest Padron peppers from Nicol Retailer. This dish, Charred Padron Peppers with Feta and Lemon – a taste of Spain from Nicol Retailer, captures the essence of Spanish flavours perfectly.
Ingredient Spotlight: Padron Peppers
At the heart of this dish are the Padron peppers — small, glossy green peppers that have become a Spanish tapas icon. Originally from the Galicia region of Spain, these bite-sized peppers are famous for their mild, earthy flavour and signature smoky aroma when blistered in olive oil.
But here’s what makes them truly special — about one in ten Padron peppers has a surprise spicy kick! This natural game of chance adds a playful twist to every serving, keeping your guests guessing. It entertains your taste buds too.
When cooked properly, Padron peppers develop a soft, silky texture. They offer a charred, slightly nutty flavour that pairs beautifully with sea salt, garlic, lemon and creamy feta. They’re delicious served simply as a bar snack, or elevated — as in this recipe — into a show-stopping side dish.
At Nicol Retailer, our Fresh Padron Peppers (500g) are carefully sourced for premium quality, ensuring freshness, vibrant colour, and authentic taste every time. Whether you’re cooking for two or preparing a tapas feast, these peppers bring the true taste of Spain right to your kitchen.
Why You’ll Love This Recipe
If you’re looking for a dish that’s effortlessly impressive, this Charred Padron Peppers with Garlic, Lemon and Feta Crumble recipe ticks every box. It captures the essence of Spanish tapas dining — relaxed, full of flavour, and perfect for sharing with friends and family.
Quick and fuss-free
Ready in just 15 minutes, this recipe is ideal for busy evenings, weekend gatherings, or spontaneous tapas nights. No complicated prep, no fancy equipment — just a hot pan and quality ingredients.
Big flavour, simple ingredients
Each bite delivers the smoky depth of blistered Padron peppers, the tangy freshness of lemon, and the creamy saltiness of feta. A drizzle of olive oil ties it all together for a true Mediterranean feel.
Healthy and wholesome
Naturally gluten-free, vegetarian, and rich in antioxidants and healthy fats, these peppers are as nourishing as they are delicious. They’re light yet satisfying — perfect as a snack, side, or part of a balanced mezze platter.
Versatile and crowd-pleasing:
Serve them as a starter, side dish, or part of a sharing tapas board. They pair beautifully with seafood, grilled meats, or simply a glass of crisp white wine.
A taste of Spain at home:
Whether you’re hosting a summer BBQ, a family dinner, or a date-night feast, this recipe brings that authentic Spanish sunshine to your table. It’s proof that simple, fresh ingredients can deliver restaurant-quality flavour in minutes.
What You’ll Need & How to Make It
To make this delicious Charred Padron Peppers with Feta and Lemon, you only need a few fresh, high-quality ingredients:
Charred Padron Peppers with Garlic, Lemon & Feta Crumble
Experience the bold flavours of Spain with this easy Charred Padron Peppers with Garlic, Lemon and Feta Crumble recipe. Using fresh Padron peppers from Nicol Retailer, this vibrant Mediterranean dish is lightly blistered in olive oil, tossed with zesty lemon and garlic, and finished with creamy crumbled feta.Perfect for tapas nights, BBQ sides or appetiser platters, this quick and healthy recipe serves four and is both gluten-free and vegetarian. Each bite offers a smoky, tangy and slightly spicy kick – an irresistible mix that brings sunshine to your table.
Warm a large griddle over medium-high heat until hot.
Cook the Padron peppers
Add the olive oil, then the peppers in a single layer. Sauté for 6–8 minutes, turning occasionally, until the skins are blistered and slightly charred.
Add garlic
Stir in the grated garlic for the last 30 seconds of cooking, just until fragrant
Season and finish
Remove from heat. Sprinkle over lemon zest, a squeeze of lemon juice, and season with sea salt and black pepper.
Garnish
Crumble over the feta cheese and, if desired, drizzle lightly with honey or sprinkle with chilli flakes for a sweet-heat finish.
Notes
Padron peppers are a Spanish favourite known for their mild, smoky flavour — but every now and then, one packs a spicy surprise! That’s part of their charm. When blistered in olive oil and finished with lemon zest, garlic and crumbled feta, they create a perfectly balanced bite of heat, salt and tang.For best results, use fresh Padron peppers from Nicol Retailer and cook them over high heat until charred and slightly wrinkled. Serve immediately while warm for that authentic tapas bar experience. This quick and easy dish is ideal for sharing platters, BBQs, or healthy vegetarian starters.
One of the best things about Charred Padron Peppers with Garlic, Lemon and Feta Crumble is their versatility. Their smoky, salty, and tangy flavour means they complement a wide range of dishes — whether you’re building a full Spanish tapas spread or adding a Mediterranean twist to your usual meal. Here are some delicious ways to enjoy them:
Classic Tapas Board
Serve your Padron peppers alongside other Spanish favourites for a vibrant sharing platter:
Patatas bravas or roasted potatoes for a hearty touch
Manchego cheese and olives for extra Mediterranean flair
Freshly baked crusty bread with olive oil and sea salt for dipping
Light Summer Lunch
Combine the peppers with crisp salads, couscous, or quinoa bowls for a bright, wholesome lunch. The feta crumble and lemon zest bring freshness and texture, pairing beautifully with cherry tomatoes and avocado.
Dinner Party Side
Add a touch of elegance to grilled or roasted mains:
Grilled chicken or halloumi skewers
Pan-seared salmon or sea bass
Oven-roasted lamb chops with rosemary
The lemon and garlic notes cut through richness perfectly, balancing the dish and brightening the plate.
Conclusion
Simple, fresh and bursting with Mediterranean flavour, this Charred Padron Peppers with Garlic, Lemon and Feta Crumble recipe is proof that great food doesn’t have to be complicated. With just a few quality ingredients, you can create a dish that’s light, healthy, and full of character — a perfect balance of smoky, salty, tangy and creamy.
Whether you serve it as part of a Spanish tapas feast, a BBQ side, or a quick weeknight appetiser, these blistered peppers always impress. Their unpredictable little kick adds fun and authenticity to every bite. It reminds you of sunny terraces and relaxed evenings in Spain.
At Nicol Retailer, we’re proud to offer Fresh Padron Peppers (500g) — sourced for their quality and flavour so you can bring the taste of Spain straight to your kitchen.
Explore our range of fresh produce, gourmet ingredients, and global flavours today at nicolretailer.com and make every meal a little more exciting.
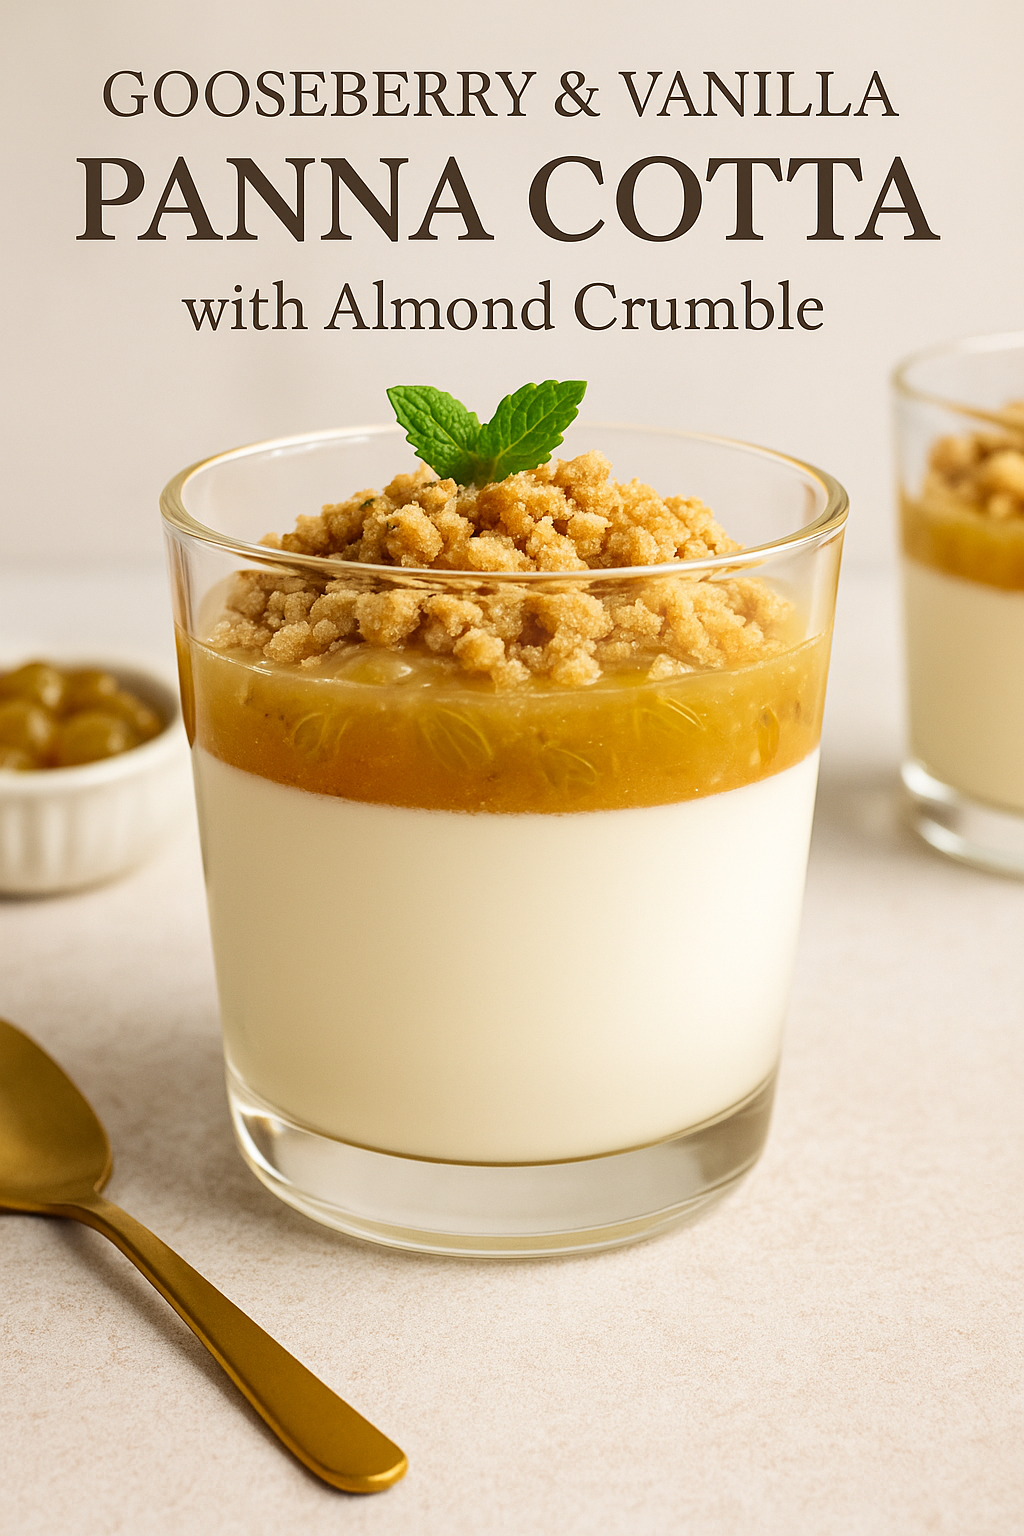
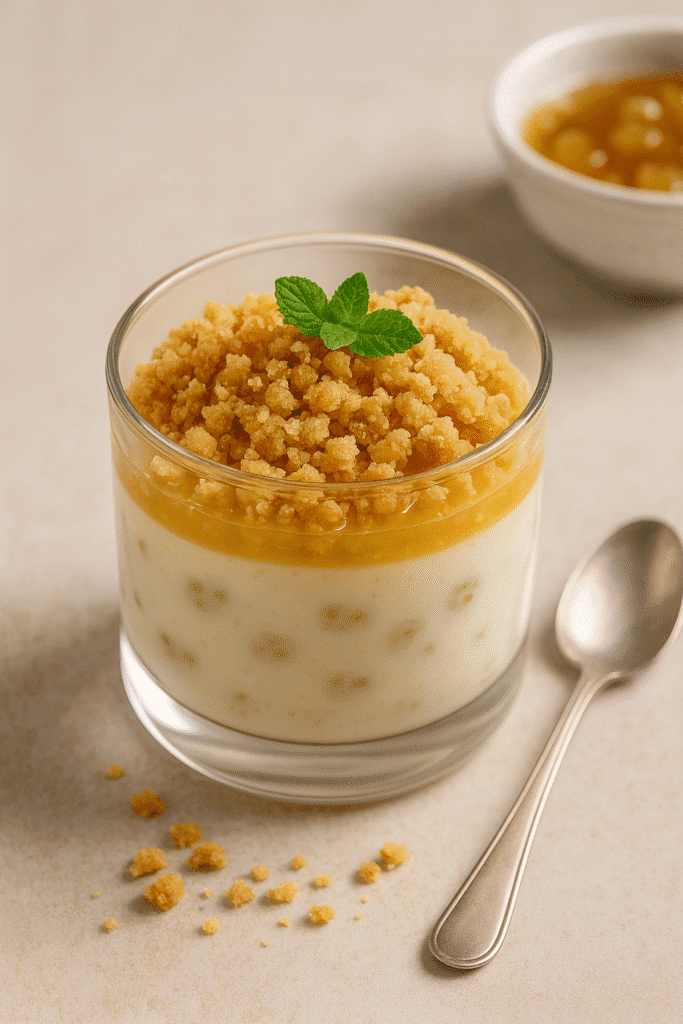
If you’re searching for a dessert that combines sophistication, simplicity, and incredible flavour, this Gooseberry & Vanilla Panna Cotta with Almond Crumble is the one to make. It’s that rare kind of recipe — elegant enough for a dinner party. Yet, it is easy enough for a midweek treat.
Each spoonful offers a harmony of textures: the smooth, creamy vanilla panna cotta, the bright tang of Royal Crown Gooseberries in Light Syrup, and the buttery crunch of almond crumble. Together, they create a dessert that’s light yet indulgent. It is comforting but undeniably luxurious.
And the best part? You don’t need to be a pastry chef to make it. Thanks to Macphie Panna Cotta Base Mix , available to buy from Nicol Retailer, creating the perfect panna cotta has never been simpler. This professional-quality mix delivers a silky, restaurant-standard texture every time. It saves you the stress of measuring gelatine or worrying about the set. Just add milk and cream, and you’re minutes away from a flawless dessert.
The secret to what makes this recipe truly shine lies in the gooseberries. Sourced and packed with care, Royal Crown Gooseberries in Light Syrup (3kg) are naturally sweet with a gentle tartness. This pairs beautifully with the creamy vanilla base. Their syrup adds a delicate gloss and subtle sweetness that elevates the entire dish. Because they’re preserved at peak ripeness, you can enjoy this fresh, fruity flavour all year round.
Whether you’re planning a romantic dinner, hosting guests, or simply indulging in a weekend treat, this panna cotta delivers that “wow” moment every time. It looks stunning, tastes divine, and takes surprisingly little effort. A true modern British dessert with a fine-dining twist.
Here is the recipe and instructions of how to make the delicious recipe:
Gooseberry & Vanilla Panna Cotta with Almond Crumble
This elegant dessert blends silky vanilla panna cotta with a vibrant gooseberry compote and buttery almond crumble. By using a panna cotta mix, you’ll create a restaurant-quality dessert effortlessly — beautifully enhanced with a handful of Royal Crown Gooseberries in Light Syrup, available from Nicol Retailer
Course Dessert
Cuisine English, European
Diet Vegetarian
Keyword Butternut squash at Nicol Retailer, buy gooseberries online, easy panna cotta dessert, gooseberry compote recipe, gooseberry dessert recipe, gooseberry panna cotta, panna cotta with fruit compote, Royal Crown Gooseberries
Prepare the panna cotta mix according to packet instructions with milk and cream.
Add vanilla bean paste for extra aroma.
Gently fold in a handful of drained Royal Crown Gooseberries for pops of flavour and texture
Pour into glass cups or moulds. Chill for at least 3 hours or until set.
Make the Gooseberry Compote
Add gooseberries, syrup, lemon zest, and juice to a saucepan.
Simmer gently for 5–7 minutes until thick and glossy.
Cool completely before spooning over the panna cotta.
Prepare the Almond Crumble
Preheat oven to 180 °C (160 °C fan).
Combine flour, butter, ground almonds, sugar, and salt until crumbly.
Bake for 10–12 minutes until golden. Cool and crumble.
Assemble & Serve
Top each panna cotta with gooseberry compote.
Sprinkle with almond crumble and garnish with fresh mint or whole gooseberries.
Serve chilled for a refreshing, elegant finish.
Notes
For the best flavour, use Royal Crown Gooseberries in Light Syrup from Nicol Retailer Their gentle sweetness and delicate tartness make the perfect topping for creamy panna cotta.If you’d like extra texture, fold a few whole gooseberries into the panna cotta before chilling — it adds a lovely burst of flavour in every spoonful.To make it gluten-free, simply substitute the plain flour in the crumble with a gluten-free blend.For a lighter version, swap half the double cream with Greek yoghurt or coconut cream — it’ll still be smooth and delicious.This dessert can be made a day ahead, making it ideal for dinner parties or special occasions. Chill, garnish just before serving, and enjoy a touch of restaurant elegance at home.Chef’s Tip The secret to a truly unforgettable panna cotta is balance — creamy, silky texture with just the right touch of tart fruit. Using Royal Crown Gooseberries in Light Syrup from Nicol Retailer gives you that perfect contrast every time. Their gentle tang lifts the sweetness of the panna cotta and adds a burst of freshness to each bite.For an elegant finish, serve in clear glasses so the golden layers of gooseberry, cream, and crumble shine through. It’s the kind of dessert that looks impressive, tastes divine, and leaves your guests asking for seconds — with none of the stress.
What makes this dessert truly special is its perfect balance of flavour, texture, and simplicity. It’s the kind of recipe that feels indulgent but doesn’t overwhelm. It is rich enough to satisfy a sweet craving, yet light enough to leave you wanting just one more spoonful.
The Macphie Panna Cotta Base Mix, available from Nicol Retailer, guarantees flawless results every time. Forget the stress of measuring gelatine or wondering if your cream will set. This professional-quality mix creates a silky, smooth panna cotta with barely any effort. It gives you that restaurant-perfect wobble and melt-in-the-mouth texture in just a few easy steps.
Then there’s the Royal Crown Gooseberries in Light Syrup (3kg) — a true gem for home bakers and dessert lovers alike. Their natural tartness cuts through the creamy richness of the panna cotta. Meanwhile, the light syrup adds a subtle sweetness and a glossy finish. Because they’re carefully preserved, you can enjoy that burst of fruity freshness no matter the season. It’s like capturing the taste of summer in every spoonful.
The addition of a buttery almond crumble brings a satisfying crunch and a touch of nuttiness. This creates a beautiful contrast against the soft panna cotta and syrupy gooseberries. Together, these elements form a dessert that feels layered, thoughtful, and completely irresistible.
But beyond flavour, this recipe works because it’s achievable. You don’t need special tools or complex techniques — just quality ingredients and a little patience while it chills. Whether you’re making it for guests or simply treating yourself, it’s a foolproof recipe that delivers big on taste, texture, and presentation.
A little elegance, a little nostalgia, and a whole lot of flavour — this Gooseberry & Vanilla Panna Cotta is proof that the simplest desserts are often the most memorable.
Serving & Pairing Suggestions
This Gooseberry & Vanilla Panna Cotta with Almond Crumble is more than just a dessert — it’s an experience. Every element brings its own texture and flavour. When served beautifully, it feels like something you’d order at an upscale restaurant. The best part? You can create it effortlessly at home.
Serve your panna cotta chilled, ideally in clear dessert glasses or stemmed coupes so the layers of creamy vanilla, glossy gooseberry compote, and golden crumble are on full display. The visual contrast — pale cream against the soft pink hue of the gooseberries — instantly elevates the presentation and makes it perfect for entertaining.
For a little extra flair, garnish with whole Royal Crown Gooseberries in Light Syrup and a few fresh mint leaves. This not only adds a pop of colour but also enhances the fruity aroma. You can even drizzle a teaspoon of the syrup from the tin over the top for that glossy, photo-worthy finish.
When it comes to pairings, this panna cotta loves a light, refreshing drink. Try serving it with a chilled glass of Prosecco, sparkling rosé, or even elderflower cordial for a delicate, floral complement to the gooseberries’ tartness. The creamy panna cotta and crisp bubbles work together beautifully. This combination cleanses the palate after each bite.
For something heartier, it follows a rich main course perfectly — think roasted lamb, venison, or a classic British beef dish. The bright, fruity notes of the gooseberries bring balance to a savoury meal. It ends dinner on a light yet luxurious note.
If you want to transform this dessert into a fine-dining showpiece, add a few edible flowers or a gentle dusting of crushed pistachios before serving. The combination of colours and textures makes this panna cotta look as impressive as it tastes.
No matter the occasion — whether it’s a romantic dinner, a garden party, or a quiet indulgence at home — this recipe delivers understated elegance and comfort in every bite.
Final Thoughts
This Gooseberry & Vanilla Panna Cotta with Almond Crumble is proof that fine dining doesn’t have to be complicated. With a handful of premium ingredients and a touch of creativity, you can transform a simple dessert into something truly extraordinary. The silky-smooth panna cotta, made effortlessly using the Macphie Panna Cotta Base Mix , pairs perfectly with the sweet-tart vibrance of Royal Crown Gooseberries in Light Syrup (3kg) — both available at Nicol Retailer.
Whether you’re hosting guests, celebrating something special, or just treating yourself, this dessert captures everything wonderful about modern British cooking: elegant presentation, incredible flavour, and quality ingredients that speak for themselves.
So go ahead — pour, chill, and serve up a taste of luxury. With Nicol Retailer’s Macphie Panna Cotta Base Mix and Royal Crown Gooseberries, creating restaurant-worthy desserts at home has never been easier (or more delicious).
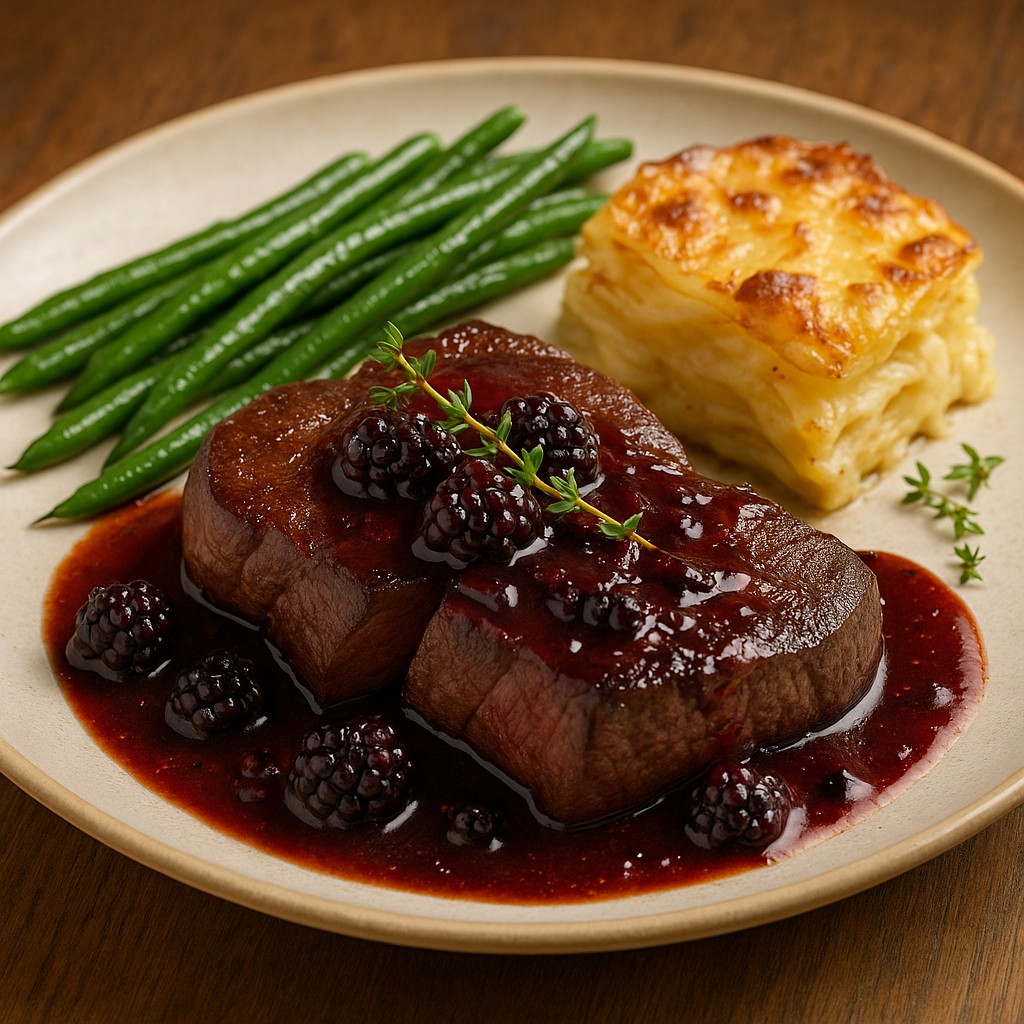
When only something extraordinary will do, Pan-Seared Highland Game Venison Steaks with Blackberry & Red Wine Sauce are the star of the show. Tender, lean, and full of rich, natural flavour, these British-sourced steaks elevate any dinner into an elegant experience.
In this recipe, we pair pan-seared venison with a luxurious blackberry and red wine reduction, buttery greens, and creamy dauphinoise potatoes. The result is indulgence on a plate — sophisticated yet comforting, perfect for special occasions or a romantic dinner at home.
When you want to impress your guests or treat yourself to something special, Highland Game Venison Steaks are the ultimate centrepiece. Tender, lean, and bursting with rich, earthy flavour, venison brings luxury to your table with minimal effort. In this recipe, the steaks are pan-seared to perfection and paired with a luscious blackberry and red wine sauce, buttery greens, and creamy dauphinoise potatoes — a harmony of flavours that’s elegant, indulgent, and irresistibly British.
Why This Recipe Works:
Premium quality: Using Highland Game Venison Steaks from Nicol Retailer ensures tenderness and flavour every time.
Balanced flavours: The sweet-tart blackberry and red wine sauce complements venison’s natural richness beautifully.
Luxurious yet achievable: Elegant presentation with minimal fuss.
Here is the delicious recipe:
Pan-Seared Venison Steaks with Blackberry & Red Wine Sauce, Buttered Greens & Dauphinoise Potatoes
Savour the elegance of restaurant-quality dining at home with this Highland Game Venison Steaks recipe. Tender, lean venison is pan-seared and paired with a rich blackberry and red wine reduction, creamy dauphinoise potatoes, and buttered green beans.Made with premium British Highland Game venison, available from Nicol Retailer, this dish balances luxury and simplicity — perfect for date nights, dinner parties, or weekend indulgence.
Course Main Course
Cuisine English, European, Fine Dining
Diet Gluten Free, Low Fat
Keyword British game meat, buy venison online UK, fine dining main course, gourmet meat dishes, Highland Game venison, roast dinner ideas, venison recipes
Preheat oven to 160 °C (fan) / 180 °C (conventional)
Rub a gratin dish with the cut garlic, then discard garlic.
Thinly slice the potatoes (≈ 3 mm).
In a saucepan, combine milk + cream + bay + pinch of nutmeg, bring just to a simmer.
Layer potatoes in the dish, seasoning each layer with salt & pepper.
Pour over the hot cream mixture so it just covers the potatoes.
Sprinkle the grated cheese on top.
Bake for about 1¼ to 1½ hours or until the potatoes are tender and the top is golden.
Cook the venison steaks
Take steaks out of fridge ~20 minutes before cooking, pat dry, season both sides with salt & pepper.
Heat a heavy frying pan over medium-high heat; add olive oil.
When oil is hot (shimmering), add the steaks. Sear for ~2–3 minutes per side for medium-rare (depending on thickness).
In the last minute, add butter & fresh thyme/rosemary to the pan; baste steaks with the melted butter.
Remove steaks to a resting plate, loosely cover with foil.
Make the blackberry & red wine sauce
In the same pan used for the steaks (with those flavourful browned bits), lower heat a little. Add shallot & garlic, sauté until softened.
Deglaze with red wine, scraping the fond from the pan. Let wine reduce ~5 minutes.
Add stock, blackberries, redcurrant jelly (if using), and balsamic. Simmer until the sauce reduces and thickens—blackberries will burst.
Strain if you prefer a smooth sauce (pressing the berries), or leave it slightly chunky.
Swirl in cold butter at the end (off the heat) for sheen and richness.
Taste & adjust salt, pepper & acidity.
Cook the greens
Blanche the greens (beans or broccoli) in salted boiling water ~2–3 minutes until just tender.
Drain and toss with butter, salt & pepper.
Plate & serve
Slice the venison steaks (if desired) and arrange on warm plates.
Spoon the blackberry & red wine sauce over the steaks (or serve on the side).
Add a portion of dauphinoise potatoes and the buttered greens.
Optionally garnish with fresh thyme sprigs or extra blackberries.
Notes
Quality matters: For the best flavour and tenderness, use Highland Game Venison Steaks from Nicol Retailer. British farmed, Red Tractor–assured venison offers a lean, rich taste that elevates any special meal.Don’t overcook: Venison is naturally lean and can dry out quickly. Cook the steaks medium-rare to medium, then rest them for 5–10 minutes to lock in juices and enhance tenderness.Make ahead: The blackberry and red wine sauce can be prepared a day in advance and gently reheated before serving — ideal for dinner parties or festive gatherings.Pairing ideas: Serve with creamy dauphinoise potatoes, buttered greens, or roasted root vegetables for a balanced, restaurant-quality meal. Diet-friendly: This dish is gluten-free, high in protein, and low in fat, making it a healthy yet indulgent choice for those following low-carb or balanced diets.Freezing tip: You can freeze cooked venison and sauce separately for up to 2 months. Defrost overnight in the fridge and reheat gently before serving.
Venison is a naturally lean, protein-rich meat that’s packed with flavour and goodness. The Highland Game Venison Steaks available from Nicol Retailer are responsibly sourced from wild deer across the Scottish Highlands, where they roam freely and graze naturally.
Each steak is expertly trimmed and portioned, ready for quick pan-searing or grilling — a perfect choice for both professional chefs and home cooks who love restaurant-quality results. When you buy from Nicol Retailer, you’re choosing: ✅ Premium British venison, ethically sourced ✅ Red Tractor quality assurance ✅ Convenient 6x4x125g pack – ideal for family meals or entertaining ✅ Freshness and quality you can taste in every bite
Order your Highland Game Venison Steaks here and bring gourmet dining home tonight.
Serving & Pairing Suggestions
A dish as elegant as pan-seared Highland Game Venison Steaks deserves accompaniments that highlight its rich, natural flavour. Whether you’re planning a romantic dinner, hosting friends, or treating yourself to a weekend feast, these serving ideas and wine pairings will turn your meal into a fine-dining experience right at home.
For a non-alcoholic option, a chilled blackberry and rosemary spritzer makes a refreshing alternative that mirrors the flavours of the sauce.
Side Dishes that Shine
Your Highland Game Venison Steaks are already a statement piece, but the right sides make them unforgettable:
Dauphinoise Potatoes: Buttery, creamy, and golden, these are the ultimate indulgent companion to tender venison.
Buttered Greens: Tenderstem broccoli, green beans, or kale sautéed in butter and garlic provide a crisp, fresh contrast.
Honey-Glazed Carrots or Parsnips: Their gentle sweetness plays off the tartness of the blackberry sauce.
Roasted Root Vegetables: Earthy flavours like beetroot or celeriac enhance venison’s natural richness.
Celeriac Purée: Smooth, silky, and lightly nutty – perfect for scooping up every last drop of sauce.
Dessert Pairing
After a rich, savoury main, end your meal on a high note with something light yet decadent:
Dark Chocolate Tart or Mousse: The bitterness of chocolate balances the fruitiness of the sauce.
Poached Pears in Red Wine: A sophisticated, flavour-matched dessert that mirrors the venison’s sauce.
Serve your venison on warm plates to keep the meat tender and juicy. For a restaurant-style finish, spoon the glossy blackberry and red wine sauce over the top, then garnish with a few fresh blackberries or a sprig of rosemary. Light candles this dish deserves a little ceremony.
Final Thoughts
This Highland Game Venison Steaks with Blackberry & Red Wine Sauce recipe is proof that fine dining doesn’t have to stay in the restaurant. With just a few quality ingredients, you can create a dish that’s elegant, comforting, and deeply satisfying. The rich, gamey flavour of Highland Game Venison Steaks, balanced with the sweetness of blackberries and the depth of red wine, delivers a true taste of luxury. Whether it’s a romantic dinner, a festive celebration, or a weekend treat, this recipe will always impress.
For the very best results, choose premium Highland Game Venison Steaks (6x4x125g) available exclusively at Nicol Retailer. Sustainably sourced, British, and beautifully tender, they’re the perfect centrepiece for any special meal. Order yours today and bring restaurant-quality flavour to your own kitchen — because great food starts with exceptional ingredients.
Looking for the ultimate crowd-pleasing recipe? These Mini Brioche Sliders with Garlic Butter & Caramelised Onions are everything you want in comfort food. They feature soft, glossy St Pierre Mini Brioche Buns, juicy beef patties, melty cheese, sweet caramelised onions, and a drizzle of garlicky butter. Perfect for parties, BBQs, or casual family dinners, these sliders are small in size but big on flavour!
Why You’ll Love This Recipe
Soft & Buttery Buns – Made with St Pierre Mini Brioche Buns, these sliders stand out from the crowd. Their rich, buttery flavour and light, fluffy texture make every bite taste gourmet.
Juicy, Flavour-Packed Patties – Each mini burger is made with seasoned beef patties that stay juicy and tender, perfectly balanced with the sweetness of slow-cooked caramelised onions.
Garlic Butter Indulgence – Brushing the brioche with melted garlic butter before toasting creates a glossy golden crust. This also creates an irresistible aroma that fills the kitchen.
Perfect for Any Occasion – Whether you’re hosting a party or planning a BBQ, these sliders are guaranteed to please kids and adults alike. They are also perfect for a quick family dinner.
Versatile & Adaptable – Keep it classic with beef and cheddar. Alternatively, customise with chicken, turkey, veggie patties, or even plant-based cheese for different diets.
Restaurant-Quality at Home – With just a few simple ingredients, you can recreate sliders that taste like they’ve come straight from a gourmet food truck. You don’t have to leave your kitchen.
Crowd-Pleasing Favourite – Bite-sized, indulgent, and fun to eat, these sliders will disappear fast from any serving platter. They’re the type of recipe that guests ask for again and again.
Here is the recipe:
Mini Brioche Sliders with Garlic Butter & Caramelised Onions
Soft, buttery St Pierre Mini Brioche Buns meet juicy beef sliders, sweet caramelised onions, and a drizzle of garlic butter. Perfect for parties, appetisers, or a fun family dinner!
Course Appetizer, brunch, Buffet, lunch, Main Course, party food
Cuisine American, European
Diet Diabetic
Keyword Beef sliders with brioche buns, Brioche bun slider recipe, Caramelised onion sliders, Garlic butter sliders, Mini brioche sliders recipe, Party food sliders, St Pierre mini brioche buns recipe
In a pan, heat olive oil and cook the sliced onions on low heat for 15–20 mins until soft, golden, and sweet.
Make the sliders
Season the beef mince with salt & pepper, shape into 10 mini patties, and pan-fry or grill for 3–4 mins per side until cooked through.
Garlic butter
Melt butter with minced garlic, gently simmer for 1 min.
Assemble
Split each brioche bun, brush with garlic butter, and lightly toast. Spread mayo and mustard, add patties, cheese, caramelised onions, and top with the golden brioche lid.
Finish & serve
Garnish with fresh parsley and serve warm.
Notes
Buns: St Pierre Mini Brioche Buns are naturally rich and buttery – lightly toasting them with garlic butter makes them extra indulgent.Meat Swap: You can replace beef with chicken, turkey, or even plant-based mince for a lighter or vegetarian-friendly version.Cheese Options: Cheddar, gouda, or Swiss cheese melt beautifully – pick your favourite!Caramelised Onions: Low and slow cooking is key – resist the urge to rush for the best sweet, golden finish.Make Ahead: Patties and caramelised onions can be prepped the day before; just reheat and assemble when ready to serve.Serving Size: Great for party platters, appetisers, or fun family dinners – they disappear fast!Pairings: Delicious with sweet potato fries, rocket salad, or a side of coleslaw.Chef’s TipsPerfectly Juicy Patties: Gently shape the mince into patties without overworking – this keeps them tender. Press a small dent in the centre of each patty before cooking to prevent them puffing up.Extra Flavour Boost: Mix a dash of Worcestershire sauce or smoked paprika into your mince for a richer depth of flavour.Crisp Finish: After caramelising, deglaze the onion pan with a splash of balsamic vinegar or red wine for tangy-sweet onions.Golden Brioche: Brush the cut sides of the buns with garlic butter before toasting for a glossy, golden crunch.Keep it Warm: If making a batch, keep sliders warm in a low oven (around 100°C) before serving so the cheese stays melty.Plating Tip: Serve on a wooden board with cocktail sticks to hold them together – practical and Instagram-worthy!
One of the best things about these Mini Brioche Sliders is their versatility. Whether you’re serving them as appetisers, party food, or the star of a casual dinner, they fit beautifully into any menu. Here are some irresistible serving ideas:
Party Platters & Buffets – Arrange the sliders neatly on a rustic wooden board or tiered serving tray. Brush the brioche buns with a little extra garlic butter for shine. Add cocktail sticks for easy grabbing. Perfect for birthdays, family gatherings, or even wedding receptions.
Family Dinners Made Fun – Instead of a traditional burger night, serve these bite-sized sliders with crispy fries, sweet potato wedges, or onion rings for a playful, family-friendly dinner. Kids will love their size, while adults enjoy their gourmet twist.
Game Day Food – Sliders are game-day royalty! Serve them alongside bowls of nachos, wings, and dips like BBQ sauce, garlic aioli, or spicy sriracha mayo. Their compact size makes them easy to enjoy in front of the TV with friends.
Picnic Perfection – Pack the cooked patties and caramelised onions separately. Then assemble on-site with your St Pierre Mini Brioche Buns for a show-stopping picnic treat. Pair with coleslaw, pickles, and crisp salad for a fresh outdoor feast.
BBQ Favourite – Take these sliders to the grill! Toast the brioche over the barbecue for a smoky finish. Then serve with grilled corn, potato salad, and fresh summer greens.
Sweet & Savoury Combo Platter – Showcase the versatility of St Pierre Mini Brioche Buns by serving both savoury beef sliders and sweet dessert sliders filled with Nutella, strawberries, and whipped cream. It’s the ultimate crowd-pleaser platter.
Sliders are all about indulgence. When made with St Pierre Mini Brioche Buns, they’re elevated into something truly unforgettable. Whether you’re cooking for a party, a family dinner, or just treating yourself, these Mini Brioche Sliders with Garlic Butter & Caramelised Onions deliver the perfect balance of flavour, texture, and style.
Bring home the star ingredient and try it for yourself – get your pack of St Pierre Mini Brioche Buns today at Nicol Retailer.
Gluten-Free & Vegan Alternatives
Nobody should miss out on these delicious sliders, and with a couple of smart swaps, you can enjoy them gluten-free or fully plant-based without compromising on taste.
Gluten-Free Option – with Schar Gluten Free Mini Brioche Sliders 10×3
If you’re catering for coeliac diets or anyone avoiding gluten, Schar’s brioche sliders are the perfect alternative. Soft, golden, and slightly sweet, they mimic the flavour and texture of traditional brioche while being 100% gluten-free. Pair them with juicy patties, caramelised onions, and garlic butter for sliders everyone can enjoy.
Tip: Lightly toast gluten-free brioche to hold the fillings better and avoid sogginess.
Vegan Option – with La Boulangerie Vegan Brioche Style Burger Bun
For a plant-based version, swap to La Boulangerie’s Vegan Brioche Style Buns. Rich, soft, and golden, they deliver the same indulgence as classic brioche but are made without eggs or dairy.
Patties: Use your favourite plant-based burger or make lentil/bean patties.
Cheese: Melt vegan cheddar or smoky vegan cheese for the perfect bite.
Butter: Replace garlic butter with a dairy-free spread for that same garlicky kick.
Result: A fully plant-based slider that’s every bit as indulgent as the original – glossy buns, savoury filling, caramelised onion sweetness, and garlicky richness in every bite.
With St Pierre, Schar, and La Boulangerie, Nicol Retailer offers a brioche option for everyone — traditional, gluten-free, and vegan — so no guest is left out at your table.
When it comes to fresh, vibrant cooking, few ingredients are as underrated and versatile as Mooli (also known as Daikon Radish). One delightful way to enjoy this ingredient is by making a Fresh Mooli & Carrot Salad with Lemon Dressing. This crisp, white root vegetable is a staple in Asian and Middle Eastern kitchens. It is loved for its delicate peppery flavour, refreshing crunch, and impressive nutritional benefits.
At Nicol Retailer, our Fresh Mooli (2kg pack) is carefully sourced for maximum freshness, flavour, and quality. Whether you’re a home cook or catering for family gatherings, this humble root transforms everyday meals into something truly special. For instance, a mooli carrot salad with lemon dressing.
Why Choose Fresh Mooli?
Light & Refreshing: Adds natural crunch to salads, slaws, and side dishes. It perfectly blends in a salad with fresh carrot and lemon dressing.
Nutrient-Rich: High in vitamin C, fibre, and antioxidants.
Versatile: Delicious raw, pickled, stir-fried, or added to soups and curries.
Diet-Friendly: Vegan, gluten-free, low in calories – perfect for healthy eating.
When paired with colourful vegetables like carrots, spring onions, and fresh coriander, mooli shines as the star ingredient. It makes this crisp, tangy, and utterly addictive salad.
Here s the step by steps of how to make this delicious recipe, a fresh mooli and carrot salad dressed with lemon.
Refreshing Mooli & Carrot Salad with Lemon Dressing
Fresh Mooli & Carrot Salad with Lemon DressingCrisp, light, and packed with flavour, this Fresh Mooli (Daikon Radish) and Carrot Salad is the perfect healthy side dish. Made with julienned mooli, crunchy carrots, spring onions, fresh coriander, and a zesty sesame-lemon dressing, it’s a refreshing no-cook recipe ready in just 10 minutes. Ideal for summer barbecues, Asian-inspired meals, or a light lunch, this vibrant salad balances sweet, tangy, and nutty flavours beautifully. Garnished with toasted sesame seeds, it pairs wonderfully with grilled fish, sushi, or spicy noodles.
Peel and julienne (or grate) the Fresh Mooli and carrots.
Place in a mixing bowl with sliced spring onions, chilli and coriander.
Make the Dressing
In a small bowl, whisk together lemon juice, vinegar, sesame oil, honey (or agave), salt and pepper.
Combine
Pour the dressing over the salad and toss well to coat.
Finish & Serve:
Sprinkle with toasted sesame seeds for extra crunch.
Serve chilled as a light side dish or refreshing starter.
Notes
For the best texture, serve this salad immediately after tossing with the dressing. If preparing ahead, keep the vegetables and dressing separate, then combine just before serving to maintain crunch and freshness.TipsAdd crunch: Toss in roasted peanuts, cashews, or crispy fried shallots for extra texture.Spice it up: A dash of chilli flakes or a drizzle of sriracha can give it a fiery kick.Make it creamy: Add a spoonful of Greek yoghurt or tahini to the dressing for a richer flavour.Swap veggies: Replace carrots with cucumber, beetroot, or thinly sliced red cabbage for colour and variety.Protein boost: Top with grilled tofu, edamame, or shredded chicken for a light main course.Citrus twist: Swap lemon with lime or yuzu juice for a sharper, tangy profile.
This salad isn’t just a side – it’s a versatile dish that elevates any meal. Especially when featuring fresh ingredients like mooli and carrot, combined with a lemony zest.
With Grilled Fish or Chicken: The citrusy dressing cuts through smoky flavours, making it a refreshing side to seafood or lean meats.
Alongside Sushi or Asian Dishes: Its crisp crunch balances soy, ginger, and wasabi notes perfectly.
At Summer BBQs: A cooling, light option to serve alongside rich burgers, skewers, and grilled veggies.
Paired with Spicy Curries: The fresh mooli offers a cooling contrast to bold Indian or Thai curries.
As a Light Lunch: Add extra protein (tofu, prawns, or chickpeas) and enjoy as a satisfying meal on its own.
Drinks Pairing: Complements citrusy mocktails, or sparkling water with lime.
Bring Freshness to Your Table
Ready to try this recipe? Stock up on Fresh Mooli (2kg) direct from Nicol Retailer. With its crisp texture and delicate flavour, it’s the secret ingredient your kitchen has been missing. Order now and create this refreshing salad at home – healthy, vibrant, and full of flavour with the freshness of mooli and carrots under a lemony finish.