Posted on

Red Wine Braised Beef Cheeks with Creamy Polenta & Crispy Sage

Braised beef cheek in rich red wine sauce served on creamy Parmesan polenta, garnished with crispy sage leaves and fresh parsley on a rustic plate by Nicol Retailer

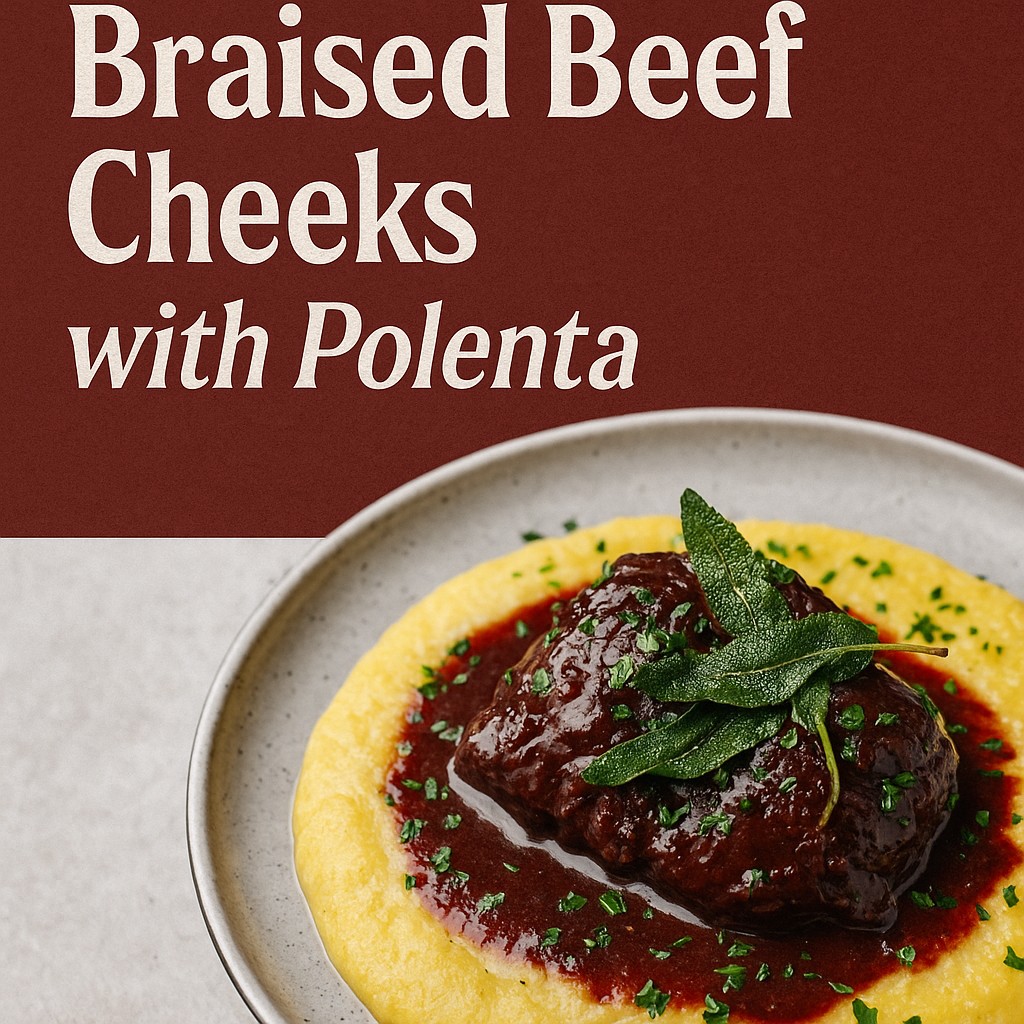
When the evenings call for something rich, comforting, and deeply satisfying, nothing quite compares to braised beef cheeks. These underrated cuts of beef transform into fork-tender, melt-in-the-mouth perfection when cooked low and slow. For an exquisite meal, try red wine braised beef cheeks with creamy polenta & crispy sage. Paired with creamy Parmesan polenta and crispy sage leaves, this dish is the ultimate autumn-winter warmer – elegant enough for a dinner party, yet hearty enough for a cosy Sunday supper.

Best of all, you don’t need to search far – you can buy premium, Red Tractor assured Alec Jarrett British Beef Cheeks (2 kg pack) directly from Nicol Retailer.

Why Beef Cheeks Deserve the Spotlight

Beef cheeks are one of the most underrated cuts. They come from the hardworking cheek muscle of the cow, and while they require time to cook, the payoff is huge: an almost buttery, melt-in-the-mouth texture that rivals prime steak. Choosing Alec Jarrett British Red Tractor Beef Cheeks guarantees not only tenderness and flavour, but also:

✅ High welfare British farming – the Red Tractor seal ensures traceability and quality.

✅ Generous pack size (2 kg) – perfect for batch cooking, dinner parties, or meal prep.

✅ Excellent value – a more affordable way to enjoy restaurant-quality dining at home.

📦 Order now from Nicol Retailer and get this exceptional cut delivered straight to your door.

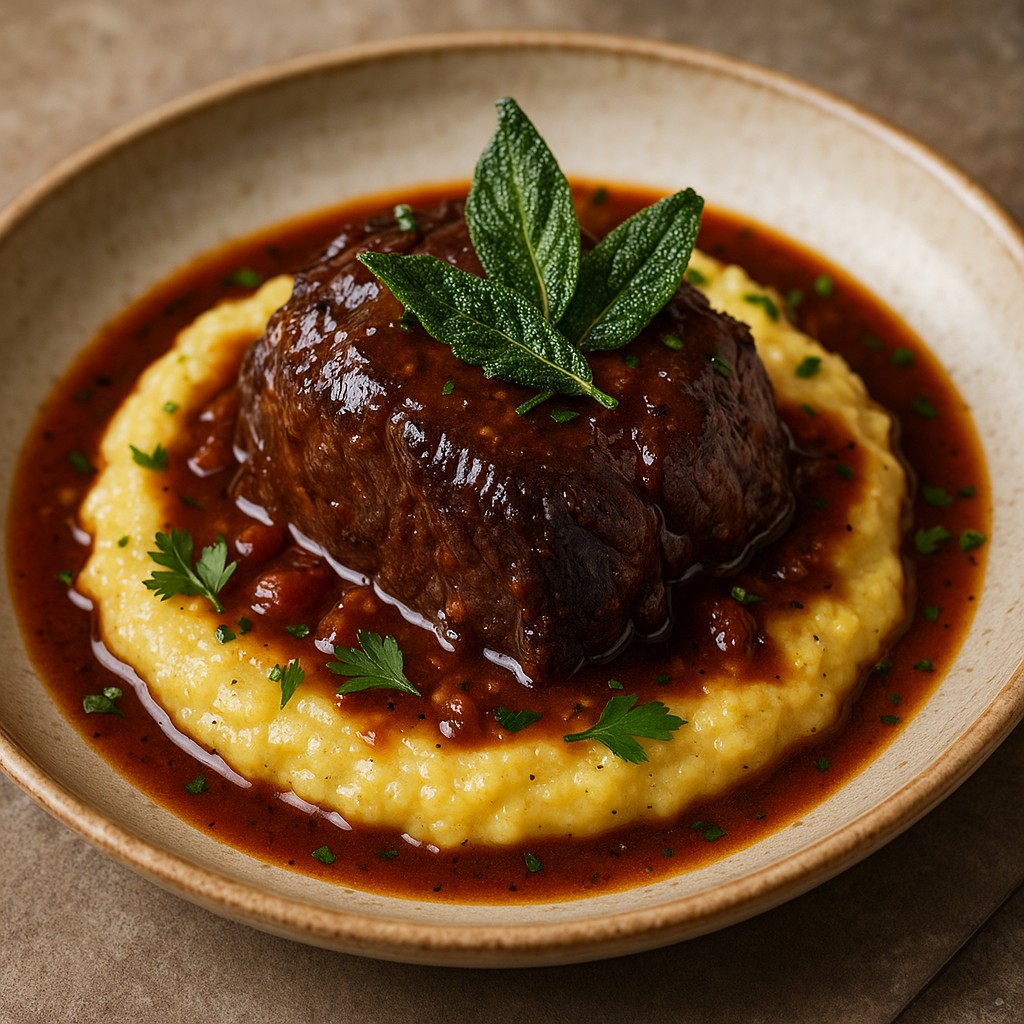
This dish highlights the beef cheeks at their absolute best: slow-braised in red wine and herbs until tender, finished with a glossy sauce, and served over creamy Parmesan polenta. Here is the recipe:

Braised beef cheek in rich red wine sauce served on creamy Parmesan polenta, garnished with crispy sage leaves and fresh parsley on a rustic plate by Nicol Retailer

Red Wine & Herb Braised Beef Cheeks with Polenta & Crispy Sage

Print Recipe
Indulge in this melt-in-the-mouth Red Wine & Herb Braised Beef Cheeks recipe – the ultimate comfort food for a special dinner. Slow-cooked to perfection, tender British beef cheeks are seared and simmered in a rich red wine sauce with garlic, carrots, and aromatic herbs, then served on a bed of creamy Parmesan polenta. Finished with crispy sage and fresh parsley, this hearty dish is perfect for Sunday roasts, dinner parties, or cosy family meals. Pair it with a bold red wine for a restaurant-quality experience at home.
Course Dinner, Main Course, Special Occasion Dish, Supper
Cuisine English, European, Italian
Diet Low Fat
Keyword beef cheeks with polenta, braised beef cheeks recipe, British beef cheeks recipe, red wine beef cheeks, restaurant style beef cheeks, slow cooked beef cheeks
Prep Time 30 minutes
Cook Time 4 hours
Servings 6 People
Calories 680

Instructions

Prep & sear

  • Take the beef cheeks out of the fridge ~30 min ahead, pat dry, season generously with salt & pepper.
  • Lightly dust with flour, shake off excess.
  • Heat a large heavy-based casserole or Dutch oven over medium-high heat. Add olive oil (and pancetta if using).
  • Sear the cheeks in batches, 2–3 minutes per side, until deeply browned. Remove and set aside.

Build the braising base

  • In the same pot, reduce heat to medium, add onions, celery, carrots, garlic. Sauté until softened and starts to take colour (≈8 minutes).
  • Stir in tomato purée, cook out for a minute.
  • Deglaze with red wine, scraping up the fond (brown bits) from the base. Let wine reduce a bit (5–8 minutes).
  • Add beef stock, bay leaves, thyme, rosemary, orange zest, and sugar/honey (if using). Stir to combine.

Braise low & slow

  • Return beef cheeks into the liquid (they should be mostly submerged; top off with extra stock or water if needed)
  • Bring to a gentle simmer, then cover, reduce heat to very low (or transfer to oven at ~150 °C / 300–325 °F).
  • Braise for 4 hours (or longer), turning once or twice, until the cheeks are falling-apart tender

Finish sauce

  • Carefully remove the beef cheeks, set aside and keep warm
  • Strain the braising liquid (optional) back into the pot, discard herbs & vegetables (or blitz & re-strain for a smoother sauce).
  • Reduce over medium heat to thicken to a nice sauce/glaze consistency. Adjust seasoning with salt, pepper, maybe a splash of balsamic or red wine vinegar for brightness.
  • Return cheeks to the sauce to coat and warm through.

Make the polenta

  • While the sauce is reducing, bring the water (or water + milk) to a simmer in a saucepan.
  • Gradually whisk in polenta, reduce heat and cook, stirring frequently, for ~20–25 minutes until thick and creamy.
  • Stir in butter, Parmesan, season to taste

Crisp the sage & plate

  • In a small frying pan, heat a little olive oil until shimmering, then fry sage leaves until crisp (a few seconds each side). Drain on paper towels, sprinkle salt.
  • Plate: spoon a bed of creamy polenta, lay a beef cheek (or pieces) on top, drizzle with sauce, garnish with crispy sage (and parsley or pancetta bits).

Notes

Make Ahead: Beef cheeks taste even better the next day as the flavours deepen. Cool, refrigerate overnight, then gently reheat in the sauce.
Freezer Friendly: Once cooled, store beef cheeks with sauce in airtight containers for up to 3 months. Defrost overnight in the fridge and reheat slowly.
Flour Swap: To keep the recipe gluten-free, dust beef cheeks with cornflour or rice flour instead of wheat flour.
Polenta Texture: For creamier polenta, replace half the water with milk or cream. For a dairy-free option, use olive oil instead of butter and nutritional yeast instead of Parmesan.
Wine Choice: A bold, full-bodied red wine (Cabernet Sauvignon, Merlot, Shiraz) works best. Avoid light wines, as they won’t stand up to the richness of the beef.
Serving Ideas: Instead of polenta, try mashed potato, celeriac mash, or buttered pappardelle pasta.
Add a Twist: A stick of cinnamon, star anise, or dried chilli in the braising liquid gives the dish a unique depth.

Nutrition

Serving: 4008 | Calories: 680kcal | Carbohydrates: 34g | Protein: 48g | Fat: 32g | Saturated Fat: 14g | Cholesterol: 180mg | Sodium: 720mg | Fiber: 3g | Sugar: 6g | Calcium: 160mg | Iron: 6mg

Why This Recipe Works

This recipe isn’t just about cooking beef – it’s about transforming a humble, underrated cut into something extraordinary. Here’s why it works so well:

  1. Beef Cheeks at Their Best

Beef cheeks are naturally full of connective tissue and collagen. While that makes them tough if cooked quickly, it’s exactly what makes them perfect for slow braising. Over hours of gentle heat, the collagen melts away, creating meat that’s fork-tender and luxuriously soft – almost like butter. Using Alec Jarrett British Red Tractor Beef Cheeks ensures the quality of the meat matches the technique, giving you consistently delicious results.

  1. Deep, Layered Flavour

Every element in this recipe builds flavour:

Searing the beef cheeks locks in rich, meaty notes.

The red wine and beef stock form a bold base, reduced slowly until concentrated.

Fresh herbs like thyme and rosemary infuse the braise with fragrance.

Orange zest adds a subtle lift, balancing the richness with a hint of brightness.
The result? A sauce that’s glossy, intense, and restaurant-worthy.

  1. The Perfect Partner: Creamy Polenta

Instead of classic mashed potato, this recipe uses Parmesan polenta – smooth, creamy, and comforting with a subtle nutty flavour. It soaks up the sauce beautifully without overpowering the beef, creating a balanced dish where every mouthful is pure comfort.

  1. A Textural Finish

The garnish of crispy sage leaves isn’t just for looks. Their crunch provides contrast to the tender beef and silky polenta, while their earthy aroma ties the whole dish together. It’s the kind of thoughtful touch that elevates a slow-cooked meal from rustic to refined.

  1. Designed for Success at Home

While this dish looks and tastes like something you’d order at a fine dining restaurant, it’s actually very achievable at home. Once the beef cheeks are in the oven, the recipe is largely hands-off – making it ideal for dinner parties or family gatherings. The large 2 kg pack from Nicol Retailer is perfect for feeding a crowd or batch-cooking for the freezer.

Serving Suggestions & Pairings

One of the greatest pleasures of cooking braised beef cheeks is how beautifully they adapt to different settings. Whether you’re planning a cosy Sunday meal with family or hosting friends for a sophisticated dinner party, this dish always rises to the occasion. Slow-cooked, succulent beef pairs effortlessly with rich reds, vibrant sides, and indulgent accompaniments that make every bite feel special.

Side Dish Ideas – Colour, Balance & Comfort

While creamy Parmesan polenta makes the perfect base, don’t stop there. Build a plate that’s as beautiful as it is delicious:

Roasted root vegetables – caramelised carrots, parsnips, and beetroot bring a natural sweetness that complements the richness of the beef.

Steamed seasonal greens – a bright, vibrant counterpoint that refreshes the palate after each decadent bite.

Crisp winter salad – bitter leaves, crunchy walnuts, and a citrus dressing add a refreshing zing, lightening the dish while adding a gourmet twist.

These sides don’t compete with the beef cheeks – they frame them, allowing the Alec Jarrett British Red Tractor Beef Cheeks to remain the star of the show.

Entertaining & Occasions – A Dish That Impresses Every Time

This isn’t just food; it’s an experience. Imagine setting down a platter of glossy, melt-in-the-mouth beef cheeks, the rich aroma of red wine and herbs filling the room. Guests lean closer, eyes widening, as you spoon the cheeks over creamy golden polenta and top them with crispy sage. It’s a dish that invites conversation, warmth, and indulgence.

For Sunday roasts, it offers a modern, luxurious alternative to traditional joints.

For dinner parties, it delivers a wow factor with very little last-minute fuss – the oven does all the work while you entertain.

For batch cooking, the generous 2 kg pack from Nicol Retailer
makes it easy to portion, freeze, and reheat – so you can relive the comfort of this dish on a weeknight without the wait.

Why These Pairings Work

The magic lies in harmony. The melt-in-the-mouth beef cheeks bring richness and depth, the glossy red wine sauce offers warmth and intensity, and the sides provide balance, freshness, and texture. Each glass of wine, each forkful of polenta, each bite of crisp sage creates a rhythm – indulgence followed by freshness, comfort balanced by elegance.

This isn’t just a recipe – it’s an invitation to slow down, to savour, and to turn a meal into a memory. And it all begins with the finest Alec Jarrett British Red Tractor Beef Cheeks, available to buy now at Nicol Retailer.

Buy the Star Ingredient Today

Ready to give it a go? Order your Alec Jarrett British Red Tractor Beef Cheeks (2 kg) now from Nicol Retailer and bring this recipe to life in your own kitchen. 👉 Click here to buy now
and experience the ultimate comfort food with premium British beef.

Final Thoughts

Some meals feed your body. This one feeds your soul. Slow-braised in red wine and herbs, Alec Jarrett British Red Tractor Beef Cheeks become melt-in-the-mouth, rich, and unforgettable. Perfect for Sunday roasts, dinner parties, or cosy nights in – it’s comfort food with a touch of elegance. 👉 Order your 2 kg pack today from Nicol Retailer
and bring restaurant-quality dining to your home.

Posted on

Crispy Pancetta & Avocado Smash Toast with Poached Egg

Avocado smash spread over golden sourdough toast with lemon and seasoning

If you’re looking for a brunch that feels like a treat but is simple enough to whip up at home, you’re in for a delicious surprise. This Crispy Pancetta & Avocado Smash Toast with Poached Egg is everything you want on a lazy weekend morning: salty, smoky, creamy, crunchy, and just the right amount of indulgent

.The star of the show? Our Smoked Pancetta Slices – perfectly cured, rich in flavour, and crisps up beautifully in the pan. Pair that with fresh sourdough, creamy avocado, and a golden poached egg. You’ve got a café-style dish without leaving your kitchen.

Crispy Pancetta & Avocado Smash Toast with Poached Egg

Print Recipe
Crispy smoked pancetta is layered over creamy avocado smash and golden sourdough, topped with a perfectly poached egg and finished with a drizzle of chilli oil. A simple yet indulgent brunch recipe that’s full of flavour and texture.
Course brunch, lunch
Cuisine European
Diet Low Fat
Keyword avocado smash with pancetta, avocado toast with pancetta, crispy pancetta toast, easy brunch recipes UK, gourmet brunch ideas, pancetta and egg recipe, pancetta avocado egg toast, pancetta breakfast ideas, poached egg brunch recipe, smoked pancetta sourdough
Prep Time 10 minutes
Cook Time 10 minutes
Servings 2 People
Calories 420

Instructions

Prepare the avocado smash

  • Scoop avocado into a bowl, mash with lemon juice, salt, and pepper until creamy but chunky.

Poach the eggs

  • Bring a pan of water to a gentle simmer, add vinegar.
  • Crack each egg into a small bowl, slide gently into the water.
  • Poach for 3–4 minutes until whites are set and yolks runny.

Cook the pancetta

  • Heat a dry frying pan on medium-high.
  • Lay in the pancetta slices, fry until crisp and golden (2–3 mins per side).
  • Remove to paper towel to drain.

Toast the bread

  • Toast the sourdough until golden and crunchy.

Assemble

  • Spread avocado smash over toast.
  • Top with a poached egg.
  • Layer crispy pancetta slices over the top.
  • Drizzle with chilli oil and garnish with microgreens.

Notes

Enjoy as a hearty weekend brunch or serve with a side salad for a light lunch. Pair with a flat white coffee or fresh orange juice.

Nutrition

Calories: 420kcal | Carbohydrates: 25g | Protein: 21g | Fat: 28g | Saturated Fat: 7g | Fiber: 5g | Sugar: 2g

Why You’ll Love It

✔ A flavour-packed brunch in under 20 minutes
✔ Crispy, salty pancetta meets creamy avocado
✔ Easy to adapt – gluten-free bread or veggie alternatives work too
✔ Ingredients available directly from our online shop

Serving Suggestions

This crispy pancetta & avocado smash toast is incredibly versatile, so you can enjoy it in different ways depending on your mood:

  • Add a little luxury: Sprinkle over some shaved Parmesan or a drizzle of truffle oil. This makes for a brunch that feels restaurant-worthy.
  • Make it lighter: Swap sourdough for wholegrain rye or gluten-free bread for a fibre boost. This will suit your diet.
  • Turn up the heat: Love spice? Add sliced fresh chillies or a pinch of chilli flakes. Alternatively, swap the drizzle of chilli oil for sriracha.
  • Veggie-friendly twist: Replace pancetta with grilled halloumi or roasted mushrooms. This creates a meat-free version.
  • Brunch board idea: Serve the toasts cut into halves on a platter. Pair them with fresh fruit, pastries, and juice. This is perfect for a family-style brunch spread.
  • Anytime snack: Enjoy without the poached egg for a quick open-faced sandwich. This makes a great lunch or late-afternoon pick-me-up.

Ready to try this recipe at home? Grab your pack of Smoked Pancetta and browse our full deli range here to stock up on all your kitchen essentials.

Posted on

Ajvar Recipe with Roasted Red Peppers & Aubergine

Have you ever wondered how to transform your cooking with a vibrant, flavour-packed spread? Look no further than Ajvar, a beloved Balkan condiment that effortlessly combines roasted red peppers and aubergine into a delightful medley. This Ajvar recipe with roasted red peppers & aubergine is a must-try for anyone eager to explore new culinary horizons.

Ajvar, known for its rich taste and versatility, can turn the simplest dishes into gourmet experiences. Originating from the Balkans, this condiment has gained popularity worldwide, not just for its flavour but also for its ease of preparation. With just a few fresh ingredients and some roasting, you can create a spread that will become a staple in your kitchen.


One of the beauties of this Ajvar recipe with roasted red peppers and aubergine lies in its simplicity and the natural flavours of the vegetables. Roasted red peppers bring a sweetness and smokiness that is hard to resist, while aubergines add a creamy texture, making the spread both indulgent and wholesome. The fusion of these ingredients creates a condiment that pairs well with a multitude of dishes, from grilled meats to toasted bread.


Whether you’re new to cooking or a seasoned chef, preparing Ajvar is a rewarding experience. Its vibrant colour and robust flavour will captivate your senses and impress anyone who tastes it. The best part? It’s as healthy as it is delicious, making it a perfect addition to your diet.


Ready to dive into the world of Ajvar? With this step-by-step Ajvar recipe using roasted red peppers & aubergine, you’ll find that making this roasted red peppers and aubergine recipe is not only easy but also incredibly satisfying. Let’s get started and bring some Balkan charm to your kitchen:

Ajvar with Roasted Red Peppers, Aubergine & Paprika Recipe

Print Recipe
Discover the rich and smoky flavours of Ajvar, a traditional Balkan roasted vegetable spread made with red peppers, aubergine, and paprika. This vibrant and versatile dish can be enjoyed as a dip, spread, or side, making it a perfect addition to your meals. The natural sweetness of roasted peppers and the earthy depth of aubergine come together with a subtle kick of paprika to create a taste that's both comforting and full of character. Whether served with fresh bread, crackers, or grilled meats, this simple yet flavourful recipe is sure to impress. Prepare this delightful homemade condiment and bring a taste of the Balkans to your table!
Course Appetizer, brunch, Side Dish, snacks
Cuisine Balkan / Southeast European Cuisine
Diet Gluten Free, Vegan, Vegetarian
Keyword how to make ajvar at home, mediterranean-style spread, roasted red pepper and aubergine dip, roasted vegetables dip recipe, smokey red dip, tTraditional ajvar with paprika, vegan ajvar spread, vegan Balkan recipes
Prep Time 20 minutes
Cook Time 50 minutes
Servings 4 People
Calories 40

Instructions

Prepare the vegetables

  • Preheat your oven to 220°C (200°C fan)/Gas Mark 7. Line a baking tray with parchment paper. Place the red peppers and aubergine on the tray and roast them for 30–40 minutes, turning occasionally, until the skins are charred and the vegetables are soft.

Cool and peel

  • Once roasted, transfer the peppers and aubergine to a bowl and cover with a plate or cling film. Let them cool for about 10 minutes. This helps loosen the skins. Peel the skins off the peppers and aubergine, and remove the seeds from the peppers.

Blend the ingredients

  • Place the peeled peppers and aubergine in a food processor or blender. Add the minced garlic, chopped chilli (if using), paprika, olive oil, and red wine vinegar. Blend until smooth, but leave a little texture if preferred.

Season and cook

  • Transfer the blended mixture to a large pan. Cook on low heat for 10–15 minutes, stirring frequently, to allow the flavours to develop and excess liquid to evaporate. Season with salt and pepper to taste.

Serve

  • Allow the ajvar to cool slightly before serving. It can be served warm or at room temperature. Enjoy as a dip with crusty bread, as a spread for sandwiches, or alongside grilled meats and vegetables.

Notes

Tips

When preparing Ajvar, the excellence of your ingredients can truly transform the final result. Let’s explore the vital components that elevate this roasted red peppers and aubergine recipe to its full potential.
Roasted red peppers are the cornerstone of any authentic Ajvar. These vibrant vegetables bring a natural sweetness and a hint of smokiness to the spread. For the best results, select fresh, ripe peppers with a bright red hue, indicating peak ripeness and flavour. Roasting them until slightly charred intensifies their taste, making them an indispensable element in your recipe.
Aubergines, also known as eggplants, contribute a creamy texture that beautifully balances the sweetness of the peppers. Choosing the right aubergines is key. Look for ones that are firm and free of blemishes. Smaller varieties often have a milder flavour and fewer seeds, which are perfect for this dish. Their inclusion adds depth and enhances the nutritional value of your Ajvar.
Another important ingredient is garlic, which adds a pungent kick that complements the roasted vegetables. Fresh, minced garlic is preferable for achieving that robust flavour. Additionally, a splash of vinegar helps to enhance the overall taste, adding a slight tanginess that lifts the richness of the peppers and aubergines.
Olive oil is another crucial component. It not only aids in roasting but also enriches the blend with a smooth, luscious texture. Opt for high-quality olive oil to ensure the best possible taste.
Lastly, seasoning with salt and pepper allows you to tailor the Ajvar to your liking, highlighting the natural flavours of the vegetables. Adjust the seasoning as needed to create a spread that perfectly suits your palate.

Nutrition

Serving: 30g | Calories: 40kcal | Carbohydrates: 2.5g | Protein: 0.5g | Fat: 3.5g | Saturated Fat: 0.5g | Fiber: 1g

Serving Suggestions

Ajvar’s culinary adaptability makes it an exciting addition to a variety of dishes, transforming them with its rich, vibrant taste.


Spread Ajvar on toasted bread for a simple yet delightful snack, or use it as a flavourful dip for an assortment of fresh vegetables. It works wonderfully as a side for grilled meats and fish, infusing them with a smoky, sweet undertone that enhances their natural flavours. Try spooning it over baked potatoes for a delicious twist or incorporating it into sandwiches and wraps for an extra layer of taste and texture.


For a quick and tasty meal, mix Ajvar into pasta as a sauce. Its robust flavours blend seamlessly with the pasta, creating a dish that is both satisfying and easy to prepare. You can also stir Ajvar into rice or couscous, adding a burst of flavour that elevates these simple grains into a gourmet experience.


Pairing Ajvar with dairy products like cheese or yoghurt brings out its versatility. Swirl it into Greek yoghurt to create a creamy, tangy dip that pairs well with pita bread or crudités. Alternatively, spread it over soft cheeses like ricotta or goat cheese for an appetising starter that’s sure to impress.


For a more creative use, try adding a dollop of Ajvar to your morning eggs. Whether scrambled, fried, or poached, eggs benefit from the added depth of flavour that Ajvar provides. You can even mix it into your egg salad for a unique twist on a classic recipe.


Ajvar’s versatility doesn’t stop there. Use it as a pizza topping or mix it into your homemade burger patties for an unexpected kick. This Ajvar recipe with roasted red peppers & aubergine offers vibrant taste and rich texture, making it a fantastic addition to countless dishes, making every meal more exciting.

Storing and Preserving Ajvar

To maintain the vibrant taste of your homemade Ajvar, proper storage is essential. For short-term enjoyment, place your Ajvar in an airtight container and refrigerate it. This method keeps it fresh for up to a week, ensuring you can relish its flavours daily.


If you wish to enjoy your Ajvar for a longer period, canning is an excellent option. Start by sterilising jars to prevent any contamination. Fill each jar with hot Ajvar, leaving a bit of space at the top to allow for expansion. Seal the jars tightly and process them in a boiling water bath. Once properly canned, store the jars in a cool, dark place. This technique ensures that your Ajvar recipe with roasted red peppers & aubergine stays preserved for several months, ready to add a burst of flavour to your meals whenever you desire.


Whether you’re storing it short-term or canning it for later, these methods will help you keep your Ajvar fresh and delicious. Enjoy the convenience of having this versatile condiment on hand to elevate your dishes effortlessly.

Posted on

Carrot Hummus with Olive Oil and Paprika

If you’re looking to bring some variety to your usual snack options, Carrot Hummus with Olive Oil and Paprika is a fantastic choice. This tasty take on traditional hummus offers a unique flavour combination that is both sweet and earthy. Carrots contribute a natural sweetness that complements the rich, creamy texture of chickpeas.

This dish is incredibly flexible and can be enjoyed in a range of situations. Whether you’re planning a picnic, hosting a gathering, or simply after a nutritious snack, Carrot Hummus with Olive Oil and Paprika makes an excellent option. Its bright orange colour is visually striking, making it a great addition to any table.

Furthermore, the ingredients in this recipe offer plenty of health benefits. Carrots are a rich source of beta-carotene, which supports eye health, while chickpeas provide protein and fibre, making this hummus a satisfying and nourishing choice. Olive oil adds a touch of richness, and paprika contributes a gentle kick that balances the flavours wonderfully.

Making Carrot Hummus is simple and requires little effort, making it ideal for both experienced cooks and beginners. The method involves blending cooked carrots with chickpeas, tahini, lemon juice, garlic, and a selection of spices to create a smooth and tasty dip. A final drizzle of olive oil and sprinkle of paprika not only enhances the flavour but also adds to its presentation. For those keen on experimenting, incorporating olive oil and paprika can further elevate the humble carrot hummus.

Include this delightful Carrot Hummus in your snack repertoire and enjoy a refreshing twist on a classic favourite.

To create your own Carrot Hummus with Olive Oil and Paprika, follow the following:

Carrot Hummus with Olive Oil and Paprika Garnish

Print Recipe
Carrot hummus with olive oil and paprika garnish is a delightful twist on the classic chickpea-based dip, offering a vibrant blend of flavours and colours. This recipe combines the natural sweetness of roasted carrots with the earthy undertones of tahini, balanced perfectly with zesty lemon juice and a hint of garlic. Drizzled with high-quality olive oil and topped with a sprinkling of smoky paprika, this dish not only looks appealing but also provides a depth of taste that’s both hearty and satisfying. Perfect as a dip for warm pita, a spread for sandwiches, or a healthy addition to a mezze platter, it’s a simple yet impressive dish that’s sure to win over guests.
Course Appetizer, Side Dish, Snack, Starter
Cuisine Mediterranean
Diet Vegan, Vegetarian
Keyword Carrot hummus, Carrot hummus recipe, Carrot hummus with olive oil, Carrot hummus with paprika
Prep Time 10 minutes
Cook Time 25 minutes
Servings 4 People
Calories 52

Instructions

  • Preheat your oven to 200°C (180°C fan)/Gas Mark 6.
  • Spread the chopped carrots on a baking tray, drizzle with 1 tablespoon of olive oil, and season with salt and pepper. Roast in the oven for about 25 minutes or until the carrots are tender and slightly caramelised. Remove from the oven and allow them to cool for a few minutes.
  • In a food processor, combine the roasted carrots, chickpeas, tahini, lemon juice, garlic, ground cumin, smoked paprika, and 1 tablespoon of olive oil. Blend until smooth and creamy. If the mixture is too thick, add a small amount of water, a tablespoon at a time, until the desired consistency is achieved.
  • Taste the hummus and adjust seasoning with more salt, pepper, or lemon juice if needed.
  • Spoon the hummus into a serving bowl. Drizzle with extra olive oil and sprinkle a pinch of smoked paprika on top for garnish.
  • Serve with warm pitta bread, crudités, or crackers.

Nutrition

Calories: 52kcal | Carbohydrates: 4g | Protein: 2g | Fat: 4g | Saturated Fat: 1g | Polyunsaturated Fat: 2g | Monounsaturated Fat: 2g | Sodium: 3mg | Potassium: 72mg | Fiber: 1g | Sugar: 1g | Vitamin A: 11IU | Vitamin C: 15mg | Calcium: 18mg | Iron: 0.5mg

Serving Suggestion

Carrot Hummus is a versatile and tasty addition to many meals and snacks. Its distinctive flavour and vibrant colour make it a standout choice for a variety of serving options. One of the simplest and most popular ways to enjoy carrot hummus paired with olive oil and paprika is with fresh vegetable sticks such as cucumber, pepper, and celery. The crisp texture of the vegetables pairs beautifully with the creamy hummus.

Pitta bread is another excellent accompaniment. Warmed and cut into triangles, pitta bread provides a soft and chewy contrast that enhances the overall eating experience. Crackers, especially those with seeds or whole grains, are also a great option for dipping.

For a more filling meal, consider using Carrot Hummus as a spread in sandwiches or wraps. It adds a flavourful and nutritious layer that works well with a variety of fillings, from grilled chicken and roasted vegetables to fresh greens and sliced avocado. Try Carrot Hummus with Olive Oil and Paprika even as a base for an open-faced sandwich topped with ingredients like sliced tomatoes, cucumbers, and sprouts.

If you’re aiming to add a unique touch to your starters, use Carrot Hummus as a topping for crostini. Spread a generous layer on toasted baguette slices and finish with a sprinkle of herbs or a few roasted chickpeas for added texture and flavour.

Carrot Hummus also works wonderfully as a side dish. Serve it alongside grilled meats such as chicken, beef, or lamb for a nutritious and flavour-packed complement. It pairs particularly well with roasted vegetables, enhancing their natural sweetness and adding depth to the dish.

For a gathering or celebration, create a platter featuring Carrot Hummus. Surround it with an assortment of items such as olives, cherry tomatoes, cheese cubes, and a variety of bread and crackers. This not only provides an appealing spread but also ensures there’s something for everyone to enjoy.

Another creative way to incorporate Carrot Hummus is by using it as a salad dressing. Simply thin it out with a little water or extra lemon juice and drizzle it over mixed greens for a healthy and flavourful dressing.

Storing and Shelf Life

To keep your Carrot Hummus fresh, place it in an airtight container and store it in the fridge. It should stay fresh for around 4 to 5 days. For longer preservation, Carrot Hummus with the added olive oil and paprika can be frozen. Use a container suitable for the freezer, ensuring you leave some space at the top to allow for expansion. When stored correctly, it will remain good for up to a month. When you’re ready to enjoy the hummus again, move it from the freezer to the fridge to defrost. Once it has thawed, give it a thorough stir to restore its creamy texture before serving.

Posted on

Venison Goulash with Vegetables, Herbs & Spicy Sauce – A Hearty Highland Twist on a Hungarian Classic

Picture this: it’s a spring evening, the windows are slightly ajar letting in a cool breeze, and the house is filled with the irresistible aroma of a rich, spicy stew bubbling away on the hob. This Venison Goulash with Vegetables Herbs & Spicy Sauce sounds dreamy, right?

This is Venison Goulash, but not as you’ve known it. We’ve taken the bold, comforting flavours of the classic Eastern European dish and lightened it up with vibrant seasonal veg, tender lean venison, and a touch of springtime spice. It’s rustic, rich, and refreshingly simple – the perfect one-pot dish for feeding the family or impressing guests without the fuss.

The Origins of Goulash

Goulash dates back to the Hungarian plains, where shepherds (gulyás) would cook pots of meat stew over open fires. Paprika, Hungary’s signature spice, gave the dish its signature depth and warmth.

As it travelled across Europe, goulash took on different forms – some thicker and more stew-like, others thinner like soup. But the heart of it stayed the same: slow-cooked meat, comforting spices, and the kind of meal that brings people together.

In our version, British venison steps in for a lighter, leaner, more flavourful twist – perfect for the brighter days and lighter appetites of spring. This lighter goulash keeps all the traditional heartiness, but swaps in some vibrant, spring-friendly vegetables and a touch more freshness in the seasoning. Below is the step by step:

Venison Goulash with Vegetables, Herbs, and Spicy Sauce Recipe

Print Recipe
Indulge in the exquisite taste of Venison Goulash with Vegetables, Herbs, and Spicy Sauce. This gourmet delight combines tender, slow-cooked venison with a medley of seasonal vegetables and a rich blend of herbs, delivering a unique culinary experience. The dish is finished with a bold, spicy sauce that adds a tantalising kick to each mouthful. Perfect for special occasions, this goulash is an excellent choice for food connoisseurs who appreciate high-quality ingredients and sophisticated flavours. Whether hosting a dinner party or celebrating a significant event, our Venison Goulash promises to impress.
Course Main Course
Cuisine Hungarian
Diet Low Calorie
Keyword healthy goulash recipe with game meat, Venison Goulash recipe, venison recipes
Prep Time 20 minutes
Cook Time 2 hours
Servings 4 People

Instructions

Prepare the Meat

  • Heat 1 tablespoon of olive oil in a large, heavy-based pan over medium-high heat. Add the diced venison and cook in batches until browned on all sides. Remove the meat and set aside.

Sauté Vegetables

  • Reducethe heat to medium and add the remaining tablespoon of olive oil to the pan.Stir in the onions, garlic, red peppers, and carrots. Cook gently for 8-10minutes until the vegetables begin to soften.

Build the Flavours

  • Add the smoked paprika, sweet paprika, and ground cumin to the vegetables, stirring well to coat. Cook for an additional 1-2 minutes until aromatic.

Simmer the Goulash

  • Return the browned venison to the pan. Stir in the tomato purée, chopped tomatoes, beef stock, dried thyme, bay leaf, caraway seeds and red chilli (if using). Season with salt and black pepper. Bring the mixture to a gentle boil, then reduce the heat to low. Cover with a lid and let it simmer for 1.5 to 2 hours, stirring occasionally, until the meat is tender and the sauce has thickened.

Adjust the Seasoning

  • Taste the goulash and adjust the seasoning as needed with additional salt, black pepper, or a cayenne pepper if desired.

Serve and Garnish

  • Remove the bay leaf before serving. Spoon the venison goulash into bowls and sprinkle with fresh parsley. Serve hot with crusty bread, rice, or mashed potatoes.

Why Venison is the Perfect Spring Meat

Venison is one of those secret-weapon ingredients that home cooks are starting to rediscover – and for good reason. It’s lean, protein-rich, full of iron and B vitamins, and it has a beautifully subtle gamey flavour that’s not overpowering.

It’s also incredibly versatile: just as good in a robust winter stew as it is in a lighter spring goulash filled with fresh herbs and colourful veg.

Try this recipe with: Highland Game Venison Steaks from Nicol Retailer – responsibly sourced and perfectly portioned for home cooking.

Serving Suggestions

Venison Goulash is a versatile dish that pairs wonderfully with various sides. Consider serving it over a bed of fluffy mashed potatoes or buttery egg noodles to soak up the delicious sauce. A side of crusty bread is perfect for sopping up every last drop. For presentation, sprinkle freshly chopped parsley over the top to add a pop of colour. This simple garnish not only enhances the dish’s visual appeal but also provides a refreshing contrast to its rich flavours.


To elevate your meal further, consider adding a side of roasted root vegetables like carrots, parsnips, and potatoes. Their natural sweetness and caramelized edges complement the savoury goulash perfectly. For a lighter option, a crisp green salad with a tangy vinaigrette can balance out the richness of the dish, providing a refreshing palate cleanser between bites.


Another delightful pairing is a serving of creamy polenta or grits. Their smooth, velvety texture marries beautifully with the robust goulash, creating a comforting, indulgent combination. For those who enjoy a bit of tang, a dollop of sour cream or a sprinkle of crumbled feta cheese can add an exciting layer of flavour. Other pairing option include:

  • Herb-buttered new potatoes – Soft, waxy new potatoes are a springtime classic. Toss them with melted butter, chopped parsley and chives for a simple, satisfying side that soaks up the spicy, tomato-rich sauce like a dream. Add a pinch of sea salt and a squeeze of lemon for extra brightness ( optional)
  • Crusty sourdough with olive oil – No stew is complete without something to mop up the sauce. A thick slice of rustic sourdough, lightly toasted, is ideal. Or go for a seeded crusty loaf with a chewy crumb – perfect for catching every last drop of flavour. Gluten-free? Try a warmed GF roll brushed with olive oil and garlic.
  • Pearl barley or quinoa – For a wholesome, nutty contrast to the tender venison, serve your goulash over a bed of cooked pearl barley, quinoa, or wild rice. These grains soak up the sauce and add a lovely texture that complements the stew’s softness. Add fresh herbs or a handful of peas to your grains for colour and taste.
  • Spring greens or a simple salad – To lighten things up, a simple green salad adds freshness and crunch. Think peppery rocket, baby spinach, or lamb’s lettuce with sliced radishes, cucumber and a lemony vinaigrette. The acidity helps cut through the richness of the dish beautifully.
  • Braised Spring Greens or Asparagus – A warm veg side like braised spring cabbage, steamed green beans, or lightly grilled asparagus offers a fresh, seasonal contrast. Drizzle with olive oil and a sprinkle of sea salt – or top with toasted almonds for extra crunch. Try a dab of herb butter or a shaving of Parmesan for extra indulgence.

Optional Toppings & Garnishes

Add your own twist at the table with these flavour boosters:

  • A dollop of sour cream or crème fraîche
  • Chopped fresh parsley, chives, or dill
  • A few shavings of hard goat’s cheese or grated Pecorino
  • A sprinkle of paprika for colour and extra warmth