Soft, Steamy, and Full of Flavour — Discover the irresistible delight of Hoisin Mushroom Bao Buns, a Vegan Street Food Sensation by Nicol Retailer Limited

The Street-Food Classic That’s Stealing the Show
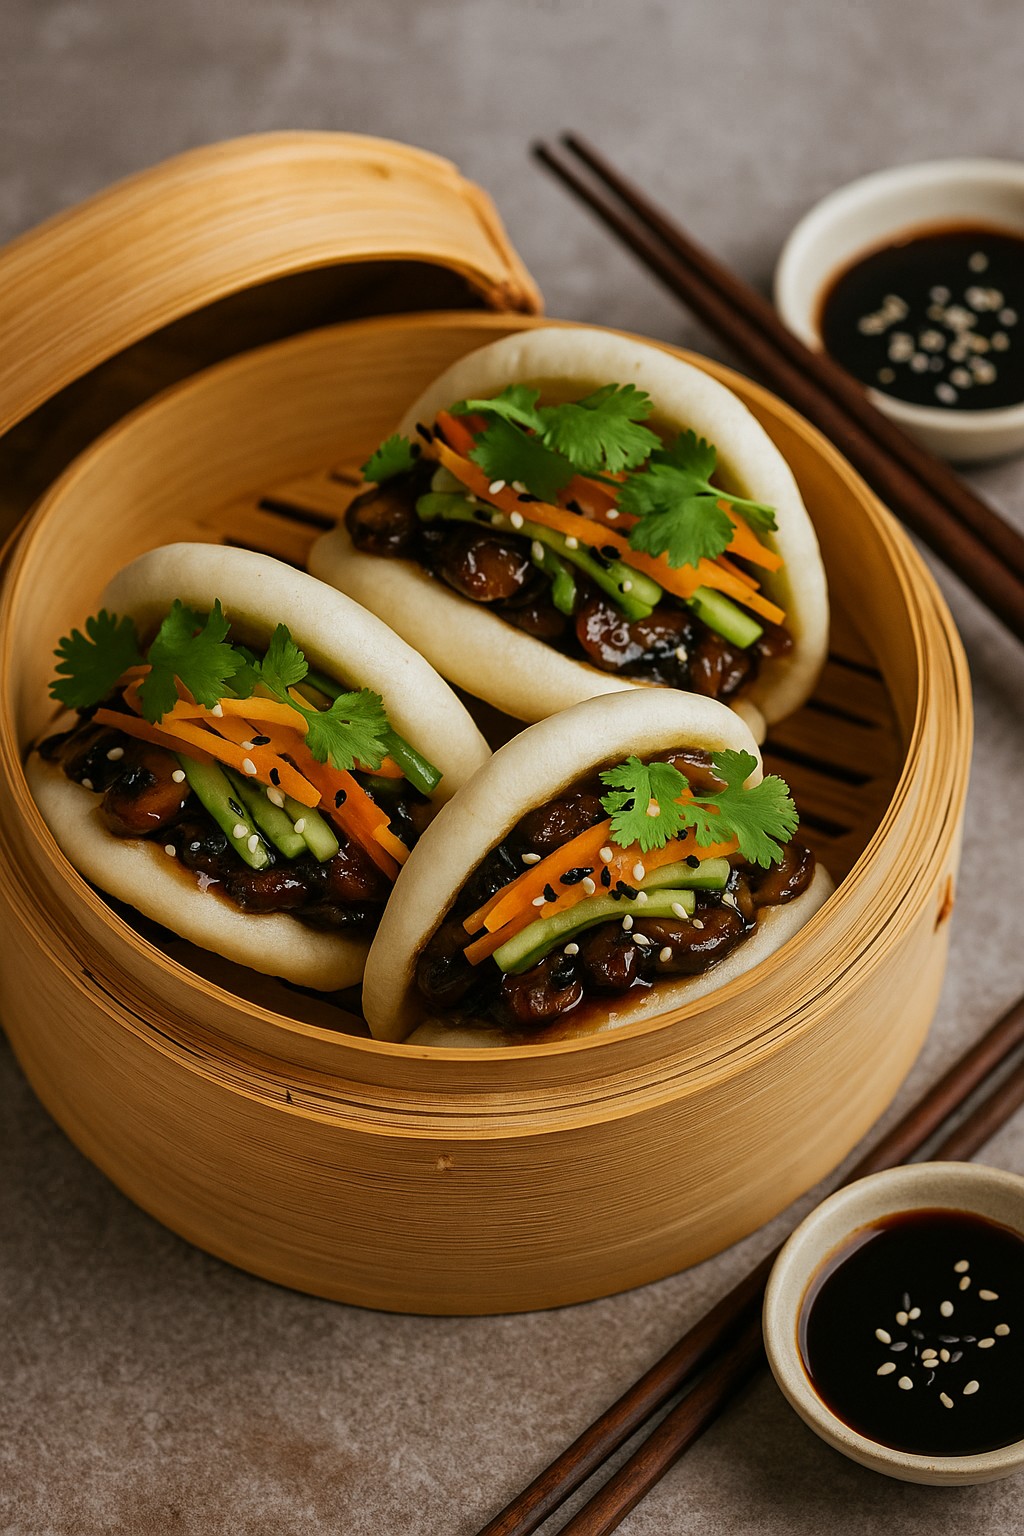
If there’s one dish guaranteed to make your taste buds dance, it’s this: Hoisin Mushroom & Pickled Veg Bao Buns — soft, fluffy clouds of perfection filled with sticky, savoury-sweet mushrooms. They also include crunchy pickled vegetables and fresh herbs.
These aren’t just any buns — they’re made with premium Bao Hirata Buns from Nicol Retailer Limited. This is the secret ingredient behind their irresistible texture.
Pillowy on the outside and perfectly chewy inside, they create the ultimate bite — one that’s sweet, tangy, and satisfyingly umami all at once.
Why Everyone Loves This Recipe
Whether you’re vegan, flexitarian, or just a foodie with good taste, this recipe ticks every box. It’s quick, healthy, and packed with bold Asian street-food flavours that feel indulgent but don’t weigh you down. Here’s what makes it a winner:
- 100% plant-based and dairy-free
- Made with authentic Hirata buns for that signature fluffiness
- 15-minute prep — perfect for midweek meals or party platters
- Customisable with tofu, jackfruit, or crispy tempeh
These bao buns aren’t just food — they’re an experience. Every bite feels like something straight out of a modern Asian restaurant, but easier and faster to make at home.
The Star Ingredient: Bao Hirata Buns
The hero of this dish is undoubtedly the Bao Hirata Bun (1 × 30 × 50 g) — soft, versatile, and restaurant-quality. At Nicol Retailer Limited, these buns are sourced for chefs and food lovers who appreciate true authenticity. Whether you’re filling them with mushrooms, or teriyaki tofu, they transform simple ingredients into unforgettable meals.
Shop them here: Bao Hirata Bun × 30 × 50 g – Nicol Retailer Limited
Recipe
There’s something truly irresistible about soft, fluffy bao buns filled with sticky, flavour-packed goodness. These Hoisin Mushroom & Pickled Veg Bao Buns are no exception. Each bite delivers the perfect balance of sweet and savoury. They feature glossy mushrooms, crisp pickled vegetables, and aromatic herbs wrapped in a warm, pillowy Bao Hirata Bun.
This recipe brings together everything you love about Asian street food — vibrant, fresh, and full of texture — but made simple for your home kitchen. Whether you’re planning a weekend lunch, a dinner party appetiser, or a vegan twist on comfort food, these bao buns are sure to impress.
Now, let’s make this mouth-watering restaurant-style dish come to life — step by step:

Hoisin Mushroom & Pickled Veg Bao Buns
Ingredients
- 8 Bao Hirata Buns
- 400g mixed mushrooms (shiitake, oyster, chestnut), sliced
- 2 tbsp vegetable oil
- 3 tbsp hoisin sauce
- 1 tbsp soy sauce
- 1 maple syrup or brown sugar
- 2 tsp rice vinegar
- 2 garlic cloves, minced
- 1 tsp grated fresh ginger
- small carrot, julienned
- small cucumber, julienned
- 1 tsp salt
- 1 tsp sugar
- 2 tbsp rice vinegar (for quick pickling)
- Fresh coriander leaves and toasted sesame seeds for garnish
Instructions
Quick-pickle the veg
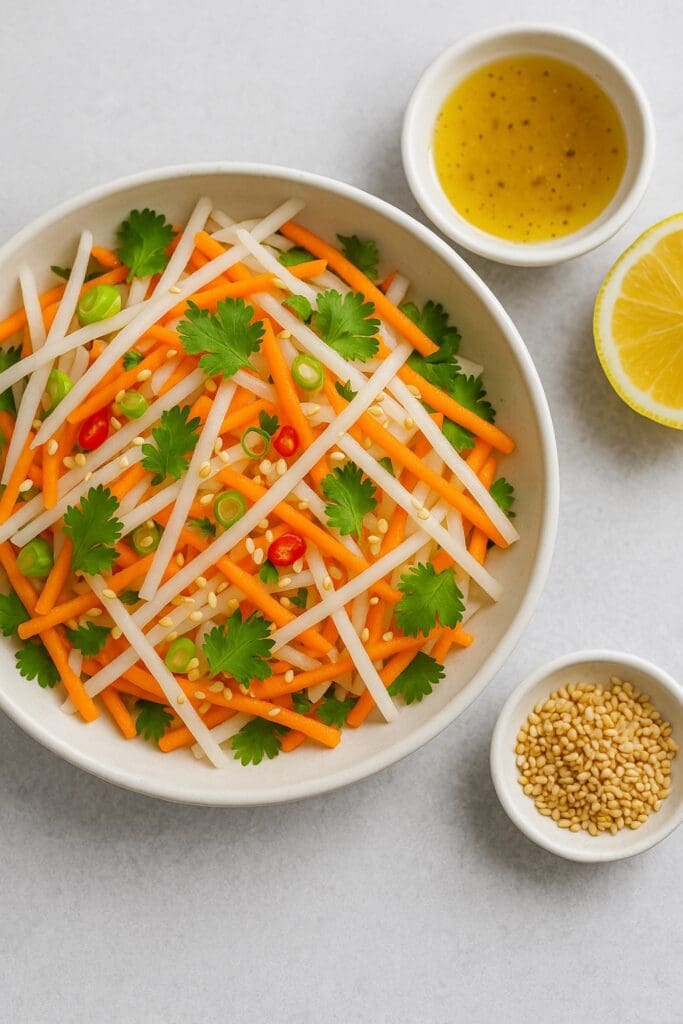
- In a bowl, combine carrot, cucumber, salt, sugar and 2 tbsp rice vinegar. Toss well and set aside for 15 minutes to soften and absorb flavour.
- Cook the mushrooms
- Heat vegetable oil in a large pan over medium-high heat. Add the sliced mushrooms and cook until they release their moisture and begin to brown (about 5–6 minutes).
- Add garlic, ginger, hoisin sauce, soy sauce, maple syrup and 1 tsp rice vinegar. Stir until the mushrooms are glossy and coated in a sticky, savoury-sweet glaze.
Steam the buns
- Steam the Bao Hirata Buns for 2–3 minutes until soft and fluffy (per pack instructions).
Assemble the bao
- Open each bun gently and fill with a spoonful of hoisin mushrooms, then top with pickled carrot and cucumber. Garnish with coriander and sesame seeds for a burst of freshness and crunch.
Serve immediately
- Serve warm with extra hoisin sauce or chilli oil on the side for dipping.
Notes
Use a mix of mushrooms such as shiitake, oyster, and chestnut for a deeper, meatier flavour. Don’t rush the cooking process — allow the mushrooms to caramelise slightly before adding the sauce for that glossy, sticky finish. Flavour Boost:
Add a dash of rice wine or mirin while cooking for extra depth, or drizzle a little sesame oil just before serving for a nutty aroma. Make Ahead:
The pickled vegetables can be prepared up to 2 days in advance — they taste even better once the flavours develop. Simply store in an airtight container in the fridge. Customise It:
These bao buns are endlessly versatile. Try swapping the mushrooms for tofu, tempeh, or even shredded jackfruit for a unique twist. Serving Suggestion:
Serve immediately after assembling while the buns are still warm and pillowy. Pair with a small bowl of dipping hoisin sauce or sriracha mayo for a restaurant-style touch. With every bite, you’ll enjoy the fusion of authentic Asian street-food flavours and plant-based goodness — all made effortless with Bao Hirata Buns from Nicol Retailer Limited.
Nutrition
Serving Suggestions & Pairings
These Hoisin Mushroom & Pickled Veg Bao Buns aren’t just a meal — they’re an experience. Each soft, pillowy bun is packed with flavour, freshness, and texture, making it the perfect centrepiece for any occasion. Whether you’re hosting friends, craving something light yet satisfying, or looking to recreate an authentic Asian street-food night at home, these bao buns will steal the spotlight.
Street-Food Feast at Home
Turn your kitchen into a bustling street market! Serve these bao buns alongside crispy vegetable spring rolls, edamame with sea salt, and steamed dumplings for the ultimate Asian street-food platter. Add a dipping trio — hoisin, sriracha mayo, and soy-ginger dressing — for flavour variety that keeps everyone coming back for more.
Light Lunch or Weekend Brunch
Pair your bao buns with a side of sesame cucumber salad or Asian-style slaw. For a weekend treat, serve them with bubble tea or homemade iced matcha lattes — refreshing, Instagram-worthy, and a total crowd-pleaser.
Date Night or Dinner Party
Planning a dinner that feels restaurant-worthy but effortless? Plate up your bao buns on a bamboo steamer or slate board, drizzle a little extra hoisin sauce on top, and sprinkle toasted sesame seeds.
Comfort Food Combo
For something heartier, serve your bao buns with sticky jasmine rice or miso soup on the side. The warm, savoury broth complements the sweet hoisin glaze beautifully, while the rice helps soak up all that irresistible sauce.
Dipping Sauces that Make It Unforgettable
Amp up the experience with easy homemade dips — creamy sriracha mayo, tangy soy-lime sauce, or a punchy peanut dressing. These sauces not only boost flavour but also make your bao buns perfect for sharing platters or party appetisers.
Pro Tip:
For a show-stopping presentation, serve the bao buns warm in bamboo baskets lined with parchment paper. Garnish with fresh coriander, red chilli slices, and a light drizzle of sesame oil. It’s a small detail that makes a big impact — both on taste and presentation.
No matter how you serve them, these Hoisin Mushroom Bao Buns promise to be the star of any table. They are simple to make, irresistibly delicious, and bursting with vibrant street-food flair
Create your own bao feast at home with authentic Bao Hirata Buns, available from Nicol Retailer Limited — delivering quality and taste across the UK.
Shop the Ingredients
Recreate this delicious street-food experience at home with authentic Bao Hirata Buns (2 × 30 × 50 g)
— available exclusively from Nicol Retailer Limited. Browse the full shop here for restaurant-quality products, sauces, and gourmet essentials delivered across the UK.
Final Thoughts
From the first bite, these Hoisin Mushroom Bao Buns prove that flavour and simplicity can coexist beautifully. They’re quick, healthy, and utterly addictive — the kind of dish that keeps people talking (and sharing). Make them once, and you’ll be hooked. Made possible with Bao Hirata Buns from Nicol Retailer Limited — where quality meets creativity.
🛒 Shop This Recipe
Bring this delicious Hoisin Mushroom & Pickled Veg Bao Bun recipe to life with authentic ingredients from Nicol Retailer Limited — your trusted UK source for restaurant-quality food and gourmet essentials.


Order online today and enjoy nationwide delivery from Nicol Retailer Limited — bringing restaurant-quality ingredients straight to your kitchen.