Posted on

Warm Morello Cherry Compote with Silky Vanilla Mascarpone Cream

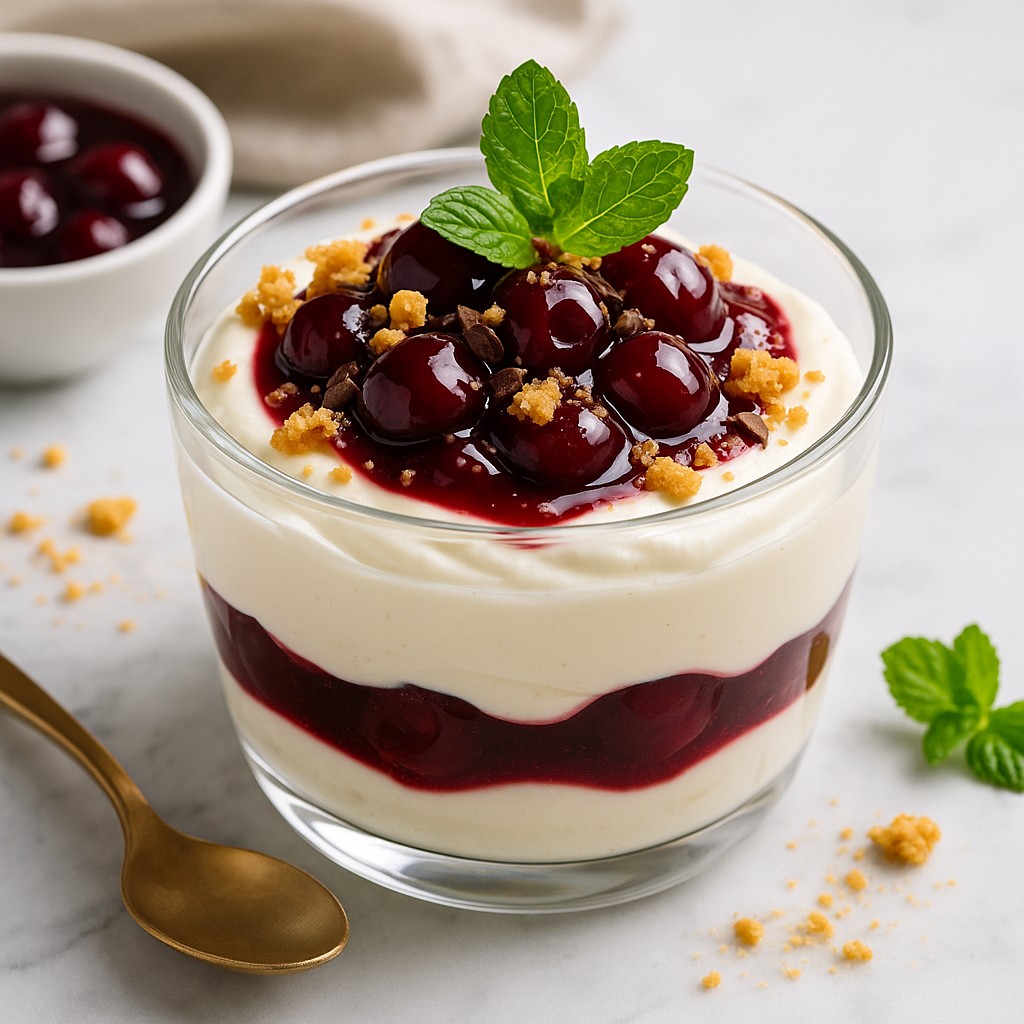
Warm Morello cherry compote served over vanilla mascarpone cream in a glass, garnished with mint and chocolate shavings. Image and recipe created by Nicol Retailer Limited.

A luxurious, no-bake dessert bursting with flavour — created by Nicol Retailer Limited.

Warm Morello cherry compote served over vanilla mascarpone cream in a glass, garnished with mint and chocolate shavings. Image and recipe created by Nicol Retailer Limited.

If you’re searching for a dessert that delivers instant indulgence with minimal effort, you’ve just found your new favourite. This Warm Morello Cherry Compote with Vanilla Mascarpone Cream is the perfect balance of tangy, rich and velvety-smooth. It’s a restaurant-quality treat made effortlessly at home.

Made using Darta Pitted Morello Cherries from Nicol Retailer Limited, this recipe celebrates the bold, natural flavour of real cherries. Each spoonful is a beautiful contrast of flavours: warm, glossy cherry compote melting into cool, creamy mascarpone with hints of vanilla. It’s elegant, comforting and guaranteed to impress.

Whether you’re hosting a dinner party, treating yourself to something special, or looking for a showstopping dessert that’s ready in minutes — this recipe delivers every time. No baking. No fuss. Just pure flavour.

How to Make This Delicious Dessert

Creating this luxurious Morello Cherry & Mascarpone dessert couldn’t be easier — and you don’t need any baking skills to achieve a restaurant-quality result. Using rich, tangy Darta Pitted Morello Cherries from Nicol Retailer Limited, this recipe comes together in just minutes. It blends warm cherry compote with silky vanilla mascarpone for the perfect balance of sweetness, creaminess, and vibrant flavour. Whether you’re preparing a quick treat, entertaining guests, or looking for a showstopping dessert with minimal effort, this step-by-step method will guide you to a stunning result every time:

Warm Morello cherry compote served over vanilla mascarpone cream in a glass, garnished with mint and chocolate shavings. Image and recipe created by Nicol Retailer Limited.

Warm Morello Cherry Compote Over Vanilla Mascarpone Cream

Print Recipe
This irresistible no-bake dessert combines the bold, tangy flavour of Darta Pitted Morello Cherries with the silky richness of vanilla mascarpone cream for a luxurious treat ready in minutes. Warm cherries simmer into a glossy compote that melts beautifully over cool, whipped mascarpone, creating the perfect balance of sweet, tart and creamy. Elegant enough for entertaining yet simple enough for everyday indulgence, this quick 17-minute recipe is ideal for dinner parties, romantic desserts or effortless weeknight treats. Made with high-quality Morello cherries from Nicol Retailer, it delivers authentic flavour, stunning presentation and guaranteed satisfaction in every spoonful.
Course Dessert, Dinner Party Dessert, No-Baked Desset
Cuisine British (with a modern twist), European, Italian
Diet Vegetarian
Keyword Cherry mascarpone recipe, Cherry vanilla mascarpone, Darta Pitted Morello Cherries, Dinner party desserts, Easy cherry dessert, Mascarpone dessert ideas, Morello cherry compote, Morello cherry dessert, Nicol Retailer recipes, No-bake cherry dessert, Warm cherry compote
Prep Time 10 minutes
Cook Time 7 minutes
Servings 4 People
Calories 390

Instructions

Make the Morello Cherry Compote

  • Add cherries, a splash of cherry juice, sugar, vanilla and lemon juice to a small saucepan.
  • Simmer gently for 5–7 minutes until warm, glossy and slightly thickened.
  • Set aside (keep warm)

Prepare the Vanilla Mascarpone Cream

  • In a bowl, whisk mascarpone, double cream, icing sugar and vanilla until soft and creamy.
  • Chill for 10 minutes for the perfect texture.

Assemble the Dessert

  • Spoon a generous layer of mascarpone cream into bowls or glasses.
  • Top with warm Morello cherry compote.
  • Finish with crushed biscuits, mint, or chocolate shavings.

Notes

For the best flavour, always use high-quality Morello cherries like the Darta Pitted Morello Cherries from Nicol Retailer. Their natural tartness balances perfectly with the rich mascarpone cream.
This recipe is no-bake and ready in under 15 minutes, making it ideal for quick desserts, entertaining, or when you need something impressive with minimal effort.
To lighten the dessert, you can use reduced-fat mascarpone or single cream, or replace part of the cream with Greek yogurt for extra freshness.
Make the mascarpone cream ahead and keep it chilled; warm the cherry compote just before serving for the perfect temperature contrast.
Add crunch by topping with crushed biscuits, granola, toasted nuts, or dark chocolate curls for added texture and flavour.
This recipe is naturally vegetarian and can be made gluten-free by using gluten-free biscuits or omitting them entirely.
Serve in glass dessert cups or bowls to show off the layers — it enhances presentation and looks stunning for dinner parties.
Leftover cherry compote can be used on pancakes, porridge, yoghurt bowls, waffles, cheesecakes or ice cream, making it a versatile addition to your kitchen.

Nutrition

Serving: 230g | Calories: 390kcal | Carbohydrates: 28g | Protein: 5g | Fat: 28g | Saturated Fat: 16g | Sodium: 45mg | Fiber: 1g | Sugar: 24g

Serving Suggestions

This Warm Morello Cherry Compote with Vanilla Mascarpone Cream is incredibly versatile. It is perfect for everything from elegant dinner parties to cosy family nights in. The rich, tangy flavour of the Morello cherries pairs beautifully with the cool, silky mascarpone, allowing you to create a dessert experience that feels indulgent, comforting, and effortlessly sophisticated.

Serve this dessert in glass tumblers, mini ramekins, cocktail glasses or dessert bowls to showcase the vibrant cherry colours and creamy layers. For added texture and flavour, sprinkle the top with crushed shortbread, biscotti crumbs, toasted almonds, granola clusters, or dark chocolate curls. These small touches elevate the presentation and create a restaurant-quality finish.

This morello cherry dessert also pairs wonderfully with:

  • Fresh mint leaves for a refreshing aroma and burst of colour
  • A drizzle of dark chocolate for a richer, more decadent twist
  • Toasted hazelnuts or pistachios for crunch and earthiness
  • A scoop of vanilla or cherry ice cream for extra indulgence
  • A dollop of whipped cream for added lightness
  • Crisp almond tuiles or wafers to add elegance

This dessert shines as a:

  • Showstopping dinner party finale
  • Easy make-ahead dessert
  • Romantic date-night treat
  • Festive Christmas or Valentine’s Day pudding
  • Summer evening sweet course

No matter the occasion, this recipe turns simple ingredients into something extraordinary — and every spoonful delivers a perfect balance of tart cherries and luscious vanilla cream.

Posted on

Burrata di Puglia with Roasted Tomatoes & Basil Oil

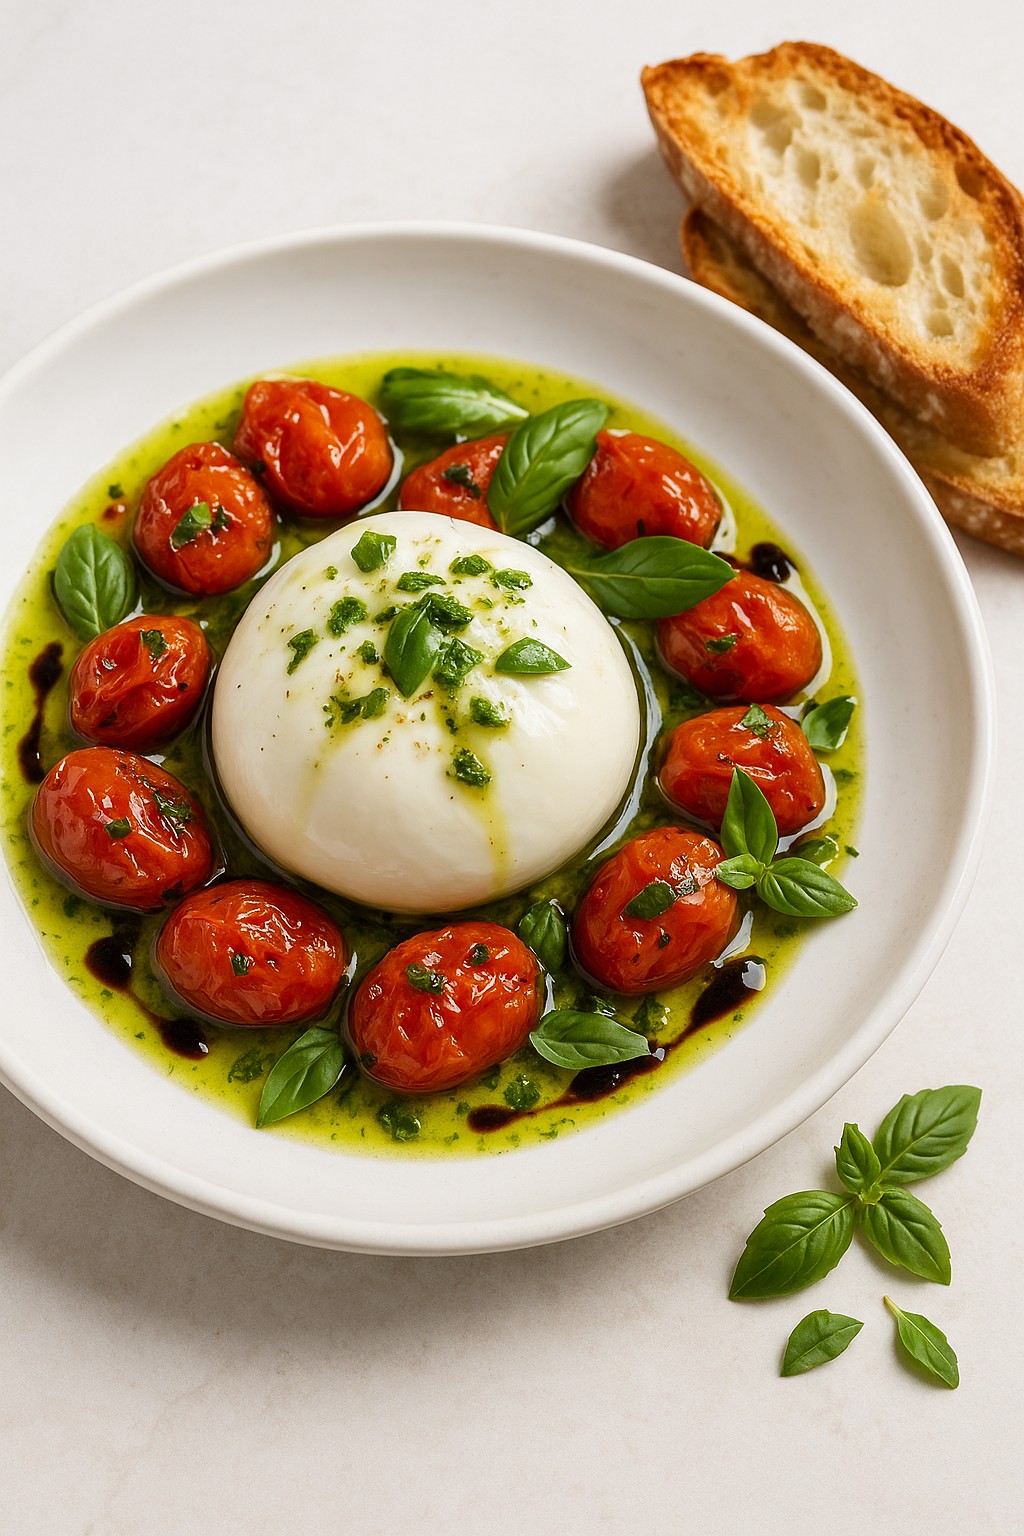
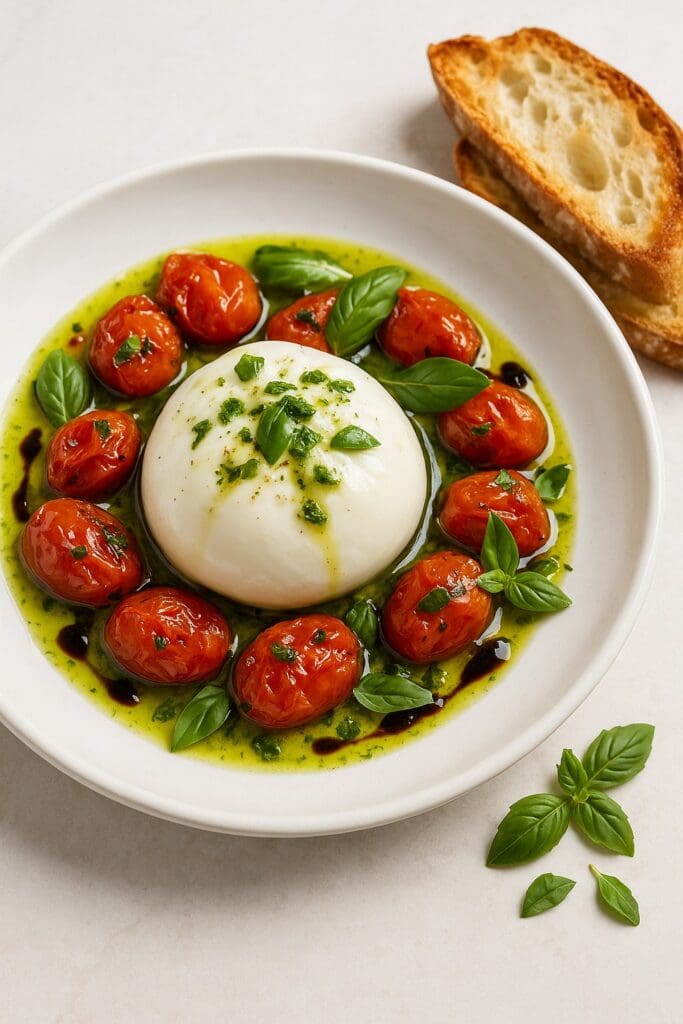
Creamy Burrata di Puglia served with roasted tomatoes, basil oil and balsamic glaze on a white plate, with toasted sourdough on the side; recipe and image created by Nicol Retailer Limited.

A Taste of Southern Italy, Crafted for Pure Indulgence

Creamy Burrata di Puglia served with roasted tomatoes, basil oil and balsamic glaze on a white plate, with toasted sourdough on the side; recipe and image created by Nicol Retailer Limited.

Few dishes capture the heart of Italian cuisine as effortlessly as Burrata di Puglia. Silky on the outside, rich and creamy on the inside, this luxurious cheese transforms even the simplest ingredients into something extraordinary. Our recipe — roasted cherry tomatoes, fresh basil oil and balsamic glaze — celebrates everything people love about this iconic Italian treasure.

Burrata comes from Puglia, a sun-soaked region in Southern Italy famous for its olives, tomatoes and artisanal cheeses. Created in the early 1900s by local cheesemakers, burrata was originally a clever way to use up leftover mozzarella curds known as stracciatella. These creamy ribbons were wrapped in a delicate mozzarella shell, creating the signature “burst of cream” we adore today.

Traditionally stored in fresh asphodel leaves to maintain its moisture, burrata was once a rare, regional delicacy. Over the years, its unique texture and indulgent flavour made it a global sensation. Today, it is loved by chefs, home cooks, and food lovers everywhere.

Burrata has become nothing short of a global food obsession — and for good reason. It combines everything people love about Italian cuisine: simplicity, indulgence, freshness and pure comfort. But its popularity goes much deeper than just flavour.

The Ultimate Creamy Indulgence

At the heart of burrata is stracciatella — soft ribbons of fresh curd mixed with cream. When you slice open the mozzarella shell and the creamy centre spills out, it creates a sensory moment that diners never forget. It feels luxurious, yet completely natural. This makes it stand out from every other cheese.

A Chef’s Secret for Instant Elegance

Restaurants around the world adore burrata because it adds a “wow factor” with almost no effort. Place it on a plate with seasonal vegetables, drizzle a little oil, and that’s it — you’ve created a dish that looks (and tastes) like fine dining. Home cooks quickly fell in love for the same reason. Burrata transforms simple meals into something extraordinary.

Taste of Authentic Italian Craftsmanship

Food lovers appreciate burrata because it represents true artisanal tradition. Handmade in Puglia using time-honoured cheesemaking techniques, burrata feels like a small piece of Italy on your plate. That cultural authenticity — combined with its luxurious texture — gives it huge global appeal.

Light, Fresh and Comforting

Unlike many cheeses, burrata is indulgent yet refreshing. The mixture of cream and curd creates a lightness that feels clean rather than heavy. It satisfies cravings without overpowering, making it ideal for modern, health-conscious eaters who still want to enjoy rich, flavourful food.

Discover the Magic of Burrata di Puglia – A Creamy Taste of Italy at Its Finest

If you’re searching for a recipe that combines effortless elegance with unforgettable flavour, this Burrata di Puglia with Roasted Tomatoes & Basil Oil is the perfect place to begin. Loved for its silky exterior and irresistibly creamy centre, burrata has become one of the world’s most celebrated cheeses — and for good reason. In this dish, the warmth of blistered cherry tomatoes meets the cool luxury of fresh burrata. This creates a restaurant-quality experience you can enjoy at home in minutes. Whether you’re planning a dinner party, elevating a family meal, or simply treating yourself, this recipe delivers pure indulgence with every bite. Made using authentic Burrata di Puglia from Nicol Retailer Limited, it’s the perfect way to bring the flavours of Southern Italy straight to your table.

Here is how to make this delicious recipe…

Creamy Burrata di Puglia served with roasted tomatoes, basil oil and balsamic glaze on a white plate, with toasted sourdough on the side; recipe and image created by Nicol Retailer Limited.

Burrata di Puglia with Roasted Tomato & Basil Oil

Print Recipe
A beautifully simple yet luxurious Italian dish, this Burrata di Puglia with roasted tomatoes and basil oil delivers creamy indulgence, vibrant flavour and restaurant-quality elegance in every bite — the perfect way to elevate any meal effortlessly.
Course Antipasti, lunch, Sharing Plate, Side Dish, Starter
Cuisine Italian
Diet Vegetarian
Keyword Authentic Italian cheese recipe, Best burrata to buy UK, Burrata di Puglia recipe, Burrata with roasted tomatoes, Creamy burrata dish, Easy Italian appetiser, Fresh burrata recipe UK, Italian burrata starter, Mediterranean recipe ideas, Nicol Retailer burrata, Vegetarian Italian recipes
Prep Time 10 minutes
Cook Time 15 minutes
Servings 4 People
Calories 500

Instructions

Roast the Tomatoes

  • Preheat oven to 200°C.
  • Place cherry tomatoes on a baking tray.
  • Drizzle with olive oil, crushed garlic, salt and pepper.
  • Roast for 12–15 minutes, until soft, blistered and aromatic.

Make the Basil Oil

  • Finely chop a generous handful of basil.
  • Mix with 2 tbsp olive oil and a small pinch of salt.
  • Set aside for flavours to infuse.

Plate the Burrata

  • Use a large serving platter or divide across four plates.
  • Place one burrata ball on each half of the platter.
  • Arrange the warm roasted tomatoes evenly around the burrata.

Drizzle & Garnish

  • Pour the basil oil over the burrata.
  • Add a swirl of balsamic glaze.
  • Tear fresh basil leaves over the top.

Serve Immediately

  • Enjoy with toasted sourdough or ciabatta for dipping.

Notes

For the best flavour and texture, use authentic Burrata di Puglia, as its rich, creamy centre pairs perfectly with warm roasted tomatoes and fresh basil. Serve immediately after plating to enjoy the full silkiness of the burrata. This recipe works beautifully as a starter, light lunch or sharing dish, and can be made gluten-free by serving with GF bread. Fresh, high-quality ingredients make all the difference — especially real Italian burrata, available to buy at Nicol Retailer.

Nutrition

Serving: 300g | Calories: 500kcal | Carbohydrates: 12.5g | Protein: 17g | Fat: 43g | Saturated Fat: 20g | Polyunsaturated Fat: 1g | Monounsaturated Fat: 19g | Cholesterol: 60mg | Sodium: 250mg | Fiber: 2g | Sugar: 10.5g

Serving Suggestion

To enjoy this dish at its absolute best, serve your Burrata di Puglia with Roasted Tomatoes & Basil Oil the moment it’s plated — timing is everything. The gentle warmth of the roasted tomatoes softens the burrata just enough. This creates that ultra-creamy centre everyone falls in love with.

Place the burrata proudly in the centre of the plate and let the tomatoes pool around it, allowing the basil oil and balsamic glaze to mingle into a glossy, flavour-packed sauce. Serve with thick slices of toasted sourdough, ciabatta or focaccia, perfect for scooping up every silky, indulgent mouthful.

For a more complete Mediterranean experience, pair the dish with:

  • A crisp rocket salad with lemon and olive oil
  • Grilled courgettes, aubergines or asparagus
  • Thinly sliced prosciutto or speck

This recipe also shines as a show-stopping starter for dinner parties, an elegant shared antipasti dish, or a fresh summer lunch when you want something light yet luxurious. Add a sprinkle of flaky sea salt, a crack of black pepper and a final swirl of extra virgin olive oil just before serving. This adds a gourmet finish.

Whether enjoyed as a centrepiece or part of a larger spread, this burrata dish brings the pure flavours of Italy straight to your table — simple, fresh and undeniably beautiful.

Shop the Fresh Ingredients for This Recipe at Nicol Retailer

Creating this luxurious Italian dish is easy when you start with the finest ingredients — and every key element you need is available to buy at Nicol Retailer. From authentic Burrata di Puglia to vibrant Mediterranean vegetables and premium pantry essentials, we make it simple to cook restaurant-quality meals at home.

Posted on

Bao Bliss: Hoisin Mushroom & Pickled Veg Bao Buns You’ll Crave Again and Again

Soft Bao Hirata Buns filled with sticky hoisin mushrooms, pickled vegetables, and herbs — a vegan street food recipe by Nicol Retailer Limited.

Soft, Steamy, and Full of Flavour — Discover the irresistible delight of Hoisin Mushroom Bao Buns, a Vegan Street Food Sensation by Nicol Retailer Limited

Soft Bao Hirata Buns filled with sticky hoisin mushrooms, pickled vegetables, and herbs — a vegan street food recipe by Nicol Retailer Limited.

The Street-Food Classic That’s Stealing the Show

If there’s one dish guaranteed to make your taste buds dance, it’s this: Hoisin Mushroom & Pickled Veg Bao Buns — soft, fluffy clouds of perfection filled with sticky, savoury-sweet mushrooms. They also include crunchy pickled vegetables and fresh herbs.

These aren’t just any buns — they’re made with premium Bao Hirata Buns from Nicol Retailer Limited. This is the secret ingredient behind their irresistible texture.

Pillowy on the outside and perfectly chewy inside, they create the ultimate bite — one that’s sweet, tangy, and satisfyingly umami all at once.

Why Everyone Loves This Recipe

Whether you’re vegan, flexitarian, or just a foodie with good taste, this recipe ticks every box. It’s quick, healthy, and packed with bold Asian street-food flavours that feel indulgent but don’t weigh you down. Here’s what makes it a winner:

  • 100% plant-based and dairy-free
  • Made with authentic Hirata buns for that signature fluffiness
  • 15-minute prep — perfect for midweek meals or party platters
  • Customisable with tofu, jackfruit, or crispy tempeh

These bao buns aren’t just food — they’re an experience. Every bite feels like something straight out of a modern Asian restaurant, but easier and faster to make at home.

The Star Ingredient: Bao Hirata Buns

The hero of this dish is undoubtedly the Bao Hirata Bun (1 × 30 × 50 g) — soft, versatile, and restaurant-quality. At Nicol Retailer Limited, these buns are sourced for chefs and food lovers who appreciate true authenticity. Whether you’re filling them with mushrooms, or teriyaki tofu, they transform simple ingredients into unforgettable meals.

Shop them here: Bao Hirata Bun × 30 × 50 g – Nicol Retailer Limited

Recipe

There’s something truly irresistible about soft, fluffy bao buns filled with sticky, flavour-packed goodness. These Hoisin Mushroom & Pickled Veg Bao Buns are no exception. Each bite delivers the perfect balance of sweet and savoury. They feature glossy mushrooms, crisp pickled vegetables, and aromatic herbs wrapped in a warm, pillowy Bao Hirata Bun.

This recipe brings together everything you love about Asian street food — vibrant, fresh, and full of texture — but made simple for your home kitchen. Whether you’re planning a weekend lunch, a dinner party appetiser, or a vegan twist on comfort food, these bao buns are sure to impress.

Now, let’s make this mouth-watering restaurant-style dish come to life — step by step:

Soft Bao Hirata Buns filled with sticky hoisin mushrooms, pickled vegetables, and herbs — a vegan street food recipe by Nicol Retailer Limited.

Hoisin Mushroom & Pickled Veg Bao Buns

Print Recipe
Indulge in these soft, pillowy Bao Hirata Buns filled with sticky hoisin-glazed mushrooms, crisp pickled vegetables, and fresh herbs. A vegan-friendly, Asian street food classic — bursting with sweet, savoury, and tangy flavours. Made with premium Bao Hirata Buns from Nicol Retailer Limited for a restaurant-quality experience at home.
Course Appetizer, Main Course, Starter, Street Food
Cuisine Asian-inspired, Chinese, Japanese, Vegan, Vegetarian
Diet Vegan, Vegetarian
Keyword Asian street food UK, bao hirata bun recipe, hoisin mushroom bao, Nicol Retailer Limited, vegan bao buns
Prep Time 20 minutes
Cook Time 10 minutes
Servings 4 People
Calories 385

Instructions

Quick-pickle the veg

  • In a bowl, combine carrot, cucumber, salt, sugar and 2 tbsp rice vinegar. Toss well and set aside for 15 minutes to soften and absorb flavour.
  • Cook the mushrooms
  • Heat vegetable oil in a large pan over medium-high heat. Add the sliced mushrooms and cook until they release their moisture and begin to brown (about 5–6 minutes).
  • Add garlic, ginger, hoisin sauce, soy sauce, maple syrup and 1 tsp rice vinegar. Stir until the mushrooms are glossy and coated in a sticky, savoury-sweet glaze.

Steam the buns

  • Steam the Bao Hirata Buns for 2–3 minutes until soft and fluffy (per pack instructions).

Assemble the bao

  • Open each bun gently and fill with a spoonful of hoisin mushrooms, then top with pickled carrot and cucumber. Garnish with coriander and sesame seeds for a burst of freshness and crunch.

Serve immediately

  • Serve warm with extra hoisin sauce or chilli oil on the side for dipping.

Notes

These Hoisin Mushroom & Pickled Veg Bao Buns are a celebration of texture and flavour — a perfect balance of sweet, savoury, and tangy wrapped in the softest Bao Hirata Buns from Nicol Retailer Limited.
Chef’s Tip:
Use a mix of mushrooms such as shiitake, oyster, and chestnut for a deeper, meatier flavour. Don’t rush the cooking process — allow the mushrooms to caramelise slightly before adding the sauce for that glossy, sticky finish.
Flavour Boost:
Add a dash of rice wine or mirin while cooking for extra depth, or drizzle a little sesame oil just before serving for a nutty aroma.
Make Ahead:
The pickled vegetables can be prepared up to 2 days in advance — they taste even better once the flavours develop. Simply store in an airtight container in the fridge.
Customise It:
These bao buns are endlessly versatile. Try swapping the mushrooms for tofu, tempeh, or even shredded jackfruit for a unique twist.
Serving Suggestion:
Serve immediately after assembling while the buns are still warm and pillowy. Pair with a small bowl of dipping hoisin sauce or sriracha mayo for a restaurant-style touch.
With every bite, you’ll enjoy the fusion of authentic Asian street-food flavours and plant-based goodness — all made effortless with Bao Hirata Buns from Nicol Retailer Limited.

Nutrition

Serving: 320g | Calories: 385kcal | Carbohydrates: 59g | Protein: 9g | Fat: 11g | Saturated Fat: 1.5g | Sodium: 720mg | Fiber: 4g | Sugar: 13g | Calcium: 40mg | Iron: 2.1mg

Serving Suggestions & Pairings

These Hoisin Mushroom & Pickled Veg Bao Buns aren’t just a meal — they’re an experience. Each soft, pillowy bun is packed with flavour, freshness, and texture, making it the perfect centrepiece for any occasion. Whether you’re hosting friends, craving something light yet satisfying, or looking to recreate an authentic Asian street-food night at home, these bao buns will steal the spotlight.

Street-Food Feast at Home

Turn your kitchen into a bustling street market! Serve these bao buns alongside crispy vegetable spring rolls, edamame with sea salt, and steamed dumplings for the ultimate Asian street-food platter. Add a dipping trio — hoisin, sriracha mayo, and soy-ginger dressing — for flavour variety that keeps everyone coming back for more.

Light Lunch or Weekend Brunch

Pair your bao buns with a side of sesame cucumber salad or Asian-style slaw. For a weekend treat, serve them with bubble tea or homemade iced matcha lattes — refreshing, Instagram-worthy, and a total crowd-pleaser.

Date Night or Dinner Party

Planning a dinner that feels restaurant-worthy but effortless? Plate up your bao buns on a bamboo steamer or slate board, drizzle a little extra hoisin sauce on top, and sprinkle toasted sesame seeds.

Comfort Food Combo

For something heartier, serve your bao buns with sticky jasmine rice or miso soup on the side. The warm, savoury broth complements the sweet hoisin glaze beautifully, while the rice helps soak up all that irresistible sauce.

Dipping Sauces that Make It Unforgettable

Amp up the experience with easy homemade dips — creamy sriracha mayo, tangy soy-lime sauce, or a punchy peanut dressing. These sauces not only boost flavour but also make your bao buns perfect for sharing platters or party appetisers.

Pro Tip:

For a show-stopping presentation, serve the bao buns warm in bamboo baskets lined with parchment paper. Garnish with fresh coriander, red chilli slices, and a light drizzle of sesame oil. It’s a small detail that makes a big impact — both on taste and presentation.

No matter how you serve them, these Hoisin Mushroom Bao Buns promise to be the star of any table. They are simple to make, irresistibly delicious, and bursting with vibrant street-food flair

Create your own bao feast at home with authentic Bao Hirata Buns, available from Nicol Retailer Limited — delivering quality and taste across the UK.

Shop the Ingredients

Recreate this delicious street-food experience at home with authentic Bao Hirata Buns (2 × 30 × 50 g)
— available exclusively from Nicol Retailer Limited. Browse the full shop here for restaurant-quality products, sauces, and gourmet essentials delivered across the UK.

Final Thoughts

From the first bite, these Hoisin Mushroom Bao Buns prove that flavour and simplicity can coexist beautifully. They’re quick, healthy, and utterly addictive — the kind of dish that keeps people talking (and sharing). Make them once, and you’ll be hooked. Made possible with Bao Hirata Buns from Nicol Retailer Limited — where quality meets creativity.

🛒 Shop This Recipe

Bring this delicious Hoisin Mushroom & Pickled Veg Bao Bun recipe to life with authentic ingredients from Nicol Retailer Limited — your trusted UK source for restaurant-quality food and gourmet essentials.

Bao Hirata Buns

Bao Hirata Buns

Soft, fluffy, and perfectly authentic

🛍️ Shop Now
Hoisin Sauce

Hoisin Sauce

Sweet, savoury & rich flavour base

🛒 Find in Store
Fresh Herbs

Fresh Herbs

Add vibrant colour and freshness

🌿 Shop Ingredients

Order online today and enjoy nationwide delivery from Nicol Retailer Limited — bringing restaurant-quality ingredients straight to your kitchen.

Posted on

Crispy Garlic-Chilli Satonoyuki Tofu with Sticky Soy Glaze

Crispy garlic-chilli Satonoyuki Firm Silken Tofu glazed in sticky soy sauce, topped with sesame seeds and spring onions, served over jasmine rice in a rustic bowl. Vegan recipe created by Nicol Retailer Limited.

A golden, flavour-packed vegan recipe for Crispy Garlic-Chilli Satonoyuki Tofu by Nicol Retailer Limited

Crispy garlic-chilli Satonoyuki Firm Silken Tofu glazed in sticky soy sauce, topped with sesame seeds and spring onions, served over jasmine rice in a rustic bowl. Vegan recipe created by Nicol Retailer Limited.

If you think tofu is bland, prepare to have your mind changed forever. This Crispy Garlic-Chilli Satonoyuki Tofu with Sticky Soy Glaze is bold, aromatic, and packed with that irresistible sweet–spicy kick we all crave.

Using the delicate yet firm texture of Satonoyuki Firm Silken Tofu — available to buy from Nicol Retailer Limited — this recipe delivers the perfect balance of crisp edges, soft interiors, and a glossy, sticky glaze that clings beautifully to every bite.

It’s quick enough for a weekday dinner, delicious enough for a dinner party, and completely plant-based. Whether you’re vegan, vegetarian, or just love a flavour explosion, this dish will become a new favourite in your kitchen.

About Satonoyuki Firm Silken Tofu

Satonoyuki is Japan’s leading tofu brand, loved for its delicate flavour, silky texture, and reliability in both Asian and Western cooking.

Unlike traditional tofu, Satonoyuki Firm Silken Tofu keeps its shape beautifully — meaning you can fry, grill, or bake it without crumbling. It absorbs sauces and marinades effortlessly, making it the perfect canvas for this sticky soy glaze.

Available in convenient 300 g packs, it’s ideal for both home cooks and restaurants. You can order Satonoyuki Firm Silken Tofu (12 × 300 g) directly from Nicol Retailer Limited — your trusted supplier of authentic British and international ingredients, delivered across the UK.

Recipe

Get ready to fall in love with tofu all over again! This Crispy Garlic-Chilli Satonoyuki Tofu with Sticky Soy Glaze is a flavour-packed masterpiece that transforms everyday ingredients into something truly extraordinary. Made using premium Satonoyuki Firm Silken Tofu — available from Nicol Retailer Limited — this recipe delivers the ultimate balance of crunchy, golden texture on the outside and silky softness within.

Infused with the bold flavours of garlic, ginger, soy, and chilli, this vegan-friendly dish is as comforting as it is impressive. Whether you’re cooking for family, entertaining friends, or simply craving something special, this recipe guarantees to satisfy every bite.

Scroll down for the full recipe, step-by-step instructions, and serving tips to make this irresistible tofu dish at home.

Crispy garlic-chilli Satonoyuki Firm Silken Tofu glazed in sticky soy sauce, topped with sesame seeds and spring onions, served over jasmine rice in a rustic bowl. Vegan recipe created by Nicol Retailer Limited.

Crispy Garlic-Chilli Satonoyuki Tofu with Sticky Soy Glaze

Print Recipe
Crispy Garlic-Chilli Satonoyuki Tofu with Sticky Soy Glaze — a flavour-packed vegan dish made with Satonoyuki Firm Silken Tofu, pan-fried until golden and coated in a sweet-spicy soy glaze. Each bite delivers a perfect balance of crisp texture, silky interior, and bold umami flavour. Finished with sesame seeds, spring onions, and a squeeze of lime, this tofu bowl is delicious served over jasmine rice or noodles. Ideal for a quick weeknight dinner or an impressive plant-based meal.
Made using premium Satonoyuki Firm Silken Tofu (available from Nicol Retailer Limited) — firm enough to hold its shape yet smooth enough to melt in your mouth.
Course Dinner, lunch, Main Course
Cuisine Asian-inspired
Diet Low Calorie, Vegan, Vegetarian
Keyword crispy silken tofu, Nicol Retailer Limited, Satonoyuki tofu recipe, Sticky soy tofu, Vegan tofu dinner
Prep Time 15 minutes
Cook Time 25 minutes
Servings 4
Calories 285

Instructions

Prep the Tofu

  • Carefully drain and press your Satonoyuki tofu to remove excess moisture (about 10 min). Cut into 1-inch cubes, then toss lightly in cornflour, salt, and pepper for a delicate crisp coating.

Fry Until Golden

  • In a non-stick pan, heat oil over medium heat. Fry tofu cubes on all sides until crisp and golden — around 6–8 minutes. Remove and drain on kitchen paper.

Make the Glaze

  • In the same pan, reduce heat to low and add garlic and ginger. Sauté until fragrant (30 sec). Stir in soy sauce, rice vinegar, maple syrup, sriracha, and sesame oil. Simmer gently until thickened and glossy — about 2–3 minutes.

Glaze & Toss

  • Return the crispy tofu to the pan and toss to coat evenly in the sticky glaze. The tofu will soak up the flavour beautifully while staying crisp outside and tender inside.

Serve & Garnish

  • Spoon over jasmine rice or noodles, sprinkle with sesame seeds and spring onions, and finish with a squeeze of lime juice.

Notes

Satonoyuki Firm Silken Tofu is the perfect base for this recipe — firm enough to hold its shape while delivering that soft, melt-in-the-mouth interior. Its versatility makes it ideal for frying, baking, or glazing.
For extra crispiness, press the tofu for 10 minutes before cooking and toss it in cornflour. This creates that irresistible golden crust.
The sticky soy glaze balances savoury umami with a touch of heat and sweetness — perfect over jasmine rice or noodles. Double the sauce for meal-prep bowls or stir-fry dishes.
Swap soy sauce for tamari to make this dish 100% gluten-free.
This tofu pairs beautifully with roasted vegetables, edamame, or steamed bok choy for a colourful, nutrient-rich plate.
Great for vegan, vegetarian, and dairy-free diets, this recipe is high in plant protein and packed with bold flavour.
Serve hot with lime wedges and sesame seeds for a restaurant-style finish.
Created using Satonoyuki Firm Silken Tofu (available from Nicol Retailer Limited) — your go-to UK supplier for premium Asian and vegan ingredients.

Nutrition

Serving: 250g | Calories: 285kcal | Carbohydrates: 22g | Protein: 18g | Fat: 12g | Saturated Fat: 1.5g | Sodium: 620mg | Fiber: 3g | Sugar: 7g | Calcium: 120mg | Iron: 3mg

Serving Suggestions & Pairings

This Crispy Garlic-Chilli Satonoyuki Tofu is one of those rare dishes that’s as versatile as it is delicious. Whether you want to keep it light or turn it into a hearty main course, this tofu works beautifully with a variety of sides, textures, and flavours. Here are some irresistible ways to serve and pair it:

Classic Rice Bowl

Serve your crispy tofu over a generous bed of steamed jasmine or sticky rice to soak up every drop of the sticky soy glaze. Add a side of stir-fried vegetables — like broccoli, bok choy, or sugar snap peas — for balance and colour.
This simple bowl highlights the savoury umami glaze while keeping the meal wholesome and satisfying.

Noodle Heaven

For a slurp-worthy twist, toss your glazed tofu into rice noodles, udon, or soba. Drizzle over a little extra sauce and top with chopped peanuts, coriander, and lime juice for a Southeast Asian-inspired vibe. Perfect for those who love a heartier, restaurant-style vegan noodle bowl.

Buddha Bowl Bliss

Turn this dish into a vibrant, nutrient-packed Buddha bowl by layering crispy tofu with quinoa, roasted sweet potatoes, fresh avocado, cucumber ribbons, and pickled red cabbage. Finish with a sprinkle of sesame seeds and a spoonful of leftover glaze as dressing. Ideal for meal prep or a balanced, colourful plant-based lunch.

Wrap It Up

Take your tofu on the go by wrapping it in a warm tortilla or rice paper roll. Add shredded carrots, lettuce, and a drizzle of spicy mayo or vegan hoisin for a delicious fusion snack. A fun, family-friendly twist that’s easy to pack for lunch or picnics.

Japanese-Inspired Dinner Set

Create an elegant dinner experience by pairing your tofu with miso soup, steamed edamame, and pickled ginger. Add a side of sushi rice and finish with a cup of green tea for a balanced, authentic Japanese meal. A simple yet sophisticated way to showcase Satonoyuki’s authentic Japanese origins.

Fresh & Light Option

If you’re after something refreshing, serve your crispy tofu on top of a crunchy Asian slaw made from shredded cabbage, carrots, and spring onions. Toss the slaw in a light sesame dressing and enjoy the perfect mix of hot, cold, crunchy, and soft textures. A refreshing option for summer days or lighter lunches.

Family-Style Feast

Double the recipe and serve it as a centrepiece alongside other dishes like fried rice, vegetable tempura, or vegan dumplings. The glossy, sticky tofu makes a stunning main dish that looks (and tastes) like something straight from your favourite restaurant.

Why It Works Year-Round

This tofu dish isn’t just for one season — it’s a recipe that fits any occasion. In winter, serve it warm with rice or noodles for cosy comfort. In summer, enjoy it chilled in a salad or as a protein-packed picnic wrap. For entertaining, it’s impressive, vibrant, and easy to prepare in advance.

Tip:

All the ingredients, including the Satonoyuki Firm Silken Tofu (12×300g), are available to buy from Nicol Retailer Limited — your trusted source for premium British and Asian ingredients with nationwide UK delivery.

This Crispy Garlic-Chilli Satonoyuki Tofu is proof that plant-based food can be indulgent, flavourful, and satisfying. It’s a recipe that celebrates texture and taste — golden on the outside, soft within, and glazed to perfection.

Proudly created by Nicol Retailer Limited, this dish brings authentic Japanese tofu to your UK kitchen. Every bite is bold, aromatic, and deeply comforting — the kind of meal that keeps everyone coming back for seconds.

Posted on

Festive Nut Roast Loaf with Cranberries & Chestnuts – A Vegan Christmas Showstopper

Delicious festive nut roast loaf topped with glossy cranberry sauce and garnished with thyme, served with roast potatoes, carrots, and gravy — a vegan Christmas dinner by Nicol Retailer Limited.

There’s something magical about Christmas dinner — the smell of rosemary and thyme filling the kitchen, the sparkle of fairy lights, and the comfort of a hearty roast at the centre of the table.
If you’re planning a vegan or vegetarian Christmas dinner, this Festive Nut Roast Loaf with Cranberries & Chestnuts deserves pride of place.

Rich, hearty, and beautifully glazed with cranberry sauce, this nut roast is a far cry from the dry, dull versions of the past. It’s moist, full of texture, and bursting with savoury-sweet flavour from chestnuts, mushrooms, and herbs.

The Secret to a Perfect Nut Roast

A truly great nut roast is all about balance — nutty crunch, tender vegetables, and a touch of festive sweetness. In this recipe, roasted nuts and chestnuts bring depth, mushrooms and lentils add savoury body, and cranberries provide that Christmassy sparkle.

Why It’s a Christmas Classic

This festive nut roast brings together everything we love about Christmas cooking: comfort, colour, and community. It’s a dish that feels homemade, wholesome, and special — without being complicated. Every slice tells a story: toasted nuts for crunch, lentils for body, chestnuts for warmth, and cranberries for a sparkle of joy. It’s proof that vegan food can be indulgent, comforting, and utterly beautiful on the Christmas table.

Recipe

Now, let’s dive into what you’ll need to create this perfect Christmas nut roast:

Delicious festive nut roast loaf topped with glossy cranberry sauce and garnished with thyme, served with roast potatoes, carrots, and gravy — a vegan Christmas dinner by Nicol Retailer Limited.

Festive Nut Roast Loaf with Cranberries & Chestnuts

Print Recipe
This Festive Nut Roast Loaf is the ultimate Christmas showstopper for vegetarians and vegans alike. Bursting with roasted nuts, earthy lentils, sweet cranberries, and savoury herbs, it’s moist on the inside with a crisp, golden crust. Topped with a glossy cranberry glaze and served alongside roasted veggies and vegan gravy, it’s a plant-based main that everyone will love. Ideal for Christmas dinner, New Year’s feasts, or cosy winter gatherings.
Course Christmas Dinner, Dinner, Festive Feast, Holiday Meal, Main Course, Sunday Roast Alternative, Vegetarian Christmas Recipes
Cuisine English, European, Vegetarian Christmas
Diet Vegan, Vegetarian
Keyword Christmas nut roast, festive nut roast loaf, nut roast with cranberries and chestnuts, plant-based Christmas main, vegan Christmas dinner, vegan nut roast recipe, vegetarian Christmas dinner recipe, vegetarian nut roast
Prep Time 25 minutes
Cook Time 1 hour
Servings 8 People
Calories 360

Ingredients

For binding:

  • 3 tbsp ground flaxseed mixed with 9 tbsp warm water (or 3 beaten eggs if not vegan)

For the topping:

Instructions

cranberry sauce or chutney

    Preheat oven:

    • 180°C (fan 160°C) / 350°F. Line a large 2lb loaf tin with baking paper.

    Cook the vegetables:

    • Heat olive oil in a large frying pan. Sauté the onion, garlic, carrot, celery, and red pepper for 5–6 minutes until soft.

    Add mushrooms:

    • Stir in mushrooms and cook for another 5 minutes, until most of the moisture evaporates.

    Combine ingredients:

    • In a large bowl, mix the cooked vegetables with the chestnuts, chopped nuts, breadcrumbs, lentils, soy sauce, tomato purée, herbs, smoked paprika, nutritional yeast, cranberries, salt, and pepper.

    Bind the mixture:

    • Add the flaxseed mixture (or eggs). Stir well until everything holds together. Add extra breadcrumbs if too wet or a splash of water if too dry.

    Assemble the loaf

    • Spoon half the mixture into the tin, press down firmly, spread with half the cranberry sauce, then add the rest of the mixture on top. Smooth the surface and finish with the remaining cranberry sauce.

    Bake:

    • Cook for 50–60 minutes, until firm, golden, and slightly crisp on the edges.

    Rest before serving:

    • Allow the loaf to rest for 10 minutes before slicing — this helps it hold together beautifully.

    Notes

    his Festive Nut Roast Loaf with Cranberries & Chestnuts is a hearty, flavour-packed vegan or vegetarian main that’s perfect for Christmas dinner, Sunday roasts, or any special occasion. It combines the richness of mixed nuts and chestnuts with sweet-tart cranberries and savoury herbs, creating a beautifully balanced dish that’s both satisfying and festive.
    Make it ahead of time — simply prepare and bake the loaf the day before, then reheat gently before serving. It slices best when cooled slightly and can be frozen for up to 3 months.
    For a gluten-free version, use gluten-free breadcrumbs and tamari instead of soy sauce. For a lower-sodium option, choose reduced-salt soy sauce or omit added salt.
    This nut roast pairs wonderfully with vegan gravy, roast potatoes, Brussels sprouts, and a dollop of cranberry sauce for the perfect plant-based Christmas feast.

    Nutrition

    Serving: 160g | Calories: 360kcal | Carbohydrates: 24g | Protein: 11g | Fat: 24g | Saturated Fat: 3g | Sodium: 350mg | Fiber: 6g | Sugar: 7g | Calcium: 55mg | Iron: 2.2mg

    Serving Suggestions

    A glorious nut roast loaf like this deserves to be served in style — surrounded by all the trimmings, glistening gravy, and the sparkle of Christmas cheer. Here are some delicious ways to serve your Festive Nut Roast with Cranberries & Chestnuts for a truly memorable meal:

    1. The Classic Roast Dinner Plate

    Pair your nut roast with all the traditional trimmings for the ultimate comforting Christmas feast:

    • Crispy roast potatoes tossed in olive oil and rosemary for that irresistible crunch.
    • Maple-glazed carrots and parsnips that bring natural sweetness to the plate.
    • Brussels sprouts with chestnuts sautéed in vegan butter for a double-chestnut hit.
    • Rich vegan gravy, poured generously over each slice for a luscious, savoury finish.

    This combination strikes the perfect balance of flavours — crisp, creamy, sweet, and savoury — everything a Christmas dinner should be.

    2. For a Lighter Festive Lunch

    If you’d rather serve this nut roast as part of a lighter meal, try pairing it with:

    • A winter salad made from kale, roasted beetroot, orange segments, and toasted pecans.
    • A spoonful of cranberry relish for tang and colour.
    • Some warm crusty bread or roasted root vegetables drizzled with olive oil and thyme.

    It’s simple, elegant, and full of seasonal flavour — perfect for Boxing Day lunch or a relaxed New Year’s Eve supper.

    3. The Leftover Magic

    One of the best things about this nut roast? The leftovers. Slice it thick and layer it into sandwiches with:

    • Vegan mayo, rocket, and extra cranberry sauce for a fresh, festive kick.
    • Or crumble it into a wrap with stuffing and roasted veg for a delicious on-the-go treat.
    • You can even reheat slices in a pan until golden and serve with a fried egg (if not vegan) or tofu scramble for a hearty post-Christmas brunch.

    5. Presentation Tips for the Wow Factor

    Turn your nut roast into the star of the show with a few finishing touches:

    • Brush the top with extra cranberry sauce before serving for that glossy, ruby-red shine.
    • Garnish with fresh thyme or rosemary sprigs for an elegant, aromatic finish.

    Serve it on a rustic wooden board or white platter surrounded by roasted vegetables and twinkling lights for a picture-perfect festive look.

    Make It Ahead – Stress-Free Christmas Cooking

    Christmas Day is magical — but let’s be honest, it can also be hectic. Between roasting potatoes, basting veggies, and keeping the prosecco chilled, the last thing you want to worry about is timing your main course perfectly. That’s why this Festive Nut Roast with Cranberries & Chestnuts is a dream come true for busy cooks — it’s make-ahead friendly, freezer-safe, and easy to reheat without losing flavour or texture

    Make the Mixture in Advance

    If you want to save time on the big day, you can prepare the nut roast mixture up to 24 hours ahead. Here’s how:

    1. Follow the recipe up to the point of baking.
    2. Pack the uncooked mixture into your lined loaf tin.
    3. Cover tightly with cling film or foil and store it in the fridge overnight.

    When you’re ready to cook, simply remove it from the fridge, let it sit at room temperature for 20–30 minutes, then bake as normal. This method not only saves time but also allows the flavours to develop and deepen overnight, making the roast even tastier.


    How to Freeze Your Nut Roast

    This recipe freezes beautifully, so you can make it weeks in advance and still enjoy that just-baked freshness. To freeze before baking:

    • Assemble the loaf, wrap it tightly in cling film and foil, and freeze for up to 2 months.
    • Defrost completely in the fridge overnight before baking.

    To freeze after baking:

    • Allow the loaf to cool completely.
    • Wrap well in foil or place in an airtight container.
    • Label with the date and freeze for up to 3 months.

    To reheat, defrost overnight in the fridge, then cover loosely with foil and bake at 170°C (fan 150°C) for about 20–25 minutes, until piping hot in the centre.


    Reheating and Refreshing the Glaze

    To restore that gorgeous glossy top, brush the nut roast with fresh cranberry sauce or a drizzle of maple syrup just before reheating. This not only refreshes the appearance but also locks in moisture and gives it that irresistible festive shine. If you’re reheating individual slices, a few minutes in the oven or a quick pan-sear in olive oil works wonders — it gives a lightly crisped edge while keeping the middle soft and juicy.


    Serving on the Day

    Once reheated, plate it up on a warm serving dish and garnish with:

    • Fresh rosemary sprigs
    • Whole cranberries
    • A scattering of toasted nuts or pomegranate seeds for sparkle

    No one will ever guess it was made ahead — it looks and tastes like it just came out of the oven.


    Why This Recipe Is Perfect for Planning Ahead

    One of the joys of this make-ahead vegan nut roast is its flexibility:

    • Holds its shape perfectly even after freezing or reheating
    • Tastes even better the next day, as the flavours have time to mingle
    • Saves time and stress on Christmas morning
    • Leaves your oven free for all those glorious trimmings.

    A Little Christmas Wisdom

    Christmas cooking isn’t about perfection — it’s about joy, warmth, and good food shared with loved ones. With this make-ahead Festive Nut Roast Loaf with Cranberries & Chestnuts, you’ll have one less thing to worry about and one more reason to celebrate. Light the candles, pour a glass of something bubbly, and let the delicious aroma of your homemade nut roast fill the house. You’ve earned it.

    Created by Nicol Retailer Limited

    This Festive Nut Roast Loaf with Cranberries & Chestnuts recipe was lovingly created by Nicol Retailer Limited — your trusted source for quality vegan, gluten-free, and festive ingredients. Every element of this dish, from the mixed nuts and chestnuts to the herbs, lentils, and cranberry sauce, is available to buy directly from Nicol Retailer.

    Explore our full range of seasonal products, plant-based essentials, and baking favourites in-store or online at Nicol Retailer Limited and bring your Christmas cooking to life with quality you can taste.

    Shop the Ingredients for This Recipe

    Make your Christmas cooking simple, stress-free, and full of festive flavour with Nicol Retailer Limited.
    We stock everything you need to recreate this Festive Nut Roast Loaf with Cranberries & Chestnuts — all in one place!

    Ingredients Available at Nicol Retailer

    Mixed Nuts – premium quality almonds, cashews, walnuts & hazelnuts for the perfect crunch.

    Lentils – wholesome plant-based protein that adds heartiness and texture.

    Cooked Chestnuts – sweet, buttery, and ready to chop straight into your nut roast.

    Cranberry Sauce – tangy and glossy, ideal for glazing your loaf or serving on the side.

    Herbs & Spices – rosemary, thyme, smoked paprika, and festive seasonings for authentic Christmas flavour.

    Breadcrumbs (Gluten-Free Option Available) – to hold your roast together beautifully.

    Olive Oil, Tomato Purée & Soy Sauce – pantry staples for that savoury, umami richness.

    All ingredients are available to buy at Nicol Retailer Limited, in online. We pride ourselves on offering high-quality vegan, vegetarian, and allergy-friendly ingredients, carefully sourced to make your festive meals truly special.

    Bring your Christmas menu to life with the best festive ingredients from Nicol Retailer Limited.
    Visit: https://nicolretailer.com/shop/

    Posted on

    Charred Padron Peppers with Feta and Lemon – A Taste of Spain from Nicol Retailer

    Charred Padron peppers with feta crumble and lemon zest created by Nicol Retailer, served in a rustic ceramic bowl and drizzled with olive oil.
    Charred Padron peppers with feta crumble and lemon zest created by Nicol Retailer, served in a rustic ceramic bowl and drizzled with olive oil.

    There’s something irresistibly simple yet special about Padron peppers. Mild, smoky, and sometimes with a cheeky surprise of heat, these little green gems are a true Spanish favourite. Our Charred Padron Peppers with Garlic, Lemon and Feta Crumble bring all the sunshine of Spain straight to your kitchen — and it all starts with the freshest Padron peppers from Nicol Retailer. This dish, Charred Padron Peppers with Feta and Lemon – a taste of Spain from Nicol Retailer, captures the essence of Spanish flavours perfectly.

    Ingredient Spotlight: Padron Peppers

    At the heart of this dish are the Padron peppers — small, glossy green peppers that have become a Spanish tapas icon. Originally from the Galicia region of Spain, these bite-sized peppers are famous for their mild, earthy flavour and signature smoky aroma when blistered in olive oil.

    But here’s what makes them truly special — about one in ten Padron peppers has a surprise spicy kick! This natural game of chance adds a playful twist to every serving, keeping your guests guessing. It entertains your taste buds too.

    When cooked properly, Padron peppers develop a soft, silky texture. They offer a charred, slightly nutty flavour that pairs beautifully with sea salt, garlic, lemon and creamy feta. They’re delicious served simply as a bar snack, or elevated — as in this recipe — into a show-stopping side dish.

    At Nicol Retailer, our Fresh Padron Peppers (500g)
    are carefully sourced for premium quality, ensuring freshness, vibrant colour, and authentic taste every time. Whether you’re cooking for two or preparing a tapas feast, these peppers bring the true taste of Spain right to your kitchen.

    Why You’ll Love This Recipe

    If you’re looking for a dish that’s effortlessly impressive, this Charred Padron Peppers with Garlic, Lemon and Feta Crumble recipe ticks every box. It captures the essence of Spanish tapas dining — relaxed, full of flavour, and perfect for sharing with friends and family.

    Quick and fuss-free

    Ready in just 15 minutes, this recipe is ideal for busy evenings, weekend gatherings, or spontaneous tapas nights. No complicated prep, no fancy equipment — just a hot pan and quality ingredients.

    Big flavour, simple ingredients

    Each bite delivers the smoky depth of blistered Padron peppers, the tangy freshness of lemon, and the creamy saltiness of feta. A drizzle of olive oil ties it all together for a true Mediterranean feel.

    Healthy and wholesome

    Naturally gluten-free, vegetarian, and rich in antioxidants and healthy fats, these peppers are as nourishing as they are delicious. They’re light yet satisfying — perfect as a snack, side, or part of a balanced mezze platter.

    Versatile and crowd-pleasing:

    Serve them as a starter, side dish, or part of a sharing tapas board. They pair beautifully with seafood, grilled meats, or simply a glass of crisp white wine.

    A taste of Spain at home:

    Whether you’re hosting a summer BBQ, a family dinner, or a date-night feast, this recipe brings that authentic Spanish sunshine to your table. It’s proof that simple, fresh ingredients can deliver restaurant-quality flavour in minutes.

    What You’ll Need & How to Make It

    To make this delicious Charred Padron Peppers with Feta and Lemon, you only need a few fresh, high-quality ingredients:

    Charred Padron peppers with feta crumble and lemon zest created by Nicol Retailer, served in a rustic ceramic bowl and drizzled with olive oil.

    Charred Padron Peppers with Garlic, Lemon & Feta Crumble

    Print Recipe
    Experience the bold flavours of Spain with this easy Charred Padron Peppers with Garlic, Lemon and Feta Crumble recipe. Using fresh Padron peppers from Nicol Retailer, this vibrant Mediterranean dish is lightly blistered in olive oil, tossed with zesty lemon and garlic, and finished with creamy crumbled feta.
    Perfect for tapas nights, BBQ sides or appetiser platters, this quick and healthy recipe serves four and is both gluten-free and vegetarian. Each bite offers a smoky, tangy and slightly spicy kick – an irresistible mix that brings sunshine to your table.
    Course Appetizer, Side Dish, Starter, Tapas
    Cuisine Mediterranean, Vegetarian
    Diet Vegetarian
    Keyword blistered padron peppers, charred padron peppers recipe, easy padron pepper recipe, fresh padron peppers UK, how to cook padron peppers, padron peppers lemon garlic, padron peppers with feta, Spanish tapas recipe
    Prep Time 5 minutes
    Cook Time 10 minutes
    Servings 4
    Calories 180

    Instructions

    Heat the pan

    • Warm a large griddle over medium-high heat until hot.

    Cook the Padron peppers

    • Add the olive oil, then the peppers in a single layer. Sauté for 6–8 minutes, turning occasionally, until the skins are blistered and slightly charred.

    Add garlic

    • Stir in the grated garlic for the last 30 seconds of cooking, just until fragrant

    Season and finish

    • Remove from heat. Sprinkle over lemon zest, a squeeze of lemon juice, and season with sea salt and black pepper.

    Garnish

    • Crumble over the feta cheese and, if desired, drizzle lightly with honey or sprinkle with chilli flakes for a sweet-heat finish.

    Notes

    Padron peppers are a Spanish favourite known for their mild, smoky flavour — but every now and then, one packs a spicy surprise! That’s part of their charm. When blistered in olive oil and finished with lemon zest, garlic and crumbled feta, they create a perfectly balanced bite of heat, salt and tang.
    For best results, use fresh Padron peppers from Nicol Retailer and cook them over high heat until charred and slightly wrinkled. Serve immediately while warm for that authentic tapas bar experience. This quick and easy dish is ideal for sharing platters, BBQs, or healthy vegetarian starters.

    Nutrition

    Serving: 250g | Calories: 180kcal | Carbohydrates: 5g | Protein: 6g | Fat: 12g | Saturated Fat: 4g | Sodium: 260mg | Fiber: 2g | Sugar: 2g

    Pairing Suggestions

    One of the best things about Charred Padron Peppers with Garlic, Lemon and Feta Crumble is their versatility. Their smoky, salty, and tangy flavour means they complement a wide range of dishes — whether you’re building a full Spanish tapas spread or adding a Mediterranean twist to your usual meal. Here are some delicious ways to enjoy them:

    Classic Tapas Board

    Serve your Padron peppers alongside other Spanish favourites for a vibrant sharing platter:

    Chorizo bites or grilled prawns for a smoky contrast

    Patatas bravas or roasted potatoes for a hearty touch

    Manchego cheese and olives for extra Mediterranean flair

    Freshly baked crusty bread with olive oil and sea salt for dipping

    Light Summer Lunch

    Combine the peppers with crisp salads, couscous, or quinoa bowls for a bright, wholesome lunch. The feta crumble and lemon zest bring freshness and texture, pairing beautifully with cherry tomatoes and avocado.

    Dinner Party Side

    Add a touch of elegance to grilled or roasted mains:

    Grilled chicken or halloumi skewers

    Pan-seared salmon or sea bass

    Oven-roasted lamb chops with rosemary

    The lemon and garlic notes cut through richness perfectly, balancing the dish and brightening the plate.

    Conclusion

    Simple, fresh and bursting with Mediterranean flavour, this Charred Padron Peppers with Garlic, Lemon and Feta Crumble recipe is proof that great food doesn’t have to be complicated. With just a few quality ingredients, you can create a dish that’s light, healthy, and full of character — a perfect balance of smoky, salty, tangy and creamy.

    Whether you serve it as part of a Spanish tapas feast, a BBQ side, or a quick weeknight appetiser, these blistered peppers always impress. Their unpredictable little kick adds fun and authenticity to every bite. It reminds you of sunny terraces and relaxed evenings in Spain.

    At Nicol Retailer, we’re proud to offer Fresh Padron Peppers (500g) — sourced for their quality and flavour so you can bring the taste of Spain straight to your kitchen.

    Explore our range of fresh produce, gourmet ingredients, and global flavours today at nicolretailer.com
    and make every meal a little more exciting.

    Posted on

    Fresh Mooli & Carrot Salad with Lemon Dressing

    Bowl of fresh mooli and carrot salad with sesame seeds, coriander, and lemon dressing by Nicol Retailer Limited
    Bowl of fresh mooli and carrot salad with sesame seeds, coriander, and lemon dressing by Nicol Retailer Limited

    When it comes to fresh, vibrant cooking, few ingredients are as underrated and versatile as Mooli (also known as Daikon Radish). One delightful way to enjoy this ingredient is by making a Fresh Mooli & Carrot Salad with Lemon Dressing. This crisp, white root vegetable is a staple in Asian and Middle Eastern kitchens. It is loved for its delicate peppery flavour, refreshing crunch, and impressive nutritional benefits.

    At Nicol Retailer, our Fresh Mooli (2kg pack) is carefully sourced for maximum freshness, flavour, and quality. Whether you’re a home cook or catering for family gatherings, this humble root transforms everyday meals into something truly special. For instance, a mooli carrot salad with lemon dressing.

    Why Choose Fresh Mooli?

    Light & Refreshing: Adds natural crunch to salads, slaws, and side dishes. It perfectly blends in a salad with fresh carrot and lemon dressing.

    Nutrient-Rich: High in vitamin C, fibre, and antioxidants.

    Versatile: Delicious raw, pickled, stir-fried, or added to soups and curries.

    Diet-Friendly: Vegan, gluten-free, low in calories – perfect for healthy eating.

    When paired with colourful vegetables like carrots, spring onions, and fresh coriander, mooli shines as the star ingredient. It makes this crisp, tangy, and utterly addictive salad.

    Here s the step by steps of how to make this delicious recipe, a fresh mooli and carrot salad dressed with lemon.

    Bowl of fresh mooli and carrot salad with sesame seeds, coriander, and lemon dressing by Nicol Retailer Limited

    Refreshing Mooli & Carrot Salad with Lemon Dressing

    Print Recipe
    Fresh Mooli & Carrot Salad with Lemon Dressing
    Crisp, light, and packed with flavour, this Fresh Mooli (Daikon Radish) and Carrot Salad is the perfect healthy side dish. Made with julienned mooli, crunchy carrots, spring onions, fresh coriander, and a zesty sesame-lemon dressing, it’s a refreshing no-cook recipe ready in just 10 minutes. Ideal for summer barbecues, Asian-inspired meals, or a light lunch, this vibrant salad balances sweet, tangy, and nutty flavours beautifully. Garnished with toasted sesame seeds, it pairs wonderfully with grilled fish, sushi, or spicy noodles.
    Course Side Dish, Starter
    Cuisine Asian-inspired, Japanese
    Diet Gluten Free, Low Calorie, Vegan, Vegetarian
    Keyword carrot and mooli salad, daikon radish salad, fresh mooli recipe, gluten free salad ideas, vegan mooli salad
    Prep Time 10 minutes
    Servings 4 People
    Calories 85

    Instructions

    Prepare the Vegetables

    • Peel and julienne (or grate) the Fresh Mooli and carrots.
    • Place in a mixing bowl with sliced spring onions, chilli and coriander.

    Make the Dressing

    • In a small bowl, whisk together lemon juice, vinegar, sesame oil, honey (or agave), salt and pepper.

    Combine

    • Pour the dressing over the salad and toss well to coat.

    Finish & Serve:

    • Sprinkle with toasted sesame seeds for extra crunch.
    • Serve chilled as a light side dish or refreshing starter.

    Notes

    For the best texture, serve this salad immediately after tossing with the dressing. If preparing ahead, keep the vegetables and dressing separate, then combine just before serving to maintain crunch and freshness.
    Tips
    Add crunch: Toss in roasted peanuts, cashews, or crispy fried shallots for extra texture.
    Spice it up: A dash of chilli flakes or a drizzle of sriracha can give it a fiery kick.
    Make it creamy: Add a spoonful of Greek yoghurt or tahini to the dressing for a richer flavour.
    Swap veggies: Replace carrots with cucumber, beetroot, or thinly sliced red cabbage for colour and variety.
    Protein boost: Top with grilled tofu, edamame, or shredded chicken for a light main course.
    Citrus twist: Swap lemon with lime or yuzu juice for a sharper, tangy profile.

    Nutrition

    Serving: 210g | Calories: 85kcal | Carbohydrates: 12g | Protein: 2g | Fat: 4g | Saturated Fat: 0.5g | Sodium: 220mg

    Serving Suggestions & Pairings

    This salad isn’t just a side – it’s a versatile dish that elevates any meal. Especially when featuring fresh ingredients like mooli and carrot, combined with a lemony zest.

    With Grilled Fish or Chicken: The citrusy dressing cuts through smoky flavours, making it a refreshing side to seafood or lean meats.

    Alongside Sushi or Asian Dishes: Its crisp crunch balances soy, ginger, and wasabi notes perfectly.

    At Summer BBQs: A cooling, light option to serve alongside rich burgers, skewers, and grilled veggies.

    Paired with Spicy Curries: The fresh mooli offers a cooling contrast to bold Indian or Thai curries.

    As a Light Lunch: Add extra protein (tofu, prawns, or chickpeas) and enjoy as a satisfying meal on its own.

    Drinks Pairing: Complements citrusy mocktails, or sparkling water with lime.

    Bring Freshness to Your Table

    Ready to try this recipe? Stock up on Fresh Mooli (2kg) direct from Nicol Retailer. With its crisp texture and delicate flavour, it’s the secret ingredient your kitchen has been missing. Order now and create this refreshing salad at home – healthy, vibrant, and full of flavour with the freshness of mooli and carrots under a lemony finish.

    Posted on

    Ajvar Recipe with Roasted Red Peppers & Aubergine

    Have you ever wondered how to transform your cooking with a vibrant, flavour-packed spread? Look no further than Ajvar, a beloved Balkan condiment that effortlessly combines roasted red peppers and aubergine into a delightful medley. This Ajvar recipe with roasted red peppers & aubergine is a must-try for anyone eager to explore new culinary horizons.

    Ajvar, known for its rich taste and versatility, can turn the simplest dishes into gourmet experiences. Originating from the Balkans, this condiment has gained popularity worldwide, not just for its flavour but also for its ease of preparation. With just a few fresh ingredients and some roasting, you can create a spread that will become a staple in your kitchen.


    One of the beauties of this Ajvar recipe with roasted red peppers and aubergine lies in its simplicity and the natural flavours of the vegetables. Roasted red peppers bring a sweetness and smokiness that is hard to resist, while aubergines add a creamy texture, making the spread both indulgent and wholesome. The fusion of these ingredients creates a condiment that pairs well with a multitude of dishes, from grilled meats to toasted bread.


    Whether you’re new to cooking or a seasoned chef, preparing Ajvar is a rewarding experience. Its vibrant colour and robust flavour will captivate your senses and impress anyone who tastes it. The best part? It’s as healthy as it is delicious, making it a perfect addition to your diet.


    Ready to dive into the world of Ajvar? With this step-by-step Ajvar recipe using roasted red peppers & aubergine, you’ll find that making this roasted red peppers and aubergine recipe is not only easy but also incredibly satisfying. Let’s get started and bring some Balkan charm to your kitchen:

    Ajvar with Roasted Red Peppers, Aubergine & Paprika Recipe

    Print Recipe
    Discover the rich and smoky flavours of Ajvar, a traditional Balkan roasted vegetable spread made with red peppers, aubergine, and paprika. This vibrant and versatile dish can be enjoyed as a dip, spread, or side, making it a perfect addition to your meals. The natural sweetness of roasted peppers and the earthy depth of aubergine come together with a subtle kick of paprika to create a taste that's both comforting and full of character. Whether served with fresh bread, crackers, or grilled meats, this simple yet flavourful recipe is sure to impress. Prepare this delightful homemade condiment and bring a taste of the Balkans to your table!
    Course Appetizer, brunch, Side Dish, snacks
    Cuisine Balkan / Southeast European Cuisine
    Diet Gluten Free, Vegan, Vegetarian
    Keyword how to make ajvar at home, mediterranean-style spread, roasted red pepper and aubergine dip, roasted vegetables dip recipe, smokey red dip, tTraditional ajvar with paprika, vegan ajvar spread, vegan Balkan recipes
    Prep Time 20 minutes
    Cook Time 50 minutes
    Servings 4 People
    Calories 40

    Instructions

    Prepare the vegetables

    • Preheat your oven to 220°C (200°C fan)/Gas Mark 7. Line a baking tray with parchment paper. Place the red peppers and aubergine on the tray and roast them for 30–40 minutes, turning occasionally, until the skins are charred and the vegetables are soft.

    Cool and peel

    • Once roasted, transfer the peppers and aubergine to a bowl and cover with a plate or cling film. Let them cool for about 10 minutes. This helps loosen the skins. Peel the skins off the peppers and aubergine, and remove the seeds from the peppers.

    Blend the ingredients

    • Place the peeled peppers and aubergine in a food processor or blender. Add the minced garlic, chopped chilli (if using), paprika, olive oil, and red wine vinegar. Blend until smooth, but leave a little texture if preferred.

    Season and cook

    • Transfer the blended mixture to a large pan. Cook on low heat for 10–15 minutes, stirring frequently, to allow the flavours to develop and excess liquid to evaporate. Season with salt and pepper to taste.

    Serve

    • Allow the ajvar to cool slightly before serving. It can be served warm or at room temperature. Enjoy as a dip with crusty bread, as a spread for sandwiches, or alongside grilled meats and vegetables.

    Notes

    Tips

    When preparing Ajvar, the excellence of your ingredients can truly transform the final result. Let’s explore the vital components that elevate this roasted red peppers and aubergine recipe to its full potential.
    Roasted red peppers are the cornerstone of any authentic Ajvar. These vibrant vegetables bring a natural sweetness and a hint of smokiness to the spread. For the best results, select fresh, ripe peppers with a bright red hue, indicating peak ripeness and flavour. Roasting them until slightly charred intensifies their taste, making them an indispensable element in your recipe.
    Aubergines, also known as eggplants, contribute a creamy texture that beautifully balances the sweetness of the peppers. Choosing the right aubergines is key. Look for ones that are firm and free of blemishes. Smaller varieties often have a milder flavour and fewer seeds, which are perfect for this dish. Their inclusion adds depth and enhances the nutritional value of your Ajvar.
    Another important ingredient is garlic, which adds a pungent kick that complements the roasted vegetables. Fresh, minced garlic is preferable for achieving that robust flavour. Additionally, a splash of vinegar helps to enhance the overall taste, adding a slight tanginess that lifts the richness of the peppers and aubergines.
    Olive oil is another crucial component. It not only aids in roasting but also enriches the blend with a smooth, luscious texture. Opt for high-quality olive oil to ensure the best possible taste.
    Lastly, seasoning with salt and pepper allows you to tailor the Ajvar to your liking, highlighting the natural flavours of the vegetables. Adjust the seasoning as needed to create a spread that perfectly suits your palate.

    Nutrition

    Serving: 30g | Calories: 40kcal | Carbohydrates: 2.5g | Protein: 0.5g | Fat: 3.5g | Saturated Fat: 0.5g | Fiber: 1g

    Serving Suggestions

    Ajvar’s culinary adaptability makes it an exciting addition to a variety of dishes, transforming them with its rich, vibrant taste.


    Spread Ajvar on toasted bread for a simple yet delightful snack, or use it as a flavourful dip for an assortment of fresh vegetables. It works wonderfully as a side for grilled meats and fish, infusing them with a smoky, sweet undertone that enhances their natural flavours. Try spooning it over baked potatoes for a delicious twist or incorporating it into sandwiches and wraps for an extra layer of taste and texture.


    For a quick and tasty meal, mix Ajvar into pasta as a sauce. Its robust flavours blend seamlessly with the pasta, creating a dish that is both satisfying and easy to prepare. You can also stir Ajvar into rice or couscous, adding a burst of flavour that elevates these simple grains into a gourmet experience.


    Pairing Ajvar with dairy products like cheese or yoghurt brings out its versatility. Swirl it into Greek yoghurt to create a creamy, tangy dip that pairs well with pita bread or crudités. Alternatively, spread it over soft cheeses like ricotta or goat cheese for an appetising starter that’s sure to impress.


    For a more creative use, try adding a dollop of Ajvar to your morning eggs. Whether scrambled, fried, or poached, eggs benefit from the added depth of flavour that Ajvar provides. You can even mix it into your egg salad for a unique twist on a classic recipe.


    Ajvar’s versatility doesn’t stop there. Use it as a pizza topping or mix it into your homemade burger patties for an unexpected kick. This Ajvar recipe with roasted red peppers & aubergine offers vibrant taste and rich texture, making it a fantastic addition to countless dishes, making every meal more exciting.

    Storing and Preserving Ajvar

    To maintain the vibrant taste of your homemade Ajvar, proper storage is essential. For short-term enjoyment, place your Ajvar in an airtight container and refrigerate it. This method keeps it fresh for up to a week, ensuring you can relish its flavours daily.


    If you wish to enjoy your Ajvar for a longer period, canning is an excellent option. Start by sterilising jars to prevent any contamination. Fill each jar with hot Ajvar, leaving a bit of space at the top to allow for expansion. Seal the jars tightly and process them in a boiling water bath. Once properly canned, store the jars in a cool, dark place. This technique ensures that your Ajvar recipe with roasted red peppers & aubergine stays preserved for several months, ready to add a burst of flavour to your meals whenever you desire.


    Whether you’re storing it short-term or canning it for later, these methods will help you keep your Ajvar fresh and delicious. Enjoy the convenience of having this versatile condiment on hand to elevate your dishes effortlessly.

    Posted on

    Cooling Cucumber & Mint Raita Recipe

    Discover the magic of Cooling Cucumber & Mint Raita, an irresistible addition to any meal. It promises to invigorate your taste buds. Originating from Indian cuisine, this Cooling Cucumber & Mint Raita Recipe offers a harmonious blend of creamy yoghurt, crisp cucumbers, and refreshing mint. Its role in balancing spicy dishes with its soothing properties cannot be overstated. The beauty of Cucumber & Mint Raita lies in its simplicity. Additionally, the minimal time it takes to prepare makes it a go-to side dish for busy households.

    One of the reasons this Cooling Cucumber & Mint Raita Recipe stands out is its versatility. Whether you’re hosting a summer barbecue or cooking a traditional Indian feast, this dish fits in seamlessly. The cooling effect of the cucumbers combined with the aromatic mint makes it not only a delicious but also a visually appealing addition to your dining table.


    Another fantastic aspect of this raita recipe is how customisable it is. You can tweak the ingredients to suit your personal preferences or dietary requirements. Whether you prefer a tangier taste with a splash of lemon juice or a richer texture by opting for full-fat yoghurt, the possibilities are endless.


    The recipe’s adaptability also makes it a family favourite. It is enjoyed by both adults and children alike. Easy to prepare and rich in flavour, Cooling Cucumber & Mint Raita can elevate your meal in minutes. Dive into the world of this delectable side dish. Transform your dining experience today with this Cooling Cucumber & Mint Raita Recipe.

    Health Benefits of Cucumber & Mint Raita

    When you enjoy a spoonful of Cucumber & Mint Raita, you’re not just treating your palate to a delightful experience but also nourishing your body. Cucumbers, with their high water content, help keep you hydrated, making them an excellent choice during warmer months. They are packed with essential vitamins such as vitamin K and vitamin C. These contribute to overall well-being and skin health. Additionally, cucumbers possess antioxidants that combat free radicals. This potentially reduces the risk of chronic diseases.


    Mint, a key ingredient in this raita, brings more than just a burst of refreshing flavour. Known for its calming effects on the digestive system, mint can help relieve symptoms of indigestion and bloating. Its natural menthol content can soothe the stomach. It also aids in easing headaches. Furthermore, the aromatic herb is known to boost oral health. This helps to keep your breath fresh and your mouth feeling clean.


    Combining these two ingredients with creamy yoghurt enhances the dish’s nutritional profile. Yoghurt is a great source of protein, calcium, and probiotics. These support gut health by promoting a healthy balance of bacteria in the digestive tract. Probiotics are known to strengthen the immune system and improve digestion. This makes this raita a powerhouse of health benefits.


    With its hydrating and digestive properties, Cucumber & Mint Raita not only cools you down but also supports your body’s natural functions. This ensures you feel your best after every meal.

    Here is the recipe:

    Cooling Cucumber & Mint Raita Recipe

    Print Recipe
    Discover the refreshing delight of Cooling Cucumber & Mint Raita, a perfect accompaniment to your meals. This creamy yoghurt-based dish combines the crispness of cucumber with the invigorating flavour of mint, creating a soothing side that complements spicy curries, grilled meats, or light salads. Packed with fresh, wholesome ingredients, it’s an ideal choice for those seeking a healthy yet flavourful addition to their menu. Whether enjoyed as a dip, a topping, or a side dish, this raita brings a burst of freshness to every bite. Perfect for summer dining or any occasion, try this classic recipe today to elevate your meals with ease.
    Course Side Dish
    Cuisine Indian
    Diet Gluten Free, Low Fat, Vegetarian
    Keyword Cooling raita recipe, Cucumber and mint raita, Easy raita recipe, Homemade raita, Indian raita side dish
    Prep Time 20 minutes
    Servings 4 People
    Calories 60

    Instructions

    Prepare the Cucumber

    • Wash and peel the cucumber. Grate it using the coarse side of a grater, and lightly squeeze out any excess water. Set aside.
    • Chop the Mint
    • Finely chop the mint leaves. If using a green chilli, deseed it and chop it finely as well.

    Mix the Base

    • In a mixing bowl, whisk the yoghurt until smooth.
    • Add the grated cucumber, chopped mint, and green chilli (if using) to the yoghurt. Stir well to combine.

    Season

    • Add the roasted cumin powder, black salt, sugar (if desired), and a pinch of black pepper. Mix thoroughly, adjusting the salt as needed.

    Serve

    • Chill the raita in the fridge for 15–20 minutes if you have time, or serve immediately.
    • Serving Suggestion
    • This raita pairs perfectly with biryanis, pulaos, grilled dishes, or as a cooling side with spicy curries.

    Notes

    Tips

    To ensure the best texture, make sure the cucumber is finely grated and any excess water is gently squeezed out before combining it with the yoghurt. This will prevent the raita from becoming too watery and maintain its creamy consistency.
    When choosing your cucumbers, opt for ones that are firm and free from blemishes to ensure the best texture and flavour. Fresh, aromatic mint leaves are essential for that burst of refreshing flavour. For a creamier consistency, full-fat yoghurt is recommended, though low-fat alternatives can also be used if you prefer a lighter version.
    Cumin powder adds a subtle earthiness to the raita, perfectly balancing the crisp cucumber and fresh mint. Adjust the salt according to your taste preferences, and a dash of black pepper can bring a slight warmth to the dish. For those who enjoy a bit of zing, a squeeze of lemon juice can elevate the raita’s overall taste, making it even more tantalising

    Nutrition

    Serving: 100g | Calories: 60kcal | Carbohydrates: 4g | Protein: 3.5g | Fat: 3g | Saturated Fat: 2g | Fiber: 0.3g | Sugar: 3g | Calcium: 120mg

    Serving Suggestions and Pairings

    The versatility of Cucumber & Mint Raita makes it an exceptional companion to many dishes, elevating your meal to new heights. Picture a steaming plate of biryani or pilaf, the spicy flavours begging for a cooling contrast. Here, this raita works its magic, soothing your palate and balancing the heat with its refreshing properties. If you’re planning a barbecue, think beyond the usual sauces and dips. Grilled meats, especially lamb or chicken kebabs, gain a delightful twist when paired with this raita. The creamy texture and minty undertones harmonise beautifully with the smoky, charred flavours of the grill. For vegetarians, this raita is a delightful addition to curries, providing a cooling counterpoint to rich, spiced sauces.


    Don’t limit yourself to traditional pairings—this raita is equally delicious as a dip. Serve it with crispy papadums or naan bread for a simple yet satisfying snack. Its creamy consistency and burst of freshness make it a hit at parties or gatherings. You could also spread it on wraps or sandwiches for an unexpected twist, adding layers of flavour and moisture.


    For a more adventurous take, try it with falafel or as a dressing for salads. The hydrating properties of cucumber combined with the tang of yoghurt and the zing of mint create a balanced flavour profile that complements many dishes. The simplicity of the ingredients belies the depth of flavour they bring, making Cooling Cucumber & Mint Raita Recipe a must-have in your culinary repertoire.

    Storing and Preserving Raita

    To ensure your Cooling Cucumber & Mint Raita remains fresh and flavourful, store it in an airtight container in the fridge. This simple practice keeps it fresh for up to two days, thus making it a convenient option for meal planning or unexpected guests. Avoid leaving the raita at room temperature for extended periods, particularly during warmer months, as this can compromise its quality.


    When ready to serve, give the raita a gentle stir to recombine any separated components. This restores its creamy texture and uniform flavour. For an added touch, you can garnish with a few fresh mint leaves or a sprinkle of cumin powder just before serving.


    If you’ve added lemon juice for a tangier flavour, note that the citrus can slightly alter the yoghurt’s texture over time. Therefore, it’s best consumed within the first day for optimal taste and consistency. For longer storage, consider preparing the cucumber and mint mixture separately and then combine it with the yoghurt just before serving. This way, you preserve the crispness of the cucumber and the freshness of the mint. This ensures a delightful experience with every spoonful. By following these simple storage tips, your Cooling Cucumber & Mint Raita Recipe will always be ready to complement your meals.

    Consider experimenting with seasonal ingredients to customise your raita; adding a sprinkle of pomegranate seeds or a handful of chopped coriander can transform it into a vibrant accompaniment. Each variation offers a unique twist, enhancing the versatility and appeal of this timeless dish.


    If you prefer ready-made options over making your own raita, consider trying Lion Yoghurt & Mint Dressing.

    Pairing this dressing with a chilled soft drink, like a citrus-infused soft drink or a classic ginger beer, can further elevate the dining experience. It offers a refreshing contrast to the savoury elements of your meal. The effervescence and subtle sweetness of the beverage provide a delightful balance to the creamy and minty notes of the raita.

    For an innovative twist, consider pairing roasted fresh purple heritage carrots or fresh rainbow carrots as snacks to dip into your raita. The natural sweetness and slight earthiness of the carrots beautifully complement the creamy and minty qualities of the raita. This combination not only adds a pop of colour to your table but also offers a delightful textural contrast, making it a perfect choice for those looking to add a touch of creativity to their appetisers. Whether you serve it as a pre-dinner nibble or a light afternoon treat, this pairing promises to impress your guests with its simple yet sophisticated charm.

    Posted on

    Carrot Hummus with Olive Oil and Paprika

    If you’re looking to bring some variety to your usual snack options, Carrot Hummus with Olive Oil and Paprika is a fantastic choice. This tasty take on traditional hummus offers a unique flavour combination that is both sweet and earthy. Carrots contribute a natural sweetness that complements the rich, creamy texture of chickpeas.

    This dish is incredibly flexible and can be enjoyed in a range of situations. Whether you’re planning a picnic, hosting a gathering, or simply after a nutritious snack, Carrot Hummus with Olive Oil and Paprika makes an excellent option. Its bright orange colour is visually striking, making it a great addition to any table.

    Furthermore, the ingredients in this recipe offer plenty of health benefits. Carrots are a rich source of beta-carotene, which supports eye health, while chickpeas provide protein and fibre, making this hummus a satisfying and nourishing choice. Olive oil adds a touch of richness, and paprika contributes a gentle kick that balances the flavours wonderfully.

    Making Carrot Hummus is simple and requires little effort, making it ideal for both experienced cooks and beginners. The method involves blending cooked carrots with chickpeas, tahini, lemon juice, garlic, and a selection of spices to create a smooth and tasty dip. A final drizzle of olive oil and sprinkle of paprika not only enhances the flavour but also adds to its presentation. For those keen on experimenting, incorporating olive oil and paprika can further elevate the humble carrot hummus.

    Include this delightful Carrot Hummus in your snack repertoire and enjoy a refreshing twist on a classic favourite.

    To create your own Carrot Hummus with Olive Oil and Paprika, follow the following:

    Carrot Hummus with Olive Oil and Paprika Garnish

    Print Recipe
    Carrot hummus with olive oil and paprika garnish is a delightful twist on the classic chickpea-based dip, offering a vibrant blend of flavours and colours. This recipe combines the natural sweetness of roasted carrots with the earthy undertones of tahini, balanced perfectly with zesty lemon juice and a hint of garlic. Drizzled with high-quality olive oil and topped with a sprinkling of smoky paprika, this dish not only looks appealing but also provides a depth of taste that’s both hearty and satisfying. Perfect as a dip for warm pita, a spread for sandwiches, or a healthy addition to a mezze platter, it’s a simple yet impressive dish that’s sure to win over guests.
    Course Appetizer, Side Dish, Snack, Starter
    Cuisine Mediterranean
    Diet Vegan, Vegetarian
    Keyword Carrot hummus, Carrot hummus recipe, Carrot hummus with olive oil, Carrot hummus with paprika
    Prep Time 10 minutes
    Cook Time 25 minutes
    Servings 4 People
    Calories 52

    Instructions

    • Preheat your oven to 200°C (180°C fan)/Gas Mark 6.
    • Spread the chopped carrots on a baking tray, drizzle with 1 tablespoon of olive oil, and season with salt and pepper. Roast in the oven for about 25 minutes or until the carrots are tender and slightly caramelised. Remove from the oven and allow them to cool for a few minutes.
    • In a food processor, combine the roasted carrots, chickpeas, tahini, lemon juice, garlic, ground cumin, smoked paprika, and 1 tablespoon of olive oil. Blend until smooth and creamy. If the mixture is too thick, add a small amount of water, a tablespoon at a time, until the desired consistency is achieved.
    • Taste the hummus and adjust seasoning with more salt, pepper, or lemon juice if needed.
    • Spoon the hummus into a serving bowl. Drizzle with extra olive oil and sprinkle a pinch of smoked paprika on top for garnish.
    • Serve with warm pitta bread, crudités, or crackers.

    Nutrition

    Calories: 52kcal | Carbohydrates: 4g | Protein: 2g | Fat: 4g | Saturated Fat: 1g | Polyunsaturated Fat: 2g | Monounsaturated Fat: 2g | Sodium: 3mg | Potassium: 72mg | Fiber: 1g | Sugar: 1g | Vitamin A: 11IU | Vitamin C: 15mg | Calcium: 18mg | Iron: 0.5mg

    Serving Suggestion

    Carrot Hummus is a versatile and tasty addition to many meals and snacks. Its distinctive flavour and vibrant colour make it a standout choice for a variety of serving options. One of the simplest and most popular ways to enjoy carrot hummus paired with olive oil and paprika is with fresh vegetable sticks such as cucumber, pepper, and celery. The crisp texture of the vegetables pairs beautifully with the creamy hummus.

    Pitta bread is another excellent accompaniment. Warmed and cut into triangles, pitta bread provides a soft and chewy contrast that enhances the overall eating experience. Crackers, especially those with seeds or whole grains, are also a great option for dipping.

    For a more filling meal, consider using Carrot Hummus as a spread in sandwiches or wraps. It adds a flavourful and nutritious layer that works well with a variety of fillings, from grilled chicken and roasted vegetables to fresh greens and sliced avocado. Try Carrot Hummus with Olive Oil and Paprika even as a base for an open-faced sandwich topped with ingredients like sliced tomatoes, cucumbers, and sprouts.

    If you’re aiming to add a unique touch to your starters, use Carrot Hummus as a topping for crostini. Spread a generous layer on toasted baguette slices and finish with a sprinkle of herbs or a few roasted chickpeas for added texture and flavour.

    Carrot Hummus also works wonderfully as a side dish. Serve it alongside grilled meats such as chicken, beef, or lamb for a nutritious and flavour-packed complement. It pairs particularly well with roasted vegetables, enhancing their natural sweetness and adding depth to the dish.

    For a gathering or celebration, create a platter featuring Carrot Hummus. Surround it with an assortment of items such as olives, cherry tomatoes, cheese cubes, and a variety of bread and crackers. This not only provides an appealing spread but also ensures there’s something for everyone to enjoy.

    Another creative way to incorporate Carrot Hummus is by using it as a salad dressing. Simply thin it out with a little water or extra lemon juice and drizzle it over mixed greens for a healthy and flavourful dressing.

    Storing and Shelf Life

    To keep your Carrot Hummus fresh, place it in an airtight container and store it in the fridge. It should stay fresh for around 4 to 5 days. For longer preservation, Carrot Hummus with the added olive oil and paprika can be frozen. Use a container suitable for the freezer, ensuring you leave some space at the top to allow for expansion. When stored correctly, it will remain good for up to a month. When you’re ready to enjoy the hummus again, move it from the freezer to the fridge to defrost. Once it has thawed, give it a thorough stir to restore its creamy texture before serving.