If you’ve ever wanted to recreate a Michelin-style seafood dish in your own kitchen, this crispy soft shell crab tempura is exactly where to start. Here, you’ll find an easy soft shell crab tempura recipe that delivers light, golden, and delicately crisp soft shell crab—one of those rare ingredients that provides both texture and flavour in every bite—no fuss, just pure indulgence. In fact, if you are searching for the perfect soft shell crab tempura recipe, this guide has you covered.
What makes this dish truly special is the contrast. The crunchy tempura coating gives way to sweet, tender crab, while the silky yuzu kosho emulsion adds a citrusy kick with just the right amount of heat. Paired with sharp, refreshing pickled vegetables, every element works together to create a perfectly balanced plate. For anyone who loves seafood, mastering a soft shell crab tempura recipe can elevate your repertoire.
Why Soft Shell Crab Is So Popular
Soft shell crab has become a favourite in modern British and Asian-fusion kitchens—and for good reason. Unlike regular crab, the entire shell is edible, meaning you get a full, satisfying bite without any effort. It cooks quickly, absorbs flavour beautifully, and delivers that irresistible crisp finish when fried.
Whether you’re planning a dinner party, a date-night meal, or simply elevating your home cooking, this dish instantly adds a touch of luxury.
If you’re curious about the health benefits of seafood, including soft shell crab, the NHS provides a helpful overview of fish and shellfish nutrition and why they are an important part of a balanced diet: https://www.nhs.uk/live-well/eat-well/food-types/fish-and-shellfish-nutrition/

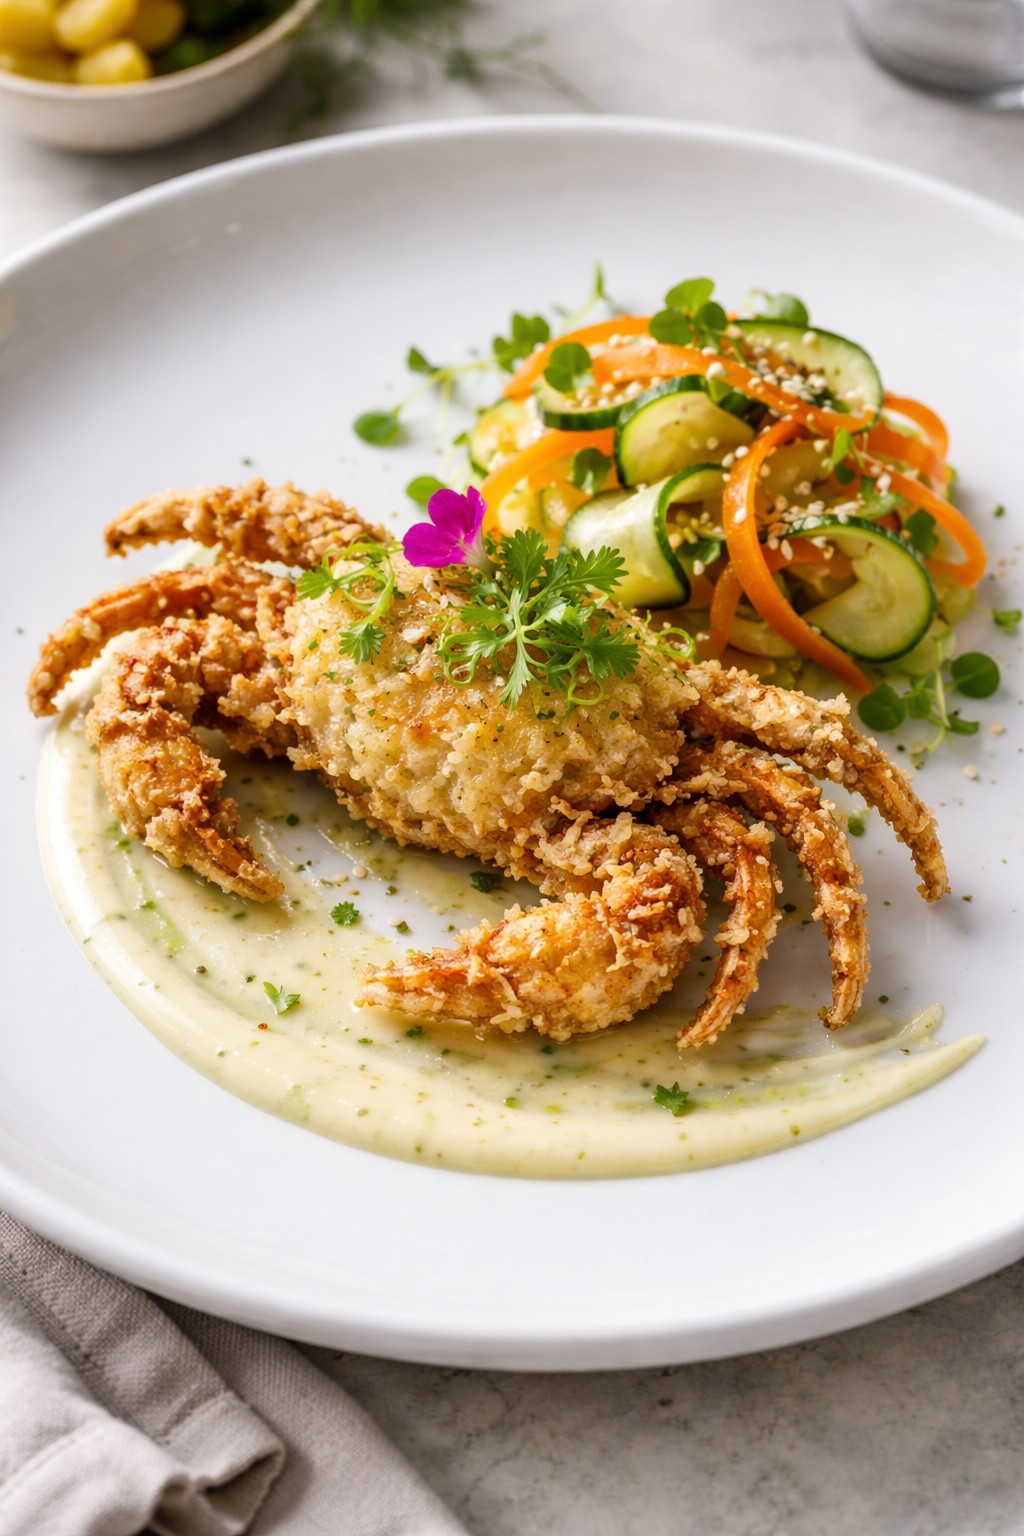
Tempura Soft Shell Crab with Yuzu Kosho Emulsion & Pickled Vegetables
Ingredients
- 8 whole soft shell crabs (cleaned)
- 80 g plain flour
- 40 g cornflour
- 1 egg yolk
- 150 ml ice-cold sparkling wate
- Pinch of salt
- Oil for deep frying
- 2 tbsp mayonnaise
- 1 tsp yuzu kosho (or lime zest + chilli paste alternative)
- 1 tsp lemon juice
- 1 tbsp olive oil
- 1 cucumber (thinly sliced)
- 1 small carrot (ribboned)
- 50 ml rice vinegar
- 1 tbsp sugar
- Pinch of salt
- Micro herbs or coriander tips
- Lime zest
- Edible flowers (optional)
Instructions
Quick Pickle (Prep – 5 mins)
- Gently heat vinegar, sugar, and salt until dissolved
- Pour over cucumber and carrot
- Leave to pickle for at least 20 minutes
Tempura Batter (Prep – 5 mins)
- In a chilled bowl, whisk egg yolk with ice-cold sparkling water
- Lightly fold in flour and cornflour
- Keep batter cold and slightly lumpy
Fry the Crab
- Heat oil to 180°C
- Dip each crab into batter
- Fry for 2–3 minutes until light golden and crisp
- Drain and lightly season
Yuzu Emulsion
- Whisk mayonnaise, yuzu kosho, lemon juice, and olive oil until smooth
Plating
- Spread or swipe the emulsion across the plate.
- Place crab slightly off-centre
- Arrange pickled vegetables neatly
- Finish with micro herbs and lime zest
Notes
Nutrition
Seafood Preparation
When preparing seafood at home, knowing how to select the freshest ingredients is key. This guide from BBC Good Food offers practical tips on choosing high-quality fish and shellfish: https://www.bbcgoodfood.com/howto/guide/how-buy-fish
Serving Suggestion (Make It Look Restaurant-Quality)
Presentation is what transforms this crispy soft shell crab from a simple dish into a true restaurant-quality dining experience at home. Moreover, presenting your soft shell crab tempura recipe with care will truly impress guests. With just a few thoughtful touches, you can elevate both the visual appeal and overall enjoyment of the dish.
Start by choosing a neutral or matte plate white, slate, or stoneware works beautifully to highlight the golden crispness of the tempura crab. Use the back of a spoon to create a smooth swipe of yuzu kosho emulsion across the plate. This not only adds a professional finish but also ensures every bite is balanced with flavour.
Place the crispy soft shell crab slightly off-centre or stacked for height, a technique often used in fine dining to create visual interest. The goal is to avoid overcrowding and allow each component to stand out.
Next, carefully arrange the pickled vegetables. Think neat, intentional placement rather than piling—this adds colour contrast and keeps the dish looking clean and refined. The vibrant greens and oranges will pop against the plate, making it instantly more appetising.
Finish with delicate garnishes:
- A sprinkle of micro herbs or coriander tips for freshness
- A light dusting of lime zest for brightness and aroma
- Optional edible flowers for a premium, Instagram-worthy touch
Timing is everything—serve the dish immediately while the crab is hot and crisp to preserve its texture. Soft shell crab is at its absolute best straight from the fryer, with that perfect contrast between crunch and tenderness.
Complete the Experience
To turn this into a full dining experience, consider pairing and plating options:
- Serve alongside steamed jasmine rice or seasoned fries for a more filling main course
- Add a small side of Asian-style slaw or light salad to enhance freshness
Entertaining Tip
If you’re hosting, serve this as part of a small plates or sharing menu. Plate individually for a fine dining feel, or present on a large serving platter for a more relaxed, social dining experience. Above all, your soft shell crab tempura recipe is sure to impress any guest.