If you love adding bold yet refined flavours to everyday meals, this Yuzu Herb Butter is about to become your new kitchen essential. For those looking for a yuzu herb butter recipe, this creamy, aromatic, and citrus-fresh compound butter transforms ordinary dishes into something truly special.
Created by Nicol Retailer Limited, this recipe celebrates the unique flavour of yuzu – a prized Japanese citrus known for its fragrant blend of lemon, lime, and grapefruit notes. Combined with fresh herbs and a hint of umami, this butter delivers restaurant-quality flavour with minimal effort.
What Is Yuzu and Why It’s Used in Cooking
Yuzu is a highly aromatic citrus fruit originating from East Asia and widely used in Japanese cuisine. While it resembles a small, knobbly lemon, its flavour is far more complex, combining notes of lemon, lime, mandarin, and grapefruit. Rather than being eaten fresh, yuzu is prized for its juice and zest, which add fragrance and brightness to both savoury and sweet dishes.
In Japan, yuzu is commonly used in ponzu sauce, dressings, marinades, soups, desserts, and compound butters. Its sharp acidity cuts through rich ingredients like butter, fish, and meat, while its floral aroma lifts flavours without overpowering them. This makes yuzu especially popular with chefs looking to add depth and refinement to simple recipes.
Because fresh yuzu is rarely available in the UK, high-quality bottled yuzu juice has become the preferred choice for home cooks and professionals alike. Using a reliable, authentic product ensures consistent flavour and avoids bitterness.
If you’d like a deeper understanding of yuzu, its origins, and how it’s traditionally used, this guide from BBC Good Food offers a helpful overview: https://www.bbcgoodfood.com/howto/guide/what-yuzu
What Makes Yuzu So Special?
Yuzu is a cornerstone of Japanese cuisine, valued for its intense aroma rather than sweetness. Unlike lemon, yuzu offers floral depth and complexity, making it perfect for savoury dishes. Using high-quality juice is key, which is why this recipe features Kishida Yuzu Juice, a premium product trusted by chefs and food professionals.
A little yuzu goes a long way, lifting rich ingredients like butter while keeping flavours balanced and fresh. Ingredient usage & culinary context
Why You’ll Love This Yuzu Herb Butter
This isn’t just butter – it’s a flavour enhancer that works across cuisines and diets:
- Adds instant depth to grilled fish, prawns, or scallops
- Elevates roasted vegetables and plant-based dishes
- Melts beautifully over steak, chicken, or tofu
- Perfect for finishing rice, noodles, or warm bread
- Ideal for entertaining, meal prep, or gifting
It’s also incredibly quick to make, requiring no cooking and just a handful of ingredients.
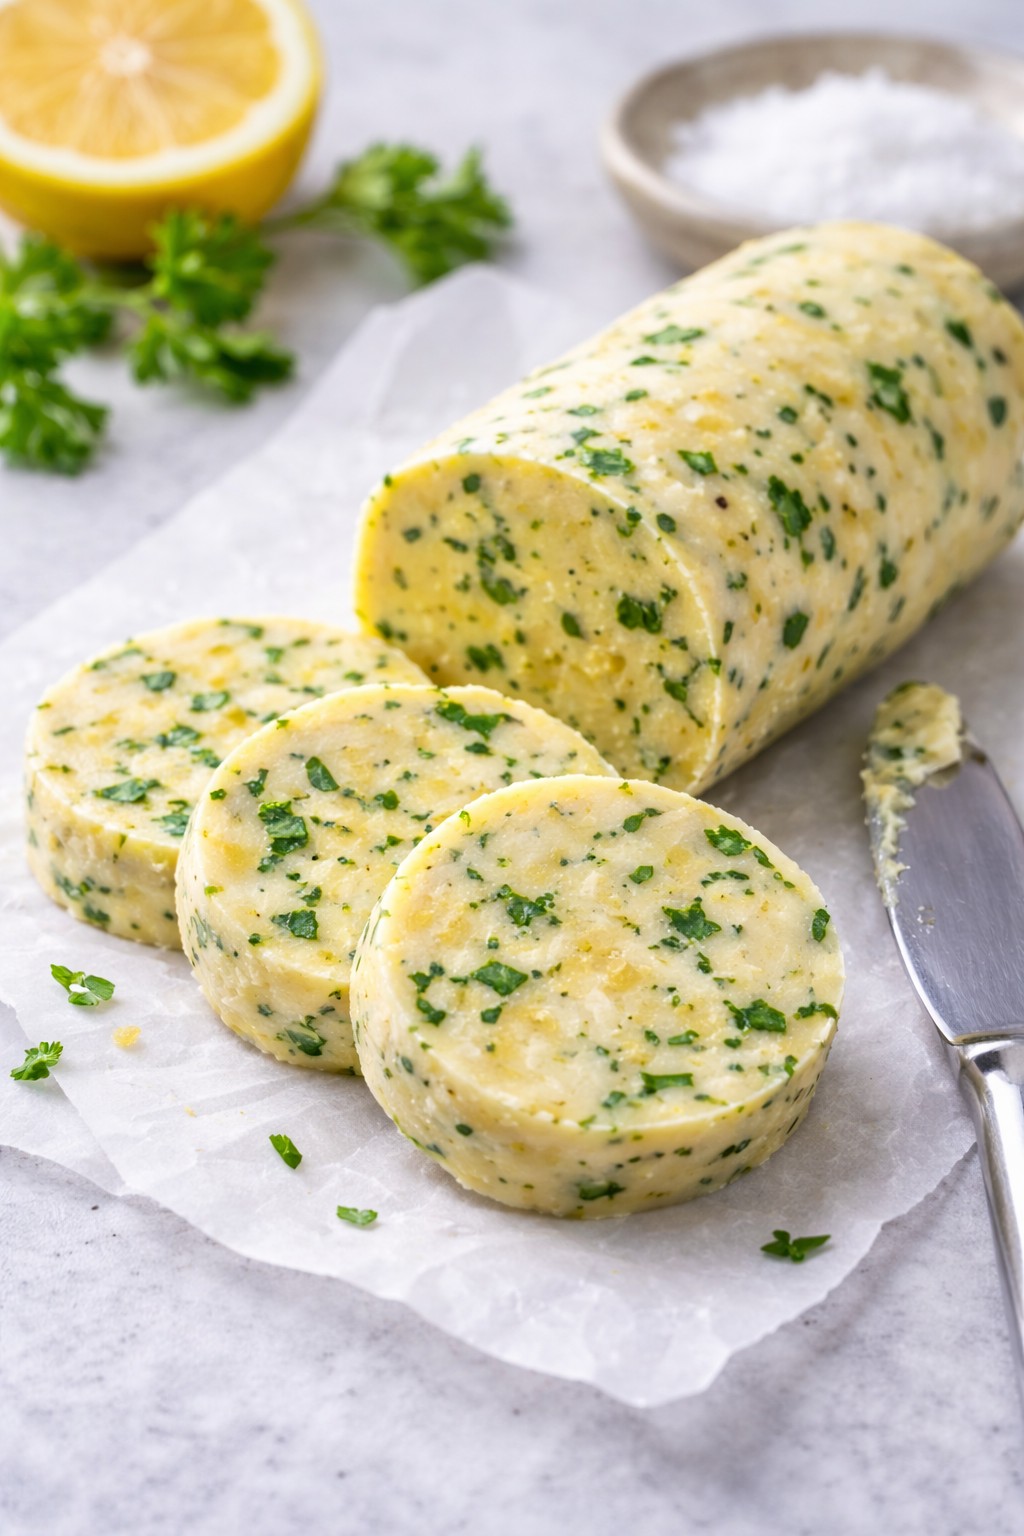
How to Make Yuzu Herb Butter
This Yuzu Herb Butter recipe is quick to prepare and requires no cooking, making it perfect for both everyday meals and special occasions. Using premium Kishida Yuzu Juice, fresh herbs, and a touch of umami, this simple compound butter delivers bold, citrus-led flavour with minimal effort. Follow the step-by-step instructions below to create a versatile butter that melts beautifully over fish, vegetables, meat, or warm bread.

Yuzu Herb Butter (Savory Compound Butter)
Ingredients
Instructions
Mix the butter:
- In a bowl, combine the softened butter with yuzu juice, herbs, miso (if using), garlic, zest, salt, and pepper. Mix until fully combined and smooth.
Shape and chill:
- Scoop the butter onto a piece of baking parchment or clingfilm, roll into a log, and twist the ends. Chill in the fridge for at least 1 hour to firm up, or freeze for longer storage.
Slice & serve:
- Slice into discs and serve over grilled salmon, roasted veg, steak, warm bread, or even stirred into steamed rice or soba noodles
Notes
Yuzu is a fragrant Japanese citrus fruit known for its sharp, floral aroma — similar to a blend of lemon, lime, and grapefruit. It’s widely used in Japanese cuisine to enhance sauces, dressings, and marinades. Where to buy yuzu juice:
We recommend Kishida Yuzu Juice 1.8L — a premium-quality product ideal for cooking, baking, and dressings available at Nicol Retailer Limited. Make-ahead & storage tips:
Yuzu herb butter can be made in advance and stored in the fridge for up to 5 days, or frozen for 3 months. Slice from frozen as needed. How to use yuzu butter:
This citrus compound butter pairs beautifully with grilled fish, roasted vegetables, steamed rice, noodles, bread, tofu, and steak. It melts easily and adds a gourmet touch to everyday dishes. Customise it:
Try swapping parsley for chives or coriander, adding chilli flakes for heat, or including a touch of white miso for a deeper umami flavour. Dietary swaps:
Use plant-based butter to make this recipe fully vegan and dairy-free. Why you’ll love it:
This recipe is quick, elegant, and brings bold flavour with minimal effort. It’s perfect for entertaining, meal prep, or enhancing weeknight dinners.
Nutrition
Serving Ideas for Yuzu Herb Butter
One of the best things about this Yuzu Herb Butter is how effortlessly it enhances a wide range of dishes. The fragrant citrus notes of yuzu cut through richness, while the herbs and umami create depth, making it a versatile finishing butter you’ll reach for again and again.
Perfect with Seafood
Yuzu herb butter melts beautifully over grilled salmon, pan-seared scallops, prawns, sea bass, or cod. The citrus freshness brightens the natural sweetness of seafood without overpowering it, making it ideal for both simple weeknight meals and elegant dinner parties.
Elevate Meat Dishes
Add a slice of yuzu butter to rested steak, roast chicken, pork chops, or lamb cutlets. As it melts, it creates a glossy, flavour-packed sauce that enhances savoury depth while keeping the dish light and balanced.
Transform Vegetables
Toss freshly roasted or steamed vegetables such as asparagus, tenderstem broccoli, green beans, carrots, mushrooms, or sweetcorn with yuzu herb butter for instant flavour. It’s an easy way to make plant-based dishes more exciting and satisfying.
Ideal for Vegetarian & Vegan Cooking
This butter is exceptional with tofu, aubergine, courgette, or roasted cauliflower. Simply swap to plant-based butter to keep it vegan while maintaining the bright, Japanese-inspired flavour profile.
Finish Rice, Noodles & Grains
Stir yuzu herb butter into steamed rice, soba noodles, udon, quinoa, or couscous for a fragrant, citrus-led finish. It adds richness without heaviness, making it perfect for Asian-inspired bowls.
Simple but Luxurious with Bread
Serve yuzu herb butter with warm sourdough, crusty baguette, focaccia, or brioche. It’s also delicious melted over corn on the cob or stirred into mashed potatoes for a refined twist.
Entertaining & Meal Prep
Because it can be made ahead and frozen, yuzu herb butter is ideal for entertaining, dinner parties, and batch cooking. Slice as needed and let it melt naturally over hot food for a restaurant-quality finish at home.
Star Ingredient: Premium Yuzu Juice from Nicol Retailer Limited
The hero of this recipe is yuzu juice – a highly prized Japanese citrus ingredient known for its fragrant aroma and vibrant, complex flavour. Unlike lemon, yuzu offers a unique balance of sharpness and floral notes, making it ideal for savoury dishes like this Yuzu Herb Butter.
For best results, we recommend using Kishida Yuzu Juice, available to buy directly from Nicol Retailer Limited. This premium-quality yuzu juice is trusted by chefs and food professionals for its consistency, freshness, and authentic flavour profile.
Using a high-quality yuzu juice ensures:
- Bright, clean citrus flavour without bitterness
- Consistent results in cooking, baking, dressings, and sauces
- A true Japanese-inspired taste that elevates simple recipes
Whether you’re making compound butter, marinades, dressings, or desserts, this yuzu juice delivers
Ingredients Available to Buy from Nicol Retailer Limited
To help you recreate this recipe with confidence, Nicol Retailer Limited stocks key specialist ingredients used in this dish:
- Kishida Yuzu Juice – Ideal for savoury recipes, desserts, drinks, and dressings
- Japanese pantry staples suitable for home cooks and professionals
- High-quality ingredients sourced with flavour and performance in mind
- Shopping with Nicol Retailer Limited means you get trusted products, reliable quality, and ingredients chosen specifically for creative cooking.
Ingredients Available to Buy from Nicol Retailer Limited
To help you recreate this recipe with confidence, Nicol Retailer Limited stocks key specialist ingredients used in this dish:
- Kishida Yuzu Juice – Ideal for savoury recipes, desserts, drinks, and dressings
- Japanese pantry staples suitable for home cooks and professionals
- High-quality ingredients sourced with flavour and performance in mind
Shopping with Nicol Retailer Limited means you get trusted products, reliable quality, and ingredients chosen specifically for creative cooking.
Yuzu Herb Butter FAQ – How to Use Yuzu Juice in Cooking
What is yuzu juice used for?
Yuzu juice is a highly aromatic Japanese citrus ingredient used to bring brightness and depth to both savoury and sweet dishes. It’s especially popular in sauces, marinades, dressings, desserts, and elegant finishing touches like yuzu herb butter, where it balances richness with fresh citrus notes.
Can yuzu juice replace lemon in recipes?
Yes. Yuzu can be used instead of lemon, but it offers a more refined flavour. While lemon is sharp and direct, yuzu delivers floral, mandarin-like notes with gentle bitterness, creating a more complex and elegant finish.
Is yuzu herb butter vegetarian or vegan?
This yuzu herb butter is vegetarian and naturally gluten-free. To make it vegan, simply use a high-quality plant-based butter — the citrus and herb flavours remain beautifully balanced.
How long does yuzu herb butter keep?
Stored in an airtight container, yuzu herb butter lasts up to 5 days in the fridge. It can also be frozen for up to 3 months. Freezing it in a log allows you to slice off portions as needed.
What does yuzu herb butter taste like?
It’s creamy and silky with a fragrant citrus lift. The butter provides richness, the herbs add freshness, and yuzu brings a bright, floral tang that feels lighter and more aromatic than lemon.
What dishes pair best with yuzu herb butter?
Yuzu herb butter pairs beautifully with grilled fish, prawns, roasted vegetables, tofu, steak, chicken, rice, noodles, and warm bread. Use it as a finishing butter to instantly elevate simple dishes.
Where can I buy yuzu juice in the UK?
You can buy premium Kishida Yuzu Juice from Nicol Retailer Limited. It’s ideal for cooking, baking, dressings, drinks, and Japanese-inspired recipes.
Why add yuzu to compound butter?
Yuzu’s acidity and aroma cut through butter’s richness, creating balance and elegance. It transforms simple butter into a restaurant-quality finishing ingredient with minimal effort.