
There’s something magical about Christmas dinner — the smell of rosemary and thyme filling the kitchen, the sparkle of fairy lights, and the comfort of a hearty roast at the centre of the table.
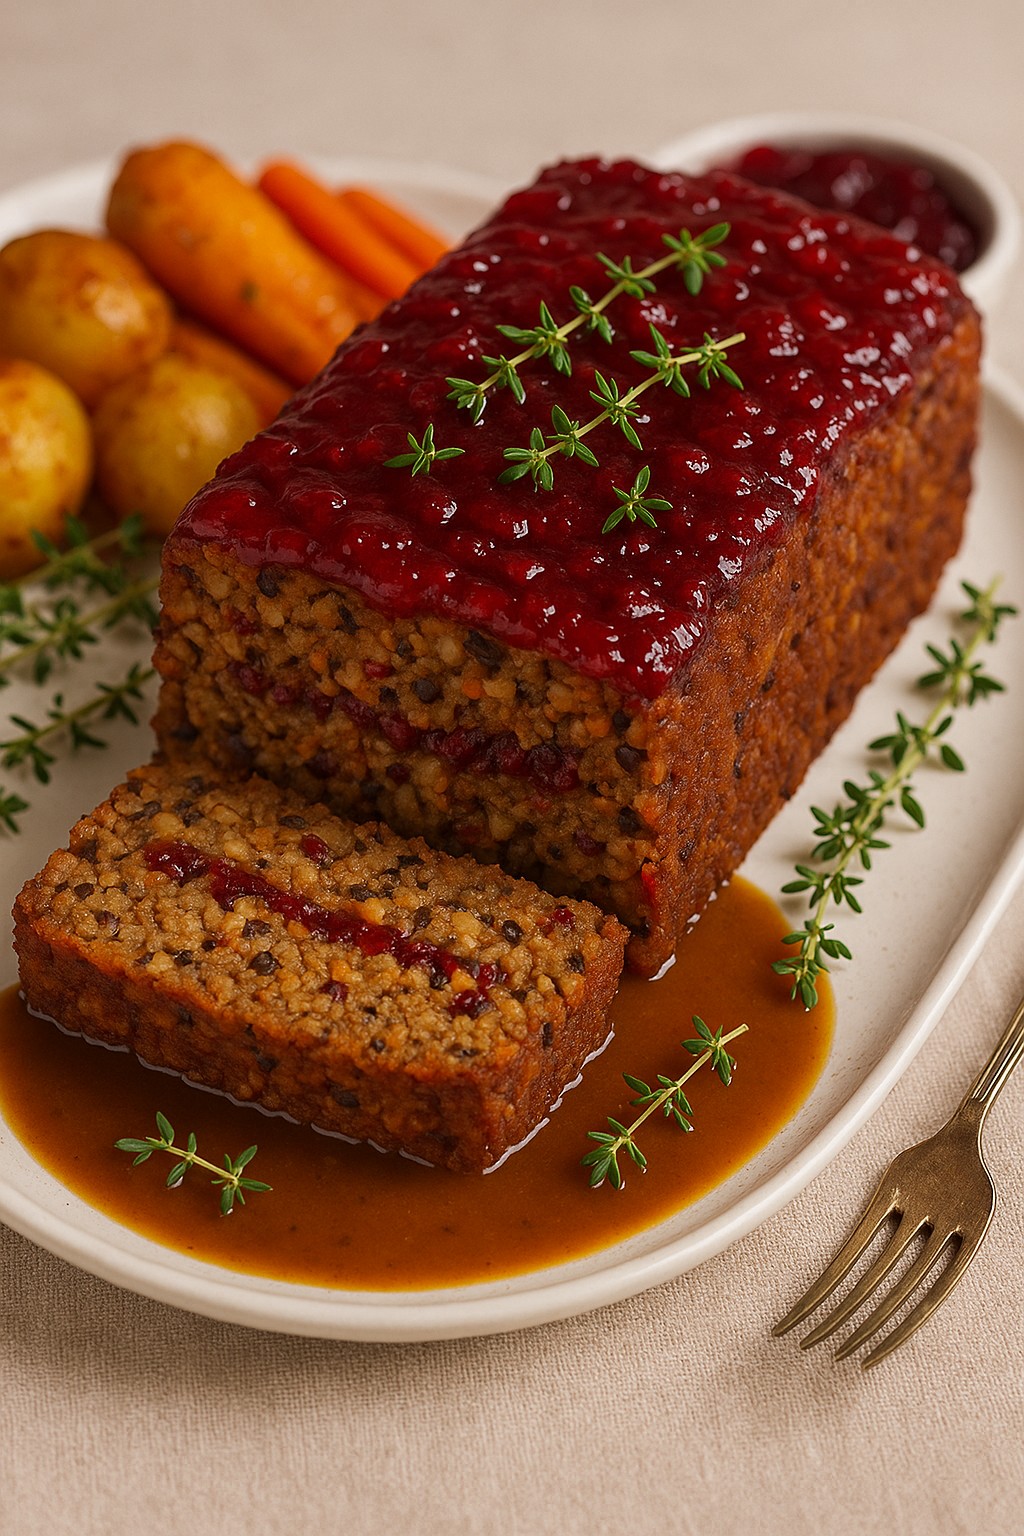
If you’re planning a vegan or vegetarian Christmas dinner, this Festive Nut Roast Loaf with Cranberries & Chestnuts deserves pride of place.
Rich, hearty, and beautifully glazed with cranberry sauce, this nut roast is a far cry from the dry, dull versions of the past. It’s moist, full of texture, and bursting with savoury-sweet flavour from chestnuts, mushrooms, and herbs.
The Secret to a Perfect Nut Roast
A truly great nut roast is all about balance — nutty crunch, tender vegetables, and a touch of festive sweetness. In this recipe, roasted nuts and chestnuts bring depth, mushrooms and lentils add savoury body, and cranberries provide that Christmassy sparkle.
Why It’s a Christmas Classic
This festive nut roast brings together everything we love about Christmas cooking: comfort, colour, and community. It’s a dish that feels homemade, wholesome, and special — without being complicated. Every slice tells a story: toasted nuts for crunch, lentils for body, chestnuts for warmth, and cranberries for a sparkle of joy. It’s proof that vegan food can be indulgent, comforting, and utterly beautiful on the Christmas table.
Recipe
Now, let’s dive into what you’ll need to create this perfect Christmas nut roast:

Festive Nut Roast Loaf with Cranberries & Chestnuts
Ingredients
For the roast:
- 2 tbsp olive oil
- 1 large onion, finely chopped
- 3 garlic cloves, minced
- 2 medium carrots, grated
- 2 celery sticks, finely diced
- 1 large red pepper, finely chopped
- 200 g mushrooms, finely chopped
- 150 g cooked chestnuts, roughly chopped
- 250 g mixed nuts (walnuts, almonds, cashews, or hazelnuts), toasted and roughly chopped
- 150 g breadcrumbs (use gluten-free if needed)
- 150 g cooked lentils (green or brown)
- 3 tbsp soy sauce or tamari
- 2 tbsp tomato purée
- 2 tsp dried thyme
- 1 tsp dried rosemary
- 1 tsp smoked paprika
- 100 g cooked lentils (green or brown)
- 2 tbsp nutritional yeast (optional but adds savoury depth)
- 60 g dried cranberries
- Salt and black pepper, to taste
For binding:
- 3 tbsp ground flaxseed mixed with 9 tbsp warm water (or 3 beaten eggs if not vegan)
For the topping:
- 4 tbsp cranberry sauce or chutney
Instructions
cranberry sauce or chutney
Preheat oven:
- 180°C (fan 160°C) / 350°F. Line a large 2lb loaf tin with baking paper.
Cook the vegetables:
- Heat olive oil in a large frying pan. Sauté the onion, garlic, carrot, celery, and red pepper for 5–6 minutes until soft.
Add mushrooms:
- Stir in mushrooms and cook for another 5 minutes, until most of the moisture evaporates.
Combine ingredients:
- In a large bowl, mix the cooked vegetables with the chestnuts, chopped nuts, breadcrumbs, lentils, soy sauce, tomato purée, herbs, smoked paprika, nutritional yeast, cranberries, salt, and pepper.
Bind the mixture:
- Add the flaxseed mixture (or eggs). Stir well until everything holds together. Add extra breadcrumbs if too wet or a splash of water if too dry.
Assemble the loaf
- Spoon half the mixture into the tin, press down firmly, spread with half the cranberry sauce, then add the rest of the mixture on top. Smooth the surface and finish with the remaining cranberry sauce.
Bake:
- Cook for 50–60 minutes, until firm, golden, and slightly crisp on the edges.
Rest before serving:
- Allow the loaf to rest for 10 minutes before slicing — this helps it hold together beautifully.
Notes
Nutrition
Serving Suggestions
A glorious nut roast loaf like this deserves to be served in style — surrounded by all the trimmings, glistening gravy, and the sparkle of Christmas cheer. Here are some delicious ways to serve your Festive Nut Roast with Cranberries & Chestnuts for a truly memorable meal:
1. The Classic Roast Dinner Plate
Pair your nut roast with all the traditional trimmings for the ultimate comforting Christmas feast:
- Crispy roast potatoes tossed in olive oil and rosemary for that irresistible crunch.
- Maple-glazed carrots and parsnips that bring natural sweetness to the plate.
- Brussels sprouts with chestnuts sautéed in vegan butter for a double-chestnut hit.
- Rich vegan gravy, poured generously over each slice for a luscious, savoury finish.
This combination strikes the perfect balance of flavours — crisp, creamy, sweet, and savoury — everything a Christmas dinner should be.
2. For a Lighter Festive Lunch
If you’d rather serve this nut roast as part of a lighter meal, try pairing it with:
- A winter salad made from kale, roasted beetroot, orange segments, and toasted pecans.
- A spoonful of cranberry relish for tang and colour.
- Some warm crusty bread or roasted root vegetables drizzled with olive oil and thyme.
It’s simple, elegant, and full of seasonal flavour — perfect for Boxing Day lunch or a relaxed New Year’s Eve supper.
3. The Leftover Magic
One of the best things about this nut roast? The leftovers. Slice it thick and layer it into sandwiches with:
- Vegan mayo, rocket, and extra cranberry sauce for a fresh, festive kick.
- Or crumble it into a wrap with stuffing and roasted veg for a delicious on-the-go treat.
- You can even reheat slices in a pan until golden and serve with a fried egg (if not vegan) or tofu scramble for a hearty post-Christmas brunch.
5. Presentation Tips for the Wow Factor
Turn your nut roast into the star of the show with a few finishing touches:
- Brush the top with extra cranberry sauce before serving for that glossy, ruby-red shine.
- Garnish with fresh thyme or rosemary sprigs for an elegant, aromatic finish.
Serve it on a rustic wooden board or white platter surrounded by roasted vegetables and twinkling lights for a picture-perfect festive look.
Make It Ahead – Stress-Free Christmas Cooking
Christmas Day is magical — but let’s be honest, it can also be hectic. Between roasting potatoes, basting veggies, and keeping the prosecco chilled, the last thing you want to worry about is timing your main course perfectly. That’s why this Festive Nut Roast with Cranberries & Chestnuts is a dream come true for busy cooks — it’s make-ahead friendly, freezer-safe, and easy to reheat without losing flavour or texture
Make the Mixture in Advance
If you want to save time on the big day, you can prepare the nut roast mixture up to 24 hours ahead. Here’s how:
- Follow the recipe up to the point of baking.
- Pack the uncooked mixture into your lined loaf tin.
- Cover tightly with cling film or foil and store it in the fridge overnight.
When you’re ready to cook, simply remove it from the fridge, let it sit at room temperature for 20–30 minutes, then bake as normal. This method not only saves time but also allows the flavours to develop and deepen overnight, making the roast even tastier.
How to Freeze Your Nut Roast
This recipe freezes beautifully, so you can make it weeks in advance and still enjoy that just-baked freshness. To freeze before baking:
- Assemble the loaf, wrap it tightly in cling film and foil, and freeze for up to 2 months.
- Defrost completely in the fridge overnight before baking.
To freeze after baking:
- Allow the loaf to cool completely.
- Wrap well in foil or place in an airtight container.
- Label with the date and freeze for up to 3 months.
To reheat, defrost overnight in the fridge, then cover loosely with foil and bake at 170°C (fan 150°C) for about 20–25 minutes, until piping hot in the centre.
Reheating and Refreshing the Glaze
To restore that gorgeous glossy top, brush the nut roast with fresh cranberry sauce or a drizzle of maple syrup just before reheating. This not only refreshes the appearance but also locks in moisture and gives it that irresistible festive shine. If you’re reheating individual slices, a few minutes in the oven or a quick pan-sear in olive oil works wonders — it gives a lightly crisped edge while keeping the middle soft and juicy.
Serving on the Day
Once reheated, plate it up on a warm serving dish and garnish with:
- Fresh rosemary sprigs
- Whole cranberries
- A scattering of toasted nuts or pomegranate seeds for sparkle
No one will ever guess it was made ahead — it looks and tastes like it just came out of the oven.
Why This Recipe Is Perfect for Planning Ahead
One of the joys of this make-ahead vegan nut roast is its flexibility:
- Holds its shape perfectly even after freezing or reheating
- Tastes even better the next day, as the flavours have time to mingle
- Saves time and stress on Christmas morning
- Leaves your oven free for all those glorious trimmings.
A Little Christmas Wisdom
Christmas cooking isn’t about perfection — it’s about joy, warmth, and good food shared with loved ones. With this make-ahead Festive Nut Roast Loaf with Cranberries & Chestnuts, you’ll have one less thing to worry about and one more reason to celebrate. Light the candles, pour a glass of something bubbly, and let the delicious aroma of your homemade nut roast fill the house. You’ve earned it.
Created by Nicol Retailer Limited
This Festive Nut Roast Loaf with Cranberries & Chestnuts recipe was lovingly created by Nicol Retailer Limited — your trusted source for quality vegan, gluten-free, and festive ingredients. Every element of this dish, from the mixed nuts and chestnuts to the herbs, lentils, and cranberry sauce, is available to buy directly from Nicol Retailer.
Explore our full range of seasonal products, plant-based essentials, and baking favourites in-store or online at Nicol Retailer Limited and bring your Christmas cooking to life with quality you can taste.
Shop the Ingredients for This Recipe
Make your Christmas cooking simple, stress-free, and full of festive flavour with Nicol Retailer Limited.
We stock everything you need to recreate this Festive Nut Roast Loaf with Cranberries & Chestnuts — all in one place!
Ingredients Available at Nicol Retailer
Mixed Nuts – premium quality almonds, cashews, walnuts & hazelnuts for the perfect crunch.
Lentils – wholesome plant-based protein that adds heartiness and texture.
Cooked Chestnuts – sweet, buttery, and ready to chop straight into your nut roast.
Cranberry Sauce – tangy and glossy, ideal for glazing your loaf or serving on the side.
Herbs & Spices – rosemary, thyme, smoked paprika, and festive seasonings for authentic Christmas flavour.
Breadcrumbs (Gluten-Free Option Available) – to hold your roast together beautifully.
Olive Oil, Tomato Purée & Soy Sauce – pantry staples for that savoury, umami richness.
All ingredients are available to buy at Nicol Retailer Limited, in online. We pride ourselves on offering high-quality vegan, vegetarian, and allergy-friendly ingredients, carefully sourced to make your festive meals truly special.
Bring your Christmas menu to life with the best festive ingredients from Nicol Retailer Limited.
Visit: https://nicolretailer.com/shop/