Posted on

Ajvar Recipe with Roasted Red Peppers & Aubergine

Have you ever wondered how to transform your cooking with a vibrant, flavour-packed spread? Look no further than Ajvar, a beloved Balkan condiment that effortlessly combines roasted red peppers and aubergine into a delightful medley. This Ajvar recipe with roasted red peppers & aubergine is a must-try for anyone eager to explore new culinary horizons.

Ajvar, known for its rich taste and versatility, can turn the simplest dishes into gourmet experiences. Originating from the Balkans, this condiment has gained popularity worldwide, not just for its flavour but also for its ease of preparation. With just a few fresh ingredients and some roasting, you can create a spread that will become a staple in your kitchen.


One of the beauties of this Ajvar recipe with roasted red peppers and aubergine lies in its simplicity and the natural flavours of the vegetables. Roasted red peppers bring a sweetness and smokiness that is hard to resist, while aubergines add a creamy texture, making the spread both indulgent and wholesome. The fusion of these ingredients creates a condiment that pairs well with a multitude of dishes, from grilled meats to toasted bread.


Whether you’re new to cooking or a seasoned chef, preparing Ajvar is a rewarding experience. Its vibrant colour and robust flavour will captivate your senses and impress anyone who tastes it. The best part? It’s as healthy as it is delicious, making it a perfect addition to your diet.


Ready to dive into the world of Ajvar? With this step-by-step Ajvar recipe using roasted red peppers & aubergine, you’ll find that making this roasted red peppers and aubergine recipe is not only easy but also incredibly satisfying. Let’s get started and bring some Balkan charm to your kitchen:

Ajvar with Roasted Red Peppers, Aubergine & Paprika Recipe

Print Recipe
Discover the rich and smoky flavours of Ajvar, a traditional Balkan roasted vegetable spread made with red peppers, aubergine, and paprika. This vibrant and versatile dish can be enjoyed as a dip, spread, or side, making it a perfect addition to your meals. The natural sweetness of roasted peppers and the earthy depth of aubergine come together with a subtle kick of paprika to create a taste that's both comforting and full of character. Whether served with fresh bread, crackers, or grilled meats, this simple yet flavourful recipe is sure to impress. Prepare this delightful homemade condiment and bring a taste of the Balkans to your table!
Course Appetizer, brunch, Side Dish, snacks
Cuisine Balkan / Southeast European Cuisine
Diet Gluten Free, Vegan, Vegetarian
Keyword how to make ajvar at home, mediterranean-style spread, roasted red pepper and aubergine dip, roasted vegetables dip recipe, smokey red dip, tTraditional ajvar with paprika, vegan ajvar spread, vegan Balkan recipes
Prep Time 20 minutes
Cook Time 50 minutes
Servings 4 People
Calories 40

Instructions

Prepare the vegetables

  • Preheat your oven to 220°C (200°C fan)/Gas Mark 7. Line a baking tray with parchment paper. Place the red peppers and aubergine on the tray and roast them for 30–40 minutes, turning occasionally, until the skins are charred and the vegetables are soft.

Cool and peel

  • Once roasted, transfer the peppers and aubergine to a bowl and cover with a plate or cling film. Let them cool for about 10 minutes. This helps loosen the skins. Peel the skins off the peppers and aubergine, and remove the seeds from the peppers.

Blend the ingredients

  • Place the peeled peppers and aubergine in a food processor or blender. Add the minced garlic, chopped chilli (if using), paprika, olive oil, and red wine vinegar. Blend until smooth, but leave a little texture if preferred.

Season and cook

  • Transfer the blended mixture to a large pan. Cook on low heat for 10–15 minutes, stirring frequently, to allow the flavours to develop and excess liquid to evaporate. Season with salt and pepper to taste.

Serve

  • Allow the ajvar to cool slightly before serving. It can be served warm or at room temperature. Enjoy as a dip with crusty bread, as a spread for sandwiches, or alongside grilled meats and vegetables.

Notes

Tips

When preparing Ajvar, the excellence of your ingredients can truly transform the final result. Let’s explore the vital components that elevate this roasted red peppers and aubergine recipe to its full potential.
Roasted red peppers are the cornerstone of any authentic Ajvar. These vibrant vegetables bring a natural sweetness and a hint of smokiness to the spread. For the best results, select fresh, ripe peppers with a bright red hue, indicating peak ripeness and flavour. Roasting them until slightly charred intensifies their taste, making them an indispensable element in your recipe.
Aubergines, also known as eggplants, contribute a creamy texture that beautifully balances the sweetness of the peppers. Choosing the right aubergines is key. Look for ones that are firm and free of blemishes. Smaller varieties often have a milder flavour and fewer seeds, which are perfect for this dish. Their inclusion adds depth and enhances the nutritional value of your Ajvar.
Another important ingredient is garlic, which adds a pungent kick that complements the roasted vegetables. Fresh, minced garlic is preferable for achieving that robust flavour. Additionally, a splash of vinegar helps to enhance the overall taste, adding a slight tanginess that lifts the richness of the peppers and aubergines.
Olive oil is another crucial component. It not only aids in roasting but also enriches the blend with a smooth, luscious texture. Opt for high-quality olive oil to ensure the best possible taste.
Lastly, seasoning with salt and pepper allows you to tailor the Ajvar to your liking, highlighting the natural flavours of the vegetables. Adjust the seasoning as needed to create a spread that perfectly suits your palate.

Nutrition

Serving: 30g | Calories: 40kcal | Carbohydrates: 2.5g | Protein: 0.5g | Fat: 3.5g | Saturated Fat: 0.5g | Fiber: 1g

Serving Suggestions

Ajvar’s culinary adaptability makes it an exciting addition to a variety of dishes, transforming them with its rich, vibrant taste.


Spread Ajvar on toasted bread for a simple yet delightful snack, or use it as a flavourful dip for an assortment of fresh vegetables. It works wonderfully as a side for grilled meats and fish, infusing them with a smoky, sweet undertone that enhances their natural flavours. Try spooning it over baked potatoes for a delicious twist or incorporating it into sandwiches and wraps for an extra layer of taste and texture.


For a quick and tasty meal, mix Ajvar into pasta as a sauce. Its robust flavours blend seamlessly with the pasta, creating a dish that is both satisfying and easy to prepare. You can also stir Ajvar into rice or couscous, adding a burst of flavour that elevates these simple grains into a gourmet experience.


Pairing Ajvar with dairy products like cheese or yoghurt brings out its versatility. Swirl it into Greek yoghurt to create a creamy, tangy dip that pairs well with pita bread or crudités. Alternatively, spread it over soft cheeses like ricotta or goat cheese for an appetising starter that’s sure to impress.


For a more creative use, try adding a dollop of Ajvar to your morning eggs. Whether scrambled, fried, or poached, eggs benefit from the added depth of flavour that Ajvar provides. You can even mix it into your egg salad for a unique twist on a classic recipe.


Ajvar’s versatility doesn’t stop there. Use it as a pizza topping or mix it into your homemade burger patties for an unexpected kick. This Ajvar recipe with roasted red peppers & aubergine offers vibrant taste and rich texture, making it a fantastic addition to countless dishes, making every meal more exciting.

Storing and Preserving Ajvar

To maintain the vibrant taste of your homemade Ajvar, proper storage is essential. For short-term enjoyment, place your Ajvar in an airtight container and refrigerate it. This method keeps it fresh for up to a week, ensuring you can relish its flavours daily.


If you wish to enjoy your Ajvar for a longer period, canning is an excellent option. Start by sterilising jars to prevent any contamination. Fill each jar with hot Ajvar, leaving a bit of space at the top to allow for expansion. Seal the jars tightly and process them in a boiling water bath. Once properly canned, store the jars in a cool, dark place. This technique ensures that your Ajvar recipe with roasted red peppers & aubergine stays preserved for several months, ready to add a burst of flavour to your meals whenever you desire.


Whether you’re storing it short-term or canning it for later, these methods will help you keep your Ajvar fresh and delicious. Enjoy the convenience of having this versatile condiment on hand to elevate your dishes effortlessly.

Posted on

Carrot Hummus with Olive Oil and Paprika

If you’re looking to bring some variety to your usual snack options, Carrot Hummus with Olive Oil and Paprika is a fantastic choice. This tasty take on traditional hummus offers a unique flavour combination that is both sweet and earthy. Carrots contribute a natural sweetness that complements the rich, creamy texture of chickpeas.

This dish is incredibly flexible and can be enjoyed in a range of situations. Whether you’re planning a picnic, hosting a gathering, or simply after a nutritious snack, Carrot Hummus with Olive Oil and Paprika makes an excellent option. Its bright orange colour is visually striking, making it a great addition to any table.

Furthermore, the ingredients in this recipe offer plenty of health benefits. Carrots are a rich source of beta-carotene, which supports eye health, while chickpeas provide protein and fibre, making this hummus a satisfying and nourishing choice. Olive oil adds a touch of richness, and paprika contributes a gentle kick that balances the flavours wonderfully.

Making Carrot Hummus is simple and requires little effort, making it ideal for both experienced cooks and beginners. The method involves blending cooked carrots with chickpeas, tahini, lemon juice, garlic, and a selection of spices to create a smooth and tasty dip. A final drizzle of olive oil and sprinkle of paprika not only enhances the flavour but also adds to its presentation. For those keen on experimenting, incorporating olive oil and paprika can further elevate the humble carrot hummus.

Include this delightful Carrot Hummus in your snack repertoire and enjoy a refreshing twist on a classic favourite.

To create your own Carrot Hummus with Olive Oil and Paprika, follow the following:

Carrot Hummus with Olive Oil and Paprika Garnish

Print Recipe
Carrot hummus with olive oil and paprika garnish is a delightful twist on the classic chickpea-based dip, offering a vibrant blend of flavours and colours. This recipe combines the natural sweetness of roasted carrots with the earthy undertones of tahini, balanced perfectly with zesty lemon juice and a hint of garlic. Drizzled with high-quality olive oil and topped with a sprinkling of smoky paprika, this dish not only looks appealing but also provides a depth of taste that’s both hearty and satisfying. Perfect as a dip for warm pita, a spread for sandwiches, or a healthy addition to a mezze platter, it’s a simple yet impressive dish that’s sure to win over guests.
Course Appetizer, Side Dish, Snack, Starter
Cuisine Mediterranean
Diet Vegan, Vegetarian
Keyword Carrot hummus, Carrot hummus recipe, Carrot hummus with olive oil, Carrot hummus with paprika
Prep Time 10 minutes
Cook Time 25 minutes
Servings 4 People
Calories 52

Instructions

  • Preheat your oven to 200°C (180°C fan)/Gas Mark 6.
  • Spread the chopped carrots on a baking tray, drizzle with 1 tablespoon of olive oil, and season with salt and pepper. Roast in the oven for about 25 minutes or until the carrots are tender and slightly caramelised. Remove from the oven and allow them to cool for a few minutes.
  • In a food processor, combine the roasted carrots, chickpeas, tahini, lemon juice, garlic, ground cumin, smoked paprika, and 1 tablespoon of olive oil. Blend until smooth and creamy. If the mixture is too thick, add a small amount of water, a tablespoon at a time, until the desired consistency is achieved.
  • Taste the hummus and adjust seasoning with more salt, pepper, or lemon juice if needed.
  • Spoon the hummus into a serving bowl. Drizzle with extra olive oil and sprinkle a pinch of smoked paprika on top for garnish.
  • Serve with warm pitta bread, crudités, or crackers.

Nutrition

Calories: 52kcal | Carbohydrates: 4g | Protein: 2g | Fat: 4g | Saturated Fat: 1g | Polyunsaturated Fat: 2g | Monounsaturated Fat: 2g | Sodium: 3mg | Potassium: 72mg | Fiber: 1g | Sugar: 1g | Vitamin A: 11IU | Vitamin C: 15mg | Calcium: 18mg | Iron: 0.5mg

Serving Suggestion

Carrot Hummus is a versatile and tasty addition to many meals and snacks. Its distinctive flavour and vibrant colour make it a standout choice for a variety of serving options. One of the simplest and most popular ways to enjoy carrot hummus paired with olive oil and paprika is with fresh vegetable sticks such as cucumber, pepper, and celery. The crisp texture of the vegetables pairs beautifully with the creamy hummus.

Pitta bread is another excellent accompaniment. Warmed and cut into triangles, pitta bread provides a soft and chewy contrast that enhances the overall eating experience. Crackers, especially those with seeds or whole grains, are also a great option for dipping.

For a more filling meal, consider using Carrot Hummus as a spread in sandwiches or wraps. It adds a flavourful and nutritious layer that works well with a variety of fillings, from grilled chicken and roasted vegetables to fresh greens and sliced avocado. Try Carrot Hummus with Olive Oil and Paprika even as a base for an open-faced sandwich topped with ingredients like sliced tomatoes, cucumbers, and sprouts.

If you’re aiming to add a unique touch to your starters, use Carrot Hummus as a topping for crostini. Spread a generous layer on toasted baguette slices and finish with a sprinkle of herbs or a few roasted chickpeas for added texture and flavour.

Carrot Hummus also works wonderfully as a side dish. Serve it alongside grilled meats such as chicken, beef, or lamb for a nutritious and flavour-packed complement. It pairs particularly well with roasted vegetables, enhancing their natural sweetness and adding depth to the dish.

For a gathering or celebration, create a platter featuring Carrot Hummus. Surround it with an assortment of items such as olives, cherry tomatoes, cheese cubes, and a variety of bread and crackers. This not only provides an appealing spread but also ensures there’s something for everyone to enjoy.

Another creative way to incorporate Carrot Hummus is by using it as a salad dressing. Simply thin it out with a little water or extra lemon juice and drizzle it over mixed greens for a healthy and flavourful dressing.

Storing and Shelf Life

To keep your Carrot Hummus fresh, place it in an airtight container and store it in the fridge. It should stay fresh for around 4 to 5 days. For longer preservation, Carrot Hummus with the added olive oil and paprika can be frozen. Use a container suitable for the freezer, ensuring you leave some space at the top to allow for expansion. When stored correctly, it will remain good for up to a month. When you’re ready to enjoy the hummus again, move it from the freezer to the fridge to defrost. Once it has thawed, give it a thorough stir to restore its creamy texture before serving.

Posted on

The Ultimate Quinoa Recipe: Stuffed Bell Peppers with a Twist

Craving a meal that’s both nutritious and bursting with flavour? Our Stuffed Bell Peppers Recipe is just what you need! Imagine biting into a colourful bell pepper, overflowing with a hearty mix of quinoa, sweet corn, and black beans. It’s a feast for your eyes and your taste buds! This quinoa recipe is perfect for anyone looking to add a little excitement to their dinner routine. Whether you’re cooking for your family, hosting friends, or just treating yourself, The Ultimate Quinoa Recipe: Stuffed Bell Peppers with a Twist are sure to impress.

So, what makes this dish so special? For one, it’s incredibly versatile. You can easily customise the filling to suit your tastes. Want a bit more spice? Add some chopped jalapeños. Looking for extra protein? Toss in some shredded chicken or tofu. The options are endless for The Ultimate Quinoa Recipe: Stuffed Bell Peppers with a Twist!

Another reason to love this recipe is its simplicity. Even if you’re not a seasoned chef, you’ll find the steps straightforward and easy to follow. Plus, the ingredients for this ultimate quinoa recipe are easily accessible and likely already in your pantry.
But let’s not forget the health benefits. This recipe is packed with vitamins, minerals, and fibre, making it a nutritious choice for any meal. The combination of quinoa and black beans provides a hearty dose of plant-based protein, while the bell peppers add a delightful crunch and a splash of colour to your plate. This truly is the ultimate quinoa recipe.
Ready to get started? Grab your apron and let’s dive into the world of stuffed bell peppers!

Stuffed Bell Peppers with Quinoa, Sweet Corn, and Black Beans Recipe

Print Recipe
Looking for a healthy, colourful, and absolutely delicious meal that’s perfect for any day of the week? These Stuffed Bell Peppers with Quinoa, Sweet Corn, and Black Beans are everything you need – hearty, high-protein, and completely plant-based! Plus, they’re gluten-free, budget-friendly, and easy to prep ahead.
Course Main Course
Diet Vegetarian
Keyword Stuffed Bell Peppers with Quinoa, Sweet Corn, and Black Beans Recipe
Prep Time 20 minutes
Cook Time 35 minutes
Servings 4 People
Calories 5

Instructions

Prepare the Bell Peppers

  • Preheat your oven to 190°C (375°F). Slice the tops off the bell peppers and remove the seeds and membranes inside. If needed, carefully trim the bottoms so they stand upright, but avoid cutting through to the hollow. Place them upright in a lightly greased baking dish.

Cook the Quinoa

  • In a medium saucepan, bring the quinoa and vegetable stock (or water) to a boil. Reduce the heat to low, cover, and simmer for about 15 minutes, or until the quinoa is tender and the liquid has been absorbed. Fluff with a fork and set aside.

Prepare the Filling

  • Heat the olive oil in a large pan over medium heat. Add the onion and cook until soft, about 3–4 minutes. Stir in the garlic, cumin, smoked paprika, and chilli powder (if using) and cook for another minute, until fragrant.
  • Add the sweetcorn, black beans, and diced tomato to the pan, stirring well. Cook for 3–4 minutes, until heated through. Stir in the cooked quinoa and season with salt and pepper to taste.

Stuff the Peppers

  • Generously spoon the quinoa mixture into the hollowed-out bell peppers, pressing gently to fill them completely. If you like, sprinkle grated cheddar cheese over the top of each stuffed pepper.

Bake

  • Cover the dish with aluminium foil and bake in the preheated oven for 25 minutes. Remove the foil and bake for another 10 minutes, or until the peppers are tender and the Mozzarella Vegan cheese (if used) is melted and golden.

Garnish and Serve

  • Remove the stuffed peppers from the oven and let them cool slightly. Sprinkle with chopped coriander, if desired, and serve warm.

Notes

Tips
– If you have extra filling, serve it on the side or save it for another meal.
– For a non-vegan version, simply skip the cheddar cheese or mozzarella cheese.

Nutrition

Calories: 5kcal | Carbohydrates: 0.5g | Protein: 0.2g | Fat: 0.4g | Saturated Fat: 0.1g | Polyunsaturated Fat: 0.1g | Monounsaturated Fat: 0.3g | Sodium: 1mg | Potassium: 20mg | Fiber: 0.2g | Sugar: 0.1g | Vitamin A: 253IU | Vitamin C: 0.04mg | Calcium: 6mg | Iron: 0.4mg

Serving Suggestions

Looking for the perfect way to serve your stuffed bell peppers? Here are some fantastic ideas to elevate your meal:

  • Garnishes – Add a pop of colour and flavour with fresh cilantro, a squeeze of lime juice, or a sprinkle of tangy feta cheese. These simple toppings can make a big difference and add an extra layer of deliciousness to The Ultimate Quinoa Recipe: Stuffed Bell Peppers with a Twist.
  • Accompaniments – Pair your stuffed peppers with a fresh green salad drizzled with a light vinaigrette. The crispness of the salad will complement the hearty stuffed peppers beautifully. Another great side is a dollop of creamy guacamole, which adds a rich and satisfying texture to your plate.
  • Dips and Sauces – Elevate your dish by serving it with a side of spicy salsa or a cool, refreshing cucumber yogurt dip. These sauces can enhance the flavours and provide a delightful contrast to the warm stuffed peppers.
  • Breads and Grains – Serve your stuffed peppers alongside a slice of crusty garlic bread or a small portion of fluffy couscous. These sides are perfect for soaking up any extra juices and adding a satisfying crunch to your meal.

Recipe Variations

Ready to take your Stuffed Bell Peppers Recipe to the next level? Let’s talk variations! Have you ever thought about adding a Mediterranean twist? Try stuffing your peppers with a mix of quinoa, black olives, sun-dried tomatoes, and a sprinkle of feta cheese. The combination of flavours will transport you straight to a seaside taverna! This ultimate quinoa recipe really shines in its adaptability.


For those who love a bit of heat, consider mixing in some chopped jalapeños or a dash of cayenne pepper. You could even add a smoky chipotle sauce to the filling for a bold, spicy kick. How about adding some diced avocado for a creamy texture that balances out the spice?


If you’re looking to boost the protein content, shredded chicken or crumbled tofu makes a fantastic addition. You can also experiment with different grains like wild rice or farro for a unique texture and flavour profile. Chickpeas are another great option—they add a nutty flavour and extra fibre.


Don’t forget to think about the herbs and spices! A sprinkle of fresh basil or cilantro can brighten up the dish, while a pinch of cumin or smoked paprika can add depth and warmth.


The true beauty of this stuffed bell peppers recipe lies in its flexibility. You can adjust the ingredients based on what you have on hand or what’s in season. Plus, involving your family or friends in the process can make cooking even more fun.


We’d love to hear your creative takes on this recipe! Share your favourite variations and tips in the comments below. Your ideas could inspire others to create their own delicious versions of The Ultimate Quinoa Recipe: Stuffed Bell Peppers with a Twist. Happy cooking and bon appétit!

Posted on

Amazing Tahdig – Crispy Saffron Rice Recipe

Are you ready to discover the magic of crispy saffron rice, otherwise known as Tahdig? This Persian culinary masterpiece is renowned for its flavourful, crispy crust and aromatic saffron-infused rice. Creating the perfect Tahdig might seem challenging, but with Nicol Retailer’s expert tips and quality ingredients, you can achieve restaurant-level results right in your kitchen. Let’s dive into the world of Amazing Tahdig – Crispy Saffron Rice Recipe and elevate your home-cooked meals with this delicious dish.

Tahdig is a celebrated dish in Persian cuisine, cherished for its unique texture and rich flavour. The name “Tahdig” translates to “bottom of the pot,” referring to the golden, crispy layer of rice that forms at the base of the cooking pot. This culinary delight is more than just a side dish; it’s a centerpiece that steals the spotlight at any dining table.

Crafting the ideal Tahdig requires a blend of skill, patience, and top-quality ingredients. High-quality basmati rice and pure saffron are the stars of this dish, providing the essential components for its signature taste and appearance. Nicol Retailer’s selection of premium saffron and basmati rice ensures that you’re starting with the best possible foundation for your culinary creation. This is key for an amazing Tahdig recipe.

Whether you’re new to cooking Persian cuisine or looking to perfect your technique, Nicol Retailer offers the guidance and products you need. Imagine the satisfaction of serving a dish that not only tastes incredible but also looks stunning on the plate. With the right approach and ingredients, you can turn a simple meal into an extraordinary dining experience. So get ready to impress your family and friends with the unforgettable flavours of this amazing crispy saffron rice recipe.

Looking for a step-by-step recipe?

Check out our full recipe for Tahdig with tomato, mint & red onion – easy instructions, and tips for perfect results every time:

Tahdig: Crispy Saffron Rice Recipe

Print Recipe
Looking for a show-stopping rice dish that’s packed with flavour, texture, and colour? This Tahdig (crispy saffron rice) recipe is the ultimate centrepiece for any meal. Golden, aromatic, and satisfyingly crunchy, this traditional Persian dish is a celebration of simple ingredients cooked with care – and it's easier to make than you might think!
Comes with a vibrant, zesty side of cooked tomatoes, fresh mint, and red onion – a match made in food heaven.
Course Main Course
Cuisine Middle East
Diet Vegan, Vegetarian
Keyword Crispy Saffron Rice Recipe, Tahdig
Prep Time 20 minutes
Cook Time 45 minutes
Servings 4 People
Calories 486

Instructions

Prepare the Rice

  • Rinse the rice under cold running water several times until the water runs clear. This helps remove excess starch and ensures the grains stay separate during cooking.

Cook the Rice

  • Bring a large pot of salted water to a boil. Add the rinsed rice and cook for 5–7 minutes, or until the grains are partially cooked but still firm in the centre. Drain and set aside.

Prepare the Tahdig Base

  • In a small bowl, combine the plain yoghurt, 1 tablespoon of the saffron water, 2 tablespoons of the melted butter, and 1 cup of the partially cooked rice. Mix well until the rice is coated.

Assemble the Dish

  • In a non-stick pot or pan, heat the vegetable oil and the remaining melted butter over medium heat. Spread the yoghurt-rice mixture evenly over the bottom of the pan to create the base layer.

Cook the Tahdig

  • Cover the pot with a clean kitchen towel or tea towel to absorb excess moisture, then place the lid tightly over it. Reduce the heat to low and let the rice cook for about 30–40 minutes. The base will develop a golden, crisp crust while the steam cooks the rest of the rice.

Prepare the Tomato Side

  • While the rice steams, heat 1 tbsp olive oil in a small frying pan. Add the chopped tomatoes and cook for 5–7 minutes until softened.
  • Stir in the red onion, mint, salt, and pepper to taste. Remove from heat and set aside.

Serve the Tahdig:

  • To release the Tahdig, carefully run a spatula around the sides of the pan. Place a large plate over the pan and quickly invert it to flip the rice out. You should see a beautiful golden crust.
    Serve hot with the warm tomato-mint-red onion mixture spooned on the side or over the rice.

Notes

Tips

Creating the perfect Tahdig can be a bit tricky for beginners, but with some essential tips, you’ll be on your way to mastering this delightful dish. Start by ensuring your basmati rice is parboiled correctly; it should be partially cooked but still firm. Use a non-stick pot to make flipping the Tahdig onto a serving platter easier and to prevent sticking. Patience is key—allow the rice to cook slowly on low heat to achieve that coveted golden, crispy crust without burning. Use a clean kitchen towel under the pot lid to absorb excess moisture and ensure a crispy texture.
Lastly, resist the urge to check on your Tahdig frequently; lifting the lid too often can disrupt the cooking process. With Nicol Retailer’s top-notch ingredients, your first attempt at Tahdig will be a delicious success.

Nutrition

Calories: 486kcal | Carbohydrates: 80g | Protein: 7g | Fat: 14g | Saturated Fat: 2g | Polyunsaturated Fat: 6g | Monounsaturated Fat: 5g | Trans Fat: 0.1g | Sodium: 5mg | Potassium: 115mg | Fiber: 1g | Sugar: 0.1g | Calcium: 28mg | Iron: 1mg

Impress at Your Next Dinner Party

Tahdig isn’t just delicious – it’s interactive. The moment you flip the pan and reveal that crispy layer is a theatrical moment that never fails to impress. An amazing Tahdig dish can be the highlight of your dinner party.

Plus, with premium ingredients from Nicol Retailer, like high-quality basmati rice and aromatic saffron, your homemade Tahdig will look and taste restaurant-worthy.

Serving suggestion

If you’ve never tried Tahdig, prepare to fall in love. This Persian classic is so much more than a side dish – it’s a culinary masterpiece that transforms humble rice into a golden, crispy delight. Whether you’re planning a dinner party, a family gathering, or a quiet night in, Amazing Tahdig – Crispy Saffron Rice Recipe is guaranteed to elevate your meal and wow your guests.

Tahdig is the ultimate crowd-pleaser, pairing beautifully with a wide range of mains. Serve it alongside:

  • A hearty lentil or bean stew
  • Succulent grilled meats or kebabs
  • Roasted seasonal vegetables
  • Traditional Persian favourites like Ghormeh Sabzi or Fesenjan

Its crispy base and tender saffron-infused rice make it the ideal complement to both bold and subtle flavours. The contrast in textures and the aromatic warmth of saffron create a satisfying dish that holds its own or enhances any main course.
Want to make your Tahdig even more eye-catching? Garnish it like a pro:

  • Sprinkle over slivered almonds or chopped pistachios for a satisfying crunch and a burst of vibrant colour
  • Add a handful of fresh herbs such as parsley, dill, or coriander for a fresh, fragrant finish
  • A squeeze of lemon just before serving can brighten the whole dish

These simple additions don’t just boost the flavour – they also turn your Tahdig into a centrepiece that looks as stunning as it tastes. When following an amazing saffron and rice recipe, such garnishes can elevate the dish visually.

Tahdig is a celebration of texture, flavour, and tradition. Whether you’re preparing a Persian feast or simply looking for something different, this crispy saffron rice dish is guaranteed to bring a touch of elegance and excitement to your table.

Posted on

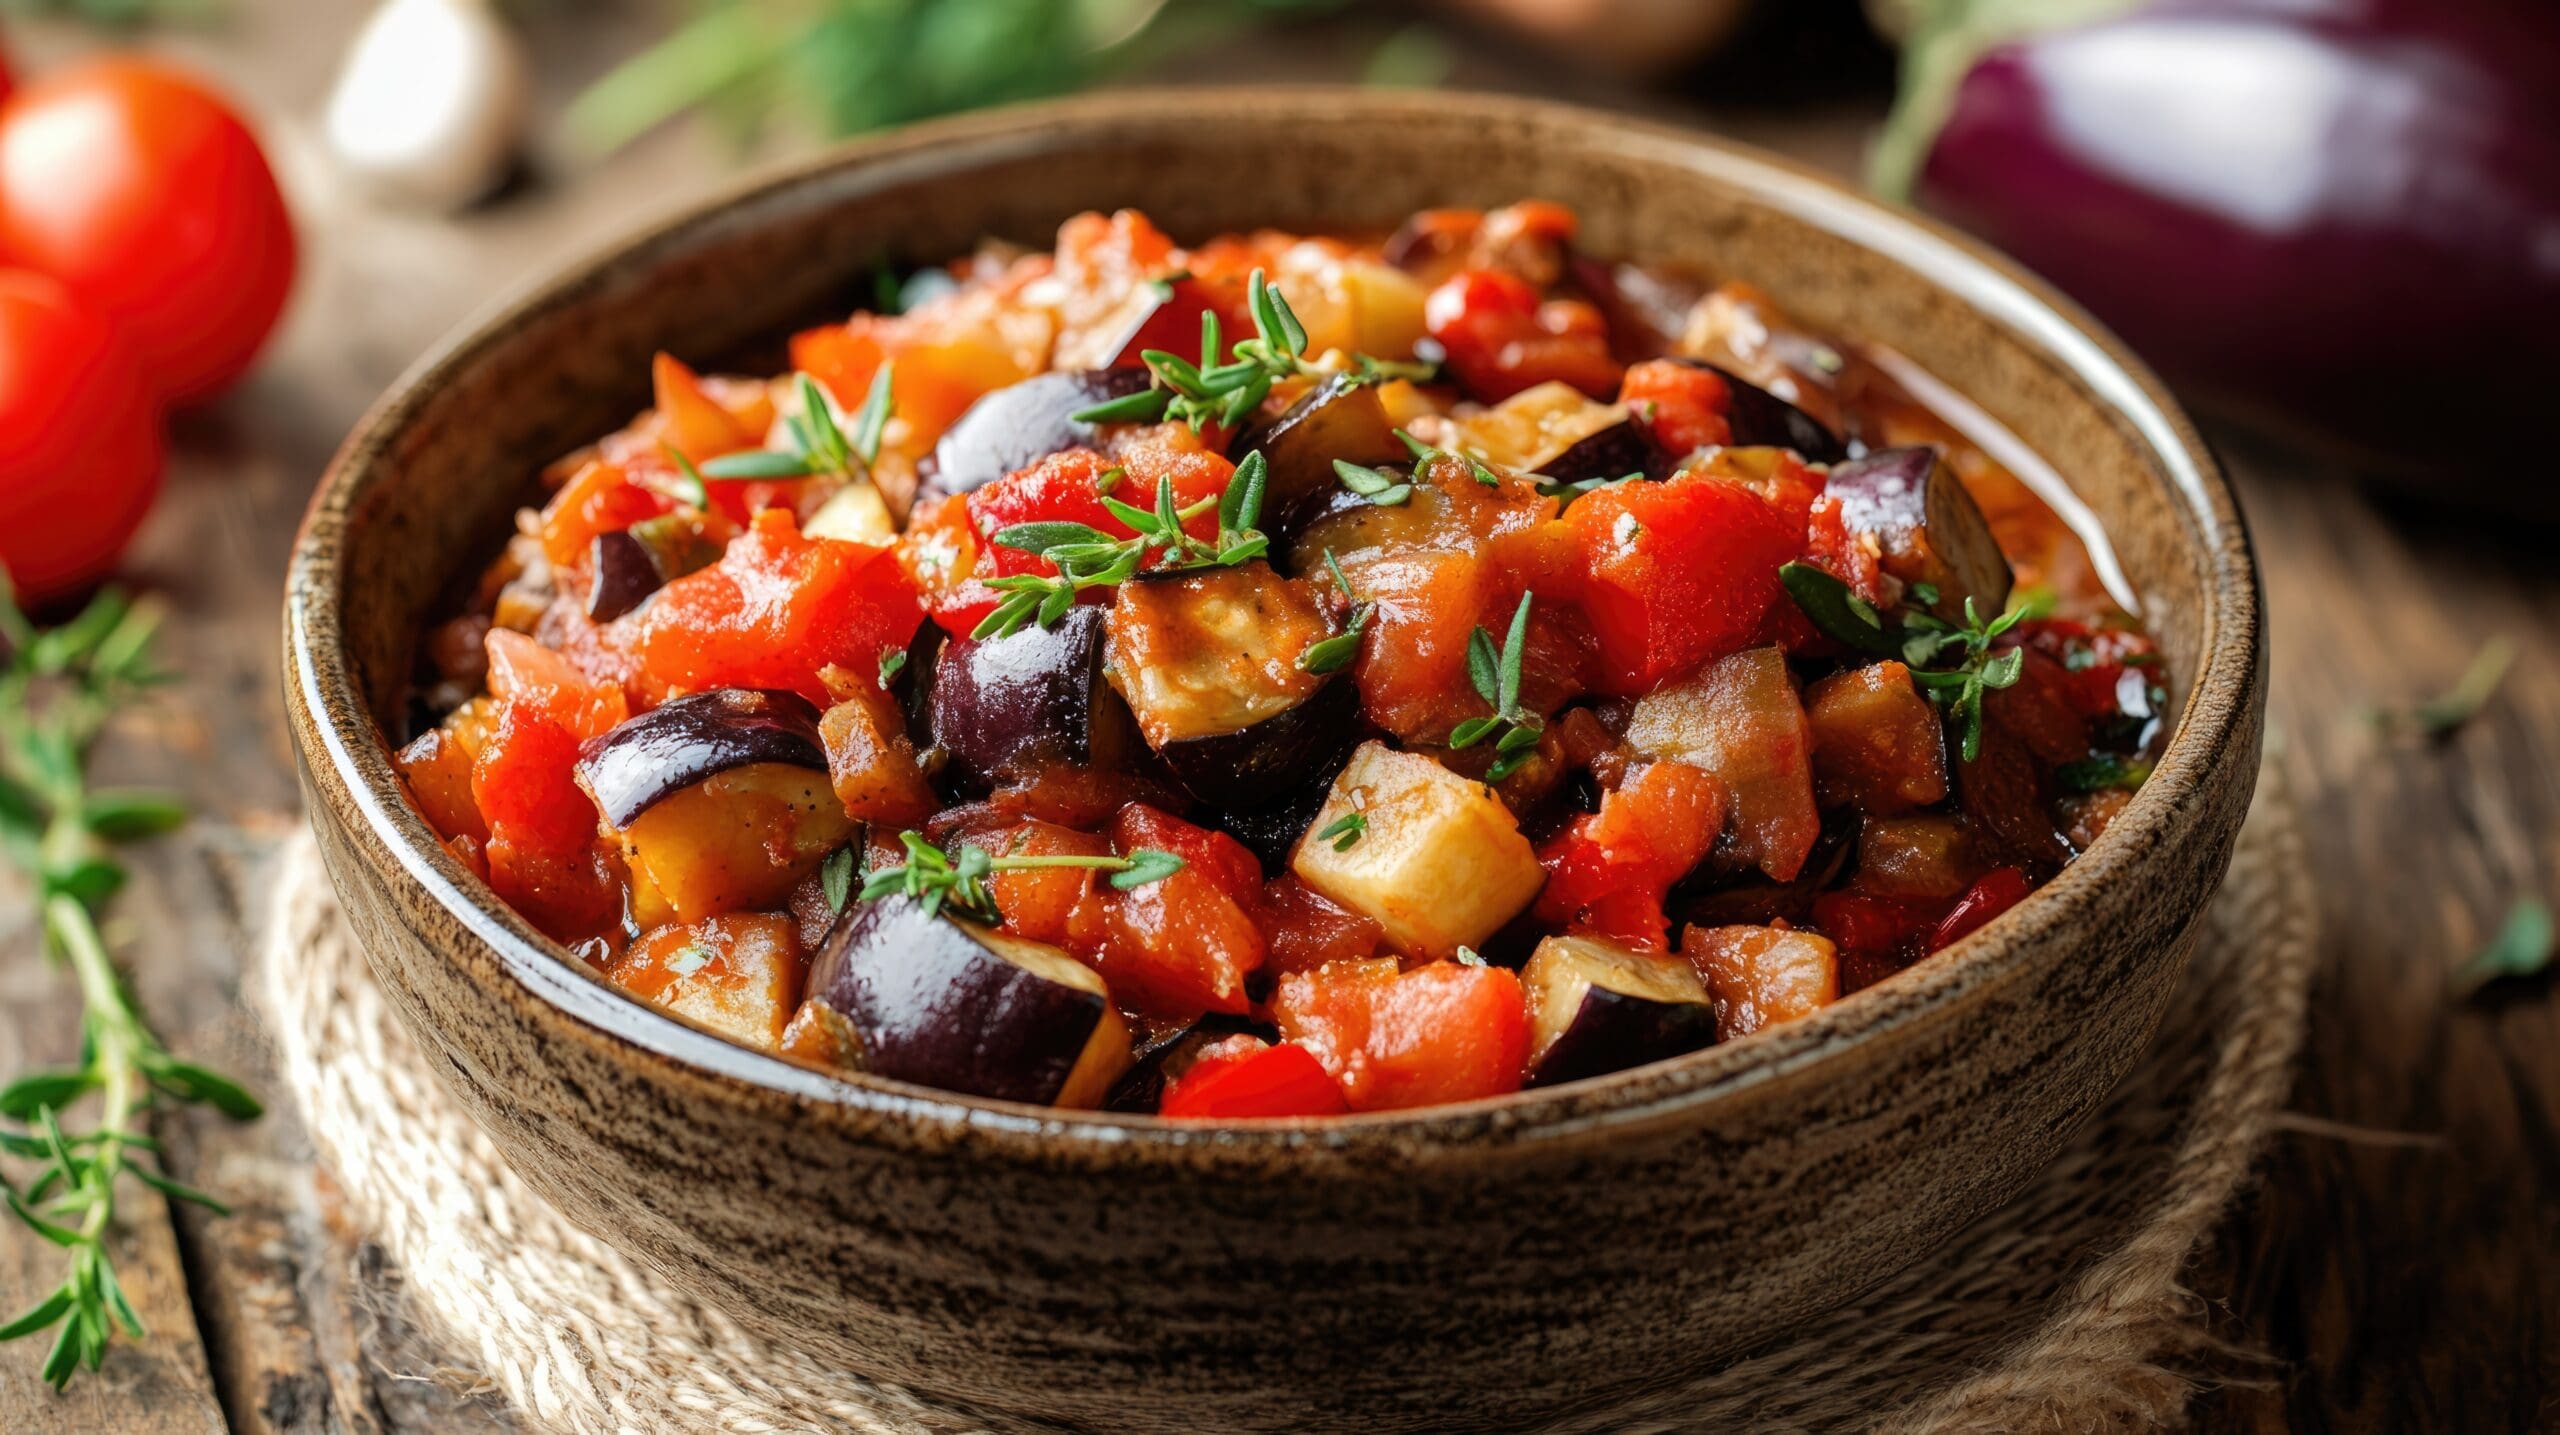
How to Cook Perfect Vegetable Ratatouille

Ratatouille, originating from the sun-soaked region of Provence in France, is a cherished dish that embodies the essence of Mediterranean cooking. This Provençal Vegetable Stew not only delights the palate but also celebrates the abundance of summer vegetables. The perfect vegetable ratatouille is a vibrant and colourful dish that brings together a medley of aubergines, courgettes, tomatoes, and peppers, all cooked to perfection with aromatic herbs and a drizzle of olive oil

What makes ratatouille particularly appealing is its versatility. Whether served hot or at room temperature, it fits seamlessly into various meal settings. It can be the star of the show as a main course or serve as a delightful side dish complementing a range of proteins. For those seeking a vegetarian or vegan option, ratatouille stands out as a hearty and satisfying choice, rich in both flavour and nutrients.

The beauty of ratatouille lies in its simplicity and the quality of its ingredients. Provençal cuisine is known for its emphasis on fresh, local produce, and this dish is no exception. The selection of vegetables, bursting with natural flavours, forms the foundation of a successful ratatouille. When cooked with care, each vegetable retains its integrity, contributing to a harmonious blend of tastes and textures.

Cooking ratatouille is not just about following a recipe; it’s an experience that engages the senses. The process of chopping and preparing the vegetables, the aromatic scent of herbs like basil and thyme filling the kitchen, and the gentle simmering that melds the flavours together all add to the charm of this dish.

Ratatouille also holds a certain rustic charm, reminiscent of countryside cooking where meals are prepared with love and shared with family and friends. It’s a dish that encourages communal dining, inviting everyone to gather around the table and enjoy the simple pleasures of good food and company.

In many ways, ratatouille is a testament to the beauty of uncomplicated cooking. With just a few fresh ingredients and some basic techniques, you can create a dish that is both wholesome and indulgent. Whether you’re new to cooking or a seasoned chef, ratatouille offers a rewarding culinary adventure that highlights the best of what nature has to offer.

Vegetable Ratatouille Recipe

Print Recipe
Enjoy your homemade vegetable ratatouille either as a main course or as a charming side dish. This classic French dish is a medley of fresh vegetables, typically including courgettes, aubergines, and tomatoes, cooked to perfection with fragrant herbs. Its rich flavours and vibrant colours make it a wonderful addition to any meal, offering both a healthy and delicious option for your dining experience. Whether you're serving it at a dinner party or enjoying it as a comforting meal at home, vegetable ratatouille is sure to impress.
Course Main Course
Cuisine France
Diet Vegan, Vegetarian
Keyword Ratatouille Recipe, Vegetable Ratatouille Recipe
Prep Time 15 minutes
Cook Time 45 minutes
Servings 4 People
Calories 190

Instructions

  • Begin by preparing all the vegetables as described in the ingredients list. This will make the cooking process smoother.
  • In a large pan, heat the olive oil over medium heat. Add the finely chopped onion and cook until it becomes translucent, which should take about 5 minutes. Stir in the minced garlic and cook for an additional minute.
  • Add the chopped red and yellow peppers to the pan. Cook them for about 5 minutes until they start to soften.
  • Incorporate the diced aubergine and sliced courgettes into the pan. Stir well and continue to cook for another 5 minutes, allowing them to soften.
  • Add the chopped tomatoes, thyme, and oregano to the pan. Season with salt and pepper to taste. Stir everything together to combine well.
  • Reduce the heat to low and cover the pan with a lid. Let the mixture simmer gently for about 30 minutes, stirring occasionally. The vegetables should become tender and the flavours will blend together beautifully.
  • Once cooked, remove the pan from the heat. Garnish the ratatouille with fresh basil leaves before serving.

Nutrition

Calories: 190kcal | Carbohydrates: 30g | Protein: 5g | Fat: 8g | Saturated Fat: 1g | Polyunsaturated Fat: 1g | Monounsaturated Fat: 5g | Sodium: 593mg | Potassium: 1299mg | Fiber: 11g | Sugar: 18g | Vitamin A: 543IU | Vitamin C: 43mg | Calcium: 153mg | Iron: 5mg

Cooking Techniques

Cooking ratatouille to perfection requires a delicate balance of techniques to ensure each vegetable retains its shape while contributing to the overall harmony of flavours. Once the vegetables have been layered in your chosen dish, the next step is to cook them slowly to meld the flavours without turning the vegetables to mush.

Begin by covering your dish with a lid or aluminium foil. This helps to trap the steam and moisture, allowing the vegetables to cook evenly and retain their natural juices. Place the dish on the hob over low heat, allowing it to simmer gently. Patience is key here, as this slow cooking method can take up to an hour but results in a rich and flavourful stew.

Alternatively, you can opt for baking the ratatouille in the oven. Preheat your oven to a moderate temperature, around 180°C (350°F). Place the covered dish in the oven and let it bake for approximately 45 minutes to an hour. Baking offers a slightly different texture, giving the vegetables a tender yet firm bite. Halfway through, you may want to uncover the dish to allow some of the liquid to evaporate, concentrating the flavours further.

During cooking, it’s important to monitor the ratatouille occasionally. Check to ensure that the vegetables are cooking evenly and give the dish a gentle stir if necessary. This ensures that the flavours are well-distributed throughout the stew.

Another technique to enhance the flavour profile is to finish the dish with a brief rest period. After cooking, allow the ratatouille to sit, covered, for about 15 minutes before serving. This resting time lets the flavours continue to develop and meld together, offering a more cohesive taste experience.

While the traditional method involves slow cooking, you can also use a pressure cooker for a quicker version. However, be mindful that the rapid cooking might slightly alter the texture of the vegetables.

Regardless of the method chosen, the goal remains the same: to create a dish where each vegetable stands out yet harmonises beautifully with the others, offering a taste of Provençal cuisine at its finest.

Serving suggestions

Ratatouille can elevate any meal with its rich, layered flavours and vibrant presentation. For a casual yet satisfying option, serve it with a slice of crusty baguette or a side of fluffy couscous. These simple accompaniments help to soak up the delightful juices of the Provençal Vegetable Stew, making each bite truly delightful.

For those seeking a more elaborate dining experience, consider pairing ratatouille with grilled meats or fish. Its robust flavours complement a variety of proteins, enhancing the overall meal. A beautifully seared piece of chicken or a succulent fillet of fish can transform your ratatouille into a gourmet feast.

Ratatouille also works wonderfully as a topping for pasta or rice. The sauce-like consistency of the dish blends seamlessly with these bases, creating a comforting and wholesome meal. For a lighter option, consider serving it over a bed of quinoa or bulgur wheat, adding an extra layer of texture and nutrition.

Presentation plays a crucial role in making your ratatouille look as appetising as it tastes. Opt for a shallow serving bowl or a large platter to showcase the vibrant colours of the vegetables. Arrange the vegetables artfully, and finish with a drizzle of extra virgin olive oil and a scattering of fresh basil leaves to enhance the dish’s visual appeal.

For a unique twist, try serving ratatouille as a warm starter or appetiser. Spoon it into individual ramekins and top with a sprinkle of cheese before popping them under the grill for a few minutes. The result is a deliciously gooey and flavourful beginning to any meal.

Ratatouille can also be served cold or at room temperature, making it a versatile option for picnics or casual gatherings. Simply spoon it into a serving dish and let your guests enjoy its rich flavours at their leisure. With so many serving possibilities, ratatouille is sure to become a favourite in your culinary repertoire.

Storing Leftovers

Storing leftover ratatouille is straightforward and helps to prolong the enjoyment of this delightful Provençal Vegetable Stew. After cooking, let the ratatouille cool to room temperature before transferring it to an airtight container. This step is crucial for maintaining the freshness and preventing condensation, which can affect the texture of the dish.

When storing in the refrigerator, the ratatouille will remain good for up to five days. If you plan to keep it longer, consider freezing it. Divide the stew into individual portions and place them in freezer-safe containers. Label each container with the date to keep track of its freshness. Frozen ratatouille can be stored for up to three months, making it a convenient option for future meals.

Reheating ratatouille is best done gently to preserve its flavours and textures. If using the hob, place the stew in a saucepan over low to medium heat, stirring occasionally until it is warmed through. This method helps to maintain the integrity of the vegetables while ensuring even heating.

For a quicker option, the microwave can be used. Place the ratatouille in a microwave-safe dish, cover it with a microwave-safe lid or wrap, and heat on low power in short intervals. Stir between each interval to ensure even heating and to prevent any hot spots.

If reheating from frozen, it’s best to thaw the ratatouille in the refrigerator overnight. This gradual thawing process helps to retain the dish’s quality. Once thawed, reheat using your preferred method, either on the hob or in the microwave.

Ratatouille also makes a fantastic meal prep option, allowing you to enjoy a nutritious and flavourful dish throughout the week. With proper storage and gentle reheating, your ratatouille will remain as delightful as when it was freshly made.

Posted on

How to Make Crispy Vegetable Tempura at Home

Crispy vegetable tempura offers a delightful way to enjoy a variety of fresh vegetables encased in a light, airy batter. This traditional Japanese dish has won the hearts of food lovers worldwide, thanks to its unique texture and the versatility of ingredients. Making vegetable tempura at home provides an opportunity to explore different vegetables and perfect the technique in your own kitchen.

The origins of tempura date back to the 16th century when Portuguese missionaries introduced the concept of frying food in batter to Japan. Over the centuries, it has evolved into a staple of Japanese cuisine, known for its delicate crunch and the subtle interplay of flavours, especially in crispy vegetable tempura.

The essence of good tempura lies in its simplicity. A minimalistic approach ensures that the natural flavours of the vegetables are highlighted. By using a basic batter of plain flour, cornflour, baking powder, salt, and ice-cold water, you can achieve the quintessential lightness that defines this dish, particularly when making crispy vegetable tempura.

One of the joys of making tempura is the freedom to experiment with a wide range of vegetables. Whether you prefer the sweetness of sweet potatoes or the earthiness of mushrooms, there’s something for everyone. The key is to maintain a consistent size and thickness for even cooking, ensuring each piece is perfectly coated and fried, resulting in the perfect crispy vegetable tempura.

The experience of preparing and enjoying homemade crispy vegetable tempura is both rewarding and educational, offering a glimpse into the artistry of Japanese culinary traditions.

How to Make Crispy Vegetable Tempura at Home:

Crispy Vegetable Tempura with Dipping Sauce

Print Recipe
Crispy, Crunchy, Delicious: Vegetable Tempura like you've never experienced before!
Indulge in the satisfying crunch of perfectly fried vegetables, coated in a light and airy batter. Paired with a delightful dipping sauce that enhances the flavours and leaves you craving for more.
Experience the ultimate satisfaction of biting into a piece of vegetable tempura, with each bite bursting with flavour and texture. Perfect for a quick snack or a tasty appetiser. Treat yourself to a plate of vegetable tempura today and elevate your snacking experience to a whole new level.
Course Appetizer, Side Dish, Snack
Cuisine Asian-inspired
Diet Vegan, Vegetarian
Keyword Crispy Vegetable Tempura with Dipping Sauce
Prep Time 15 minutes
Cook Time 20 minutes
Servings 4 People

Instructions

Preparation

  • Ina large bowl, combine the plain flour, cornflour, and baking powder. Gradually whisk in the sparkling water until you achieve a smooth batter. Be careful not to overmix; a few lumps are fine.
  • Prepare the vegetables by slicing them as directed. Keep the pieces relatively uniform to ensure even cooking.

Cooking the Tempura

  • Heat vegetable oil in a deep pan or wok to around 180°C (350°F). To test, drop a small amount of batter into the oil; it should sizzle and rise to the surface immediately.
  • Dip each vegetable piece into the batter, ensuring they are coated evenly. Carefully lower them into the hot oil, frying in batches to avoid overcrowding.
  • Fry each batch for about 2-3 minutes or until the tempura is crisp and lightly golden. Remove with a slotted spoon and drain on kitchen paper. Season with salt while still hot.

Making the Dipping Sauce

  • In a small bowl, combine soy sauce, rice vinegar, mirin, ginger, spring onion,and sesame oil. Mix well.

Serving

  • Arrange the tempura vegetables on a serving platter. Serve immediately with the dipping sauce on the side.

Suggestions for Serving

Serving crispy vegetable tempura with an eye for detail can elevate the dining experience. Arrange the tempura pieces on a serving platter with a touch of artistry, perhaps using a garnish of fresh herbs like coriander or chives. A few slices of lemon can add a burst of colour and a hint of zest, making the presentation visually appealing.

For a complete meal, consider pairing your tempura with other Japanese favourites. A bowl of steaming noodles or a side of delicate sushi can complement the light, crispy texture of the tempura beautifully. You could also serve it alongside a simple bowl of steamed rice and miso soup for a well-rounded, traditional Japanese meal.

Individual dipping bowls for the sauce can add a touch of elegance to the presentation. Ensure each guest has their own small bowl of the delightful dipping sauce , allowing them to enjoy the tempura at their own pace.

To add variety, include a selection of tempura vegetables on the platter. The contrasting colours and flavours can create an inviting visual feast, showcasing the appeal of crispy vegetable tempura.

Finally, for a more informal setting, serve the tempura as part of a sharing platter, allowing everyone to pick and choose their favourite pieces. This communal style of eating not only makes the meal more interactive but also highlights the versatility and appeal of crispy vegetable tempura.

Typical Mistakes and How to Prevent When Tempura Vegetables

A frequent issue in tempura preparation is ending up with a batter that’s too thick, leading to a heavy coating. Ensuring the batter is slightly thinner than pancake batter can help achieve the desired lightness. Another common mistake is not maintaining the oil temperature. Use a kitchen thermometer to keep it between 170-180°C to ensure the tempura crisps up properly.

Avoid overcrowding the pan, as this can lower the oil temperature and result in soggy tempura. Fry in small batches to maintain consistent heat. Additionally, cutting vegetables into uniform sizes ensures even cooking, preventing overcooked or undercooked pieces.

To keep the batter cold, place the mixing bowl in a larger bowl filled with ice. Cold batter creates a better texture for making crispy vegetable tempura. If the batter starts warming up, refrigerate it for a few minutes. You may also consider using Tempura Batter Mix instead to save time.

Lastly, drain excess oil using a wire rack instead of kitchen roll to prevent sogginess. By paying attention to these details, you can ensure a delightful and authentic crispy vegetable tempura experience.

Posted on

Baked Sweet Potatoes Recipe with a Tasty Filling

Baked sweet potatoes are a culinary delight, combining simplicity with rich, satisfying flavours. This baked sweet potatoes recipe not only brings essential vitamins and minerals but also their natural sweetness, making them an ideal base for an array of delicious fillings. Baking sweet potatoes enhances their caramelised notes, offering a delectable contrast to savoury ingredients.

One of the most appealing aspects of baked sweet potatoes is their versatility. They can be enjoyed as a main course or as a hearty side dish. Additionally, they are suitable for various dietary preferences, being both gluten-free and vegetarian. Whether you’re catering to a large family dinner or preparing a simple meal for yourself, baked sweet potatoes are a reliable choice that never disappoints.

Today’s recipe combines corn, and black beans to create a flavourful and nutritious filling. Each ingredient brings its own unique texture and taste, resulting in a harmonious blend that complements the sweet, tender flesh of the baked potatoes. The combination of spices such as cumin and smoked paprika adds a delightful depth of flavour, turning a simple meal into something special.

Another advantage of baked sweet potatoes is their ease of preparation. With just a few basic steps, you can create a wholesome and satisfying dish. The process requires minimal effort, yet the results are incredibly rewarding. This makes baked sweet potatoes an excellent option for busy weekdays or relaxed weekends.

So, whether you’re an experienced cook or just starting out, baked sweet potatoes offer an accessible and delightful way to enjoy a nutritious meal. With the right ingredients and a bit of creativity, you can transform this humble root vegetable into a culinary masterpiece. Here is the recipe below:

Baked Sweet Potatoes filled with Corn and Black Beans

Print Recipe
Enjoy your delightful baked sweet potatoes, bursting with flavor and nutrients, filled with a satisfying mix of black beans and corn that will leave your taste buds tingling with joy!
Course brunch, lunch, Main Course
Cuisine Vegan
Keyword Bakes sweet potato recipe
Prep Time 20 minutes
Cook Time 45 minutes
Servings 4 People
Calories 34

Instructions

Preparethe Sweet Potatoes

  • Preheat your oven to200°C (180°C fan-assisted). Wash the sweet potatoes thoroughly and pierce each one several times with a fork. Place them on a baking tray and bake in the preheated oven for about 45 minutes or until they are tender when pierced with a fork.

Prepare the Filling

  • While the sweet potatoes are baking, heat the olive oil in a frying pan over medium heat. Add the sweetcorn, black beans, ground cumin, smoked paprika, salt, and pepper. Stir well and cook for about 5-7 minutes, until the mixture is heated through and the flavours combine nicely. Set aside.

Assemble the Dish

  • Once the sweet potatoes are cooked, remove them from the oven and let them cool slightly. Carefully cut a slit down the centre of each sweet potato and gently push the ends to open them up. Use a fork to fluff the insides a bit.

Fill the Sweet Potatoes

  • Divide the black bean and corn mixture evenly among the four sweet potatoes, spooning it into the centre of each.

Garnish and Serve

  • Once ready, remove the sweet potatoes from the oven. Garnish with fresh coriander, if desired, and serve immediately.

Notes

Having  ingredients on hand will streamline your cooking experience. In addition to the primary ingredients, you might want to have some optional garnishes ready, such as chopped fresh coriander or sour cream. These can add an extra layer of flavour and visual appeal to your final dish.
Ensuring you have everything prepped and measured before you start cooking will make the entire process smoother and more enjoyable. 

Nutrition

Calories: 34kcal | Carbohydrates: 0.5g | Protein: 0.2g | Fat: 4g | Saturated Fat: 1g | Polyunsaturated Fat: 0.4g | Monounsaturated Fat: 3g | Sodium: 1mg | Potassium: 20mg | Fiber: 0.2g | Sugar: 0.1g | Vitamin A: 253IU | Vitamin C: 0.04mg | Calcium: 6mg | Iron: 0.5mg

Suggestions for Serving

Once your Baked Sweet Potatoes are ready, it’s time to assemble and serve them with flair. Carefully slice each sweet potato lengthwise, creating an opening for the filling. Generously spoon the corn, diced sweet potatoes, and black bean mixture into the cavity of each potato. For an added touch, consider garnishing with chopped fresh coriander or a dollop of sour cream. Serve alongside a crisp green salad or avocado slices for a balanced meal. Presentation is key, so take a moment to arrange the sweet potatoes on a platter, ensuring they look as appetising as they taste.

Wrapping up

This recipe for Baked Sweet Potatoes filled with corn, diced sweet potatoes, and black beans is a true testament to how simple ingredients can come together to create a flavourful and wholesome dish. The combination of textures and the balance of sweet and savoury notes make it a standout option for both everyday meals and special occasions. It’s a versatile dish that caters to various dietary preferences and is bound to become a staple in your culinary repertoire.

What makes this recipe even more appealing is its ease of preparation. With a few basic steps and minimal effort, you can create a meal that’s not only delicious but also packed with nutrients. The process is straightforward, making it perfect for both novice cooks and seasoned chefs looking for a reliable go-to recipe.

Serving this dish is a pleasure in itself. The vibrant colours of the sweet potatoes, corn, and black beans make for an inviting presentation that is sure to whet anyone’s appetite. Adding optional garnishes like chopped coriander or a dollop of sour cream can enhance both the visual appeal and the flavour profile, making your dish even more delightful.

This recipe also offers plenty of room for creativity. Feel free to experiment with additional ingredients or spices to suit your taste. Whether you prefer a spicier kick or a hint of citrus, the filling can be adapted to reflect your personal preferences. It’s a great opportunity to get creative in the kitchen and make the dish truly your own.

In summary, these Baked Sweet Potatoes are not just a meal; they are an experience of taste and satisfaction. The ease of preparation combined with the depth of flavour ensures that this dish will be a favourite in your household. I look forward to hearing your feedback and any unique twists you might add. Enjoy your cooking adventure and the delicious results that follow!

Posted on

Savoury Jackfruit Bao Buns: The Perfect Vegan Recipe

If you’re seeking an enticing vegan dish that combines unique textures and bold flavours, look no further than Jackfruit Bao Buns. These fluffy steamed buns, filled with a savoury jackfruit mixture, offer a delightful twist on the traditional bao and are perfect for any occasion. What sets these bao buns apart is the jackfruit filling, which mimics the texture of pulled meat while offering a distinct taste that blends seamlessly with the soft, pillowy dough.

Jackfruit, known for its meat-like consistency, becomes incredibly flavourful when seasoned properly. Adding Fine Sea Salt to the mix ensures the filling has a balanced, rich taste without any additives, enhancing the natural flavours of the ingredients. The combination of soy sauce, hoisin sauce, and a touch of ginger and garlic creates a filling that is both savoury and slightly sweet, making each bite a flavourful experience.

Whether you’re hosting a dinner party or looking for a comforting weeknight meal, these Jackfruit Bao Buns are sure to impress. They offer a versatile option for those adhering to a plant-based diet and can easily be adapted to suit various flavour preferences. With the right ingredients and a bit of patience, you can create a dish that not only looks impressive but tastes fantastic as well.

This recipe is ideal for both seasoned cooks and those new to vegan cooking, providing a straightforward yet rewarding culinary endeavour. So, gather your ingredients and get ready to enjoy a taste sensation that’s sure to become a favourite in your home.

Jackfruit Bao Bun with Savoury Filling Recipe

Print Recipe
Jackfruit Bao Bun with a Savoury Filling is a delightful culinary creation that combines the soft, fluffy texture of the bao bun with the unique taste of jackfruit. This Asian-inspired dish is perfect for those who enjoy exploring new flavours and textures. The bao bun itself is made from a simple dough, steamed to perfection, and has a slight sweetness that complements the savoury filling.
Course Main Course, party food, Snack, vegan food
Cuisine Asian-inspired
Keyword Jackfruit recipe
Prep Time 40 minutes
Cook Time 20 minutes
Servings 4 People

Ingredients

For the Bao Buns:

Instructions

Prepare the Bao Dough

  • In a large bowl, combine the flour, caster sugar, baking powder, and salt. In a separate small bowl, mix the yeast with the warm water and let it sit for about 5 minutes until foamy. Add the yeast mixture and vegetable oil to the dry ingredients. Mix until a dough forms. Knead the dough on a lightly floured surface for about 10 minutes until smooth and elastic. Place the dough in a greased bowl, cover with a damp cloth, and let it rise in a warm place for about 1 hour or until doubled in size

Prepare the Filling

  • Drained the jackfruit. Trim the firm, pointed ends off each triangular piece of jackfruit (you can still use them if you prefer) and gently press each piece so that it separates into individual strands and absorbs more of the cooking sauce. Set aside.
  • Heat the vegetable oil in a pan over medium heat. Add the onion, garlic, and ginger, and sauté until the onion is translucent. Add the shredded jackfruit, soy sauce, hoisin sauce, tamarind sauce and sesame oil. Stir well and cook for about 10 minutes until the jackfruit is tender and well coated. Add the red pepper, cooking for an additional 5 minutes. Season with salt and black pepper. Remove from heat and set aside

Shape and Steam the Bao

  • Once the dough has risen, punch it down and divide it into 8 equal pieces. Roll each piece into a ball and flatten each ball into an oval shape, approximately 10cm long.
  • Lightly brush one side with oil and fold in half to create a bun shape. Prepare a steamer lined with parchment paper. Place the buns inside, ensuring they are not touching.
  • Cover and steam over medium heat for 10-12 minutes until the buns are puffed and cooked through.

Assembling the Bao Buns

  • Once the buns are steamed, carefully open them and fill a bao bun with pulled jackfruit filling, drizzling with extra hoisin sauce if desired. Finish garnishing each filled bao bun with white and black sesame seeds, and chopped fresh coriander leaves.

Notes

Tips for Shaping:

Ensure the filling is well-centred to avoid uneven cooking.
If you find the dough sticking to your hands, lightly flour your hands to make handling easier.
Shaping the bao buns might require a bit of practice, but it’s a fun and rewarding process. Don’t worry if the first few attempts aren’t perfect; the buns will still be delicious. 
Properly sealed buns help in achieving that delightful, fluffy texture without losing any of the savoury filling inside. Enjoy the process and look forward to tasting these delectable bao bu

Suggestions for Serving

For a complete meal, consider pairing your Savoury Jackfruit Bao Buns with refreshing side dishes and thoughtful presentation touches. A fresh cucumber salad, lightly dressed with rice vinegar and sesame oil, adds a crisp and refreshing contrast to the rich filling of the bao buns. Alternatively, a simple mix of pickled vegetables like carrots, radishes, and red onions offers a tangy counterbalance to the savoury jackfruit filling.

For an added burst of flavour, serve the bao buns with a side of dipping sauce. A mixture of soy sauce, rice vinegar, a touch of sesame oil, and a sprinkle of chilli flakes makes for a delicious dip that complements the buns beautifully.

When it comes to presentation, arranging the buns in a bamboo steamer basket adds an authentic and charming touch to your meal. Sprinkling sesame seeds or finely chopped spring onions over the buns before serving can enhance both the visual appeal and the texture.

For those looking to elevate the dining experience further, consider serving the bao buns with a pot of hot green tea. The tea’s subtle bitterness pairs well with the savoury and slightly sweet flavours of the bao buns, providing a well-rounded meal experience.

If you’re hosting guests, these presentation and serving suggestions can turn a simple meal into a memorable culinary event. The attention to detail in pairing and presentation not only enhances the taste but also makes the meal visually appealing, ensuring that your Jackfruit Bao Buns are the highlight of the dining experience. Enjoy this delightful vegan recipe that brings together flavour, texture, and a touch of elegance.

Posted on

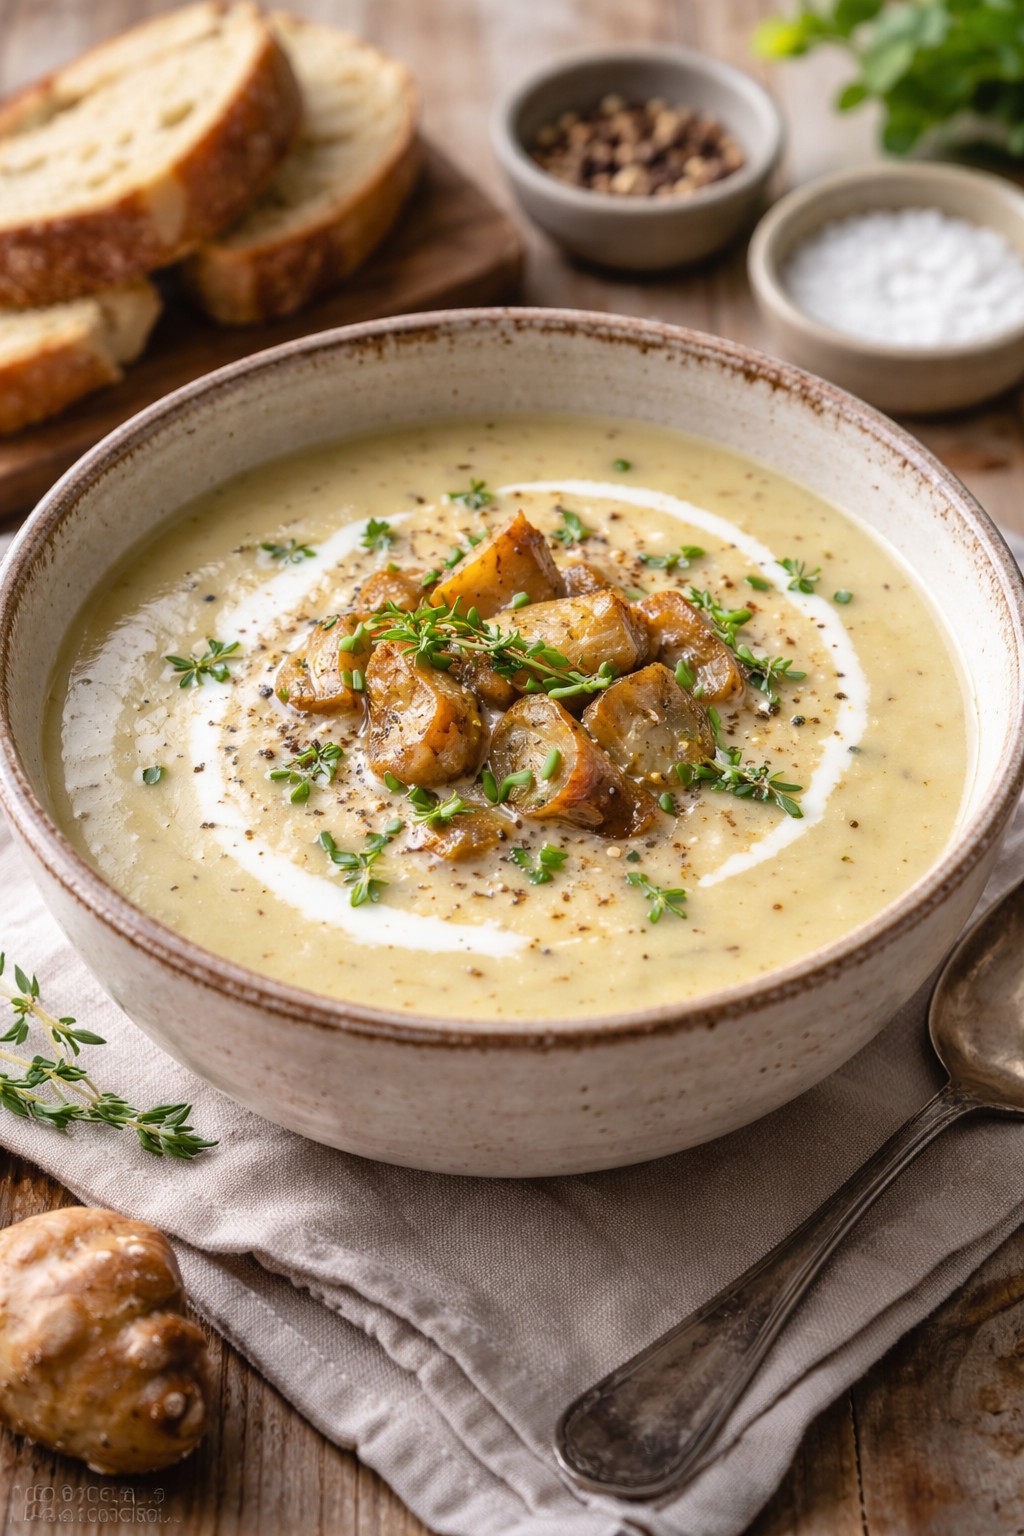
Delicious Butternut Squash Soup Recipe

The vibrant orange hue of butternut squash not only brightens up the table but also signifies its rich nutritional value. Packed with vitamins, minerals, and antioxidants, butternut squash is a powerhouse of goodness. When transformed into a soup, it retains its nutritional benefits while offering a delightful taste experience.

The beauty of butternut squash soup lies in its simplicity. A few fresh ingredients come together to create a harmonious blend of flavours that can be enjoyed by all. Whether you’re seeking a quick weekday dinner or an elegant starter for a dinner party, this soup fits the bill.

Its versatility means you can tailor the recipe to suit your preferences, adding spices, herbs, or other ingredients to make it uniquely yours. The process of making this soup is also quite therapeutic – from the roasting of the squash to the blending of the ingredients, every step adds to the anticipation of the final dish.

Here is a step-by-step recipe to create a delightful butternut squash soup from scratch.

Butternut Squash Soup Recipe

Print Recipe
Savour the rich, comforting flavours of butternut squash soup, an ideal dish for the cooler months. This velvety soup is simple to prepare and presents a marvellous combination of sweet and savoury notes that will warm you from within. Not only is this butternut squash soup a delight to cook, but it also provides a soothing treat that is bound to become a beloved staple at the dining table. Whether shared with family or enjoyed in solitude, this soup serves as the perfect companion on any brisk day.
Course brunch, Starter
Cuisine African, American, English, Mediterranean
Keyword Butternut squash at Nicol Retailer, Butternut Squash Recipe, butternut squash soup
Prep Time 20 minutes
Cook Time 40 minutes
Servings 4 People
Calories 77

Instructions

  • Begin by peeling and dicing the butternut squash into small cubes. Ensure all other vegetables are properly prepared as well.
  • Heat the olive oil in a large pot over medium heat. Add the chopped onion and garlic, and sauté for about 5 minutes until the onion becomes translucent.
  • Incorporate the diced carrot and butternut squash into the pot. Stir the mixture well, allowing the vegetables to coat with the oil and onion mixture.
  • Pour in the vegetable stock and add the ground nutmeg. Stir to combine all ingredients. Bring the mixture to a gentle boil, then reduce the heat to low. Cover the pot and let it simmer for about 30 minutes, or until the vegetables are tender.
  • Once the vegetables are cooked through, remove the pot from the heat. Use an immersion blender to puree the soup until smooth. Alternatively, you can carefully transfer the soup in batches to a countertop blender.
  • Season the soup with salt and pepper according to your taste. If desired, stir in a swirl of double cream or coconut milk for added richness.
  • Serve the soup hot, garnished with fresh parsley if you wish. Enjoy your warm, comforting butternut squash soup

Notes

Tips
For the best results, choose a firm, unblemished butternut squash. Quality ingredients make a significant difference, so it’s worth visiting Nicol Retailer online  to ensure you’re getting the freshest produce available.
Additionally, you may want to keep some spices and herbs on hand. Nutmeg and cinnamon can add a warm, sweet note, while fresh thyme or sage can introduce an aromatic complexity. If you enjoy a bit of heat, a pinch of cayenne pepper can also be a nice touch.

Nutrition

Calories: 77kcal | Carbohydrates: 3g | Protein: 0.03g | Fat: 7g | Saturated Fat: 1g | Polyunsaturated Fat: 1g | Monounsaturated Fat: 5g | Sodium: 994mg | Potassium: 2mg | Fiber: 0.1g | Sugar: 2g | Vitamin A: 529IU | Vitamin C: 0.01mg | Calcium: 1mg | Iron: 0.1mg

Tips for Enhancing the Flavour

To boost the taste of your butternut squash soup, play around with various spices and herbs. Nutmeg and cinnamon can bring out the squash’s inherent sweetness, while fresh thyme or sage can introduce aromatic depth.

For an even creamier soup, consider adding a swirl of double cream or coconut milk. If you prefer a bit of crunch, garnish with roasted nuts or seeds just before serving.

Experimenting with different seasoning blends can also yield delightful results. A hint of curry powder can give the soup a twist, while smoked paprika can add a subtle smokiness. For those who enjoy a bit of spice, a pinch of cayenne pepper can provide a gentle kick.

Incorporating acidic elements like a squeeze of lemon juice or a splash of apple cider vinegar can also enhance the overall flavour profile. These additions can balance the soup’s sweetness and add a refreshing contrast.

Another way to enrich the taste is by using flavoured oils. A drizzle of truffle oil or chilli oil can add a gourmet touch to your butternut squash soup, making it feel extra special.

Fresh herbs such as parsley, coriander, or chives can be sprinkled on top for a burst of colour and an extra layer of flavour.

By experimenting with these tips, you can customise your butternut squash soup to suit your taste preferences, creating a dish that’s both unique and delicious.

Suggestions for Serving

Butternut squash soup pairs beautifully with a variety of accompaniments, making it a versatile choice for any meal. One delightful option is to serve it with a crusty loaf of bread, perfect for dipping and soaking up every last drop of the soup’s rich, velvety goodness. A fresh green salad can add a refreshing contrast, offering a crisp texture that balances the soup’s creamy consistency.

For a more filling meal, consider pairing the soup with a hearty sandwich. Options like a classic grilled cheese or a roasted vegetable panini can complement the soup’s flavours and provide a satisfying bite. Additionally, a side of roasted or steamed vegetables can further enhance the nutritional value and variety of your meal.

Garnishing your butternut squash soup can also elevate the dining experience. A sprinkle of freshly chopped herbs such as parsley, coriander, or chives can add a burst of colour and an extra layer of flavour. A drizzle of olive oil or a touch of cream can create an appealing visual effect, while a dash of paprika or a few roasted nuts or seeds can introduce an interesting textural contrast.

If you’re serving the soup for a special occasion or dinner party, consider adding a gourmet touch with flavoured oils like truffle or chilli oil. These small additions can make your butternut squash soup feel extra special and impress your guests.

By exploring different serving options and garnishes, you can transform a simple butternut squash soup into a memorable and satisfying meal.

Posted on

Hasselback Butternut Squash Recipe

Transform your meals with our Hasselback Butternut Squash Recipe. A twist on the traditional roasted butternut squash, this recipe brings both flair and flavour to your dinner table. With carefully scored slices, each piece absorbs more seasoning, delivering a delightful taste in every bite. This versatile dish can be enjoyed as a side for any main course or stand alone as a vegetarian delight. Made from the freshest squash and spiced with herbs and a touch of garlic, it’s sure to impress family and friends. Perfect for autumn gatherings or holiday feasts, add this show-stopping recipe to your kitchen repertoire.

Roasted butternut squash with pecans and pomegranate.

Hasselback Butternut Squash

Print Recipe
Discover a new way to enjoy butternut squash with our Hasselback Butternut Squash Recipe. Perfect for vegetarians and vegans, this delightful dish is both tasty and nutritious. With just a few ingredients, including olive oil, garlic, and your favourite herbs, you'll create a visually appealing side dish that's full of flavour. The recipe's unique cutting technique ensures each piece absorbs all the seasoning, making every bite delicious. Easy to follow and quick to prepare, this recipe will soon become a staple in your kitchen.
Course Main Course, Side Dish
Keyword Butternut Squash, Butternut Squash Recipe, Hasselback Butternut Squash Recipe
Prep Time 30 minutes
Cook Time 1 hour

Ingredients

Instructions

  • Preheat your oven to 200°C (400°F). Peel the butternut squash, cut it in half lengthwise, and scoop out the seeds. Place the halves flat side down on a cutting board.
  • Using a sharp knife, make thin slices across each squash half, cutting about three-quarters of the way through. Be careful not to slice all the way to the bottom.
  • In a small bowl, mix together the olive oil, honey or maple syrup, minced garlic, salt, and pepper.
  • Place the squash halves on a baking tray. Brush them generously with the olive oil mixture, ensuring it seeps into the slices. Cover with foil and bake in the oven for 30 minutes.
  • Remove the foil and bake for an additional 15-20 minutes, or until the squash is tender and slightly caramelised on the edges.
  • Once cooked, transfer the squash to a serving platter. Sprinkle with fresh thyme and the optional pecan & pomegranate seeds.